This post is the second in a series (Part 1) that addresses the challenges of training an accurate deep learning model using a large public dataset and deploying the model on the edge for real-time inference using NVIDIA DeepStream.
In the previous post, you learned how to train a RetinaNet network with a ResNet34 backbone for object detection. This included pulling a container, preparing the dataset, tuning the hyperparameters, and training the model.
In this post, you learn how to build and deploy a real-time, AI-based application. This model is deployed on an NVIDIA Jetson powered AGX Xavier edge device using DeepStream SDK to redact faces on multiple video streams in real time. The output of the application is shown below:
Video: Before redaction. Faces can be clearly seen.
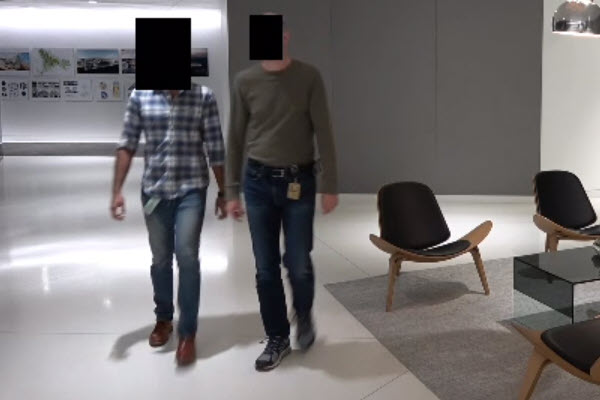
Video: After redaction. We are redacting four copies of the video simultaneously on the Jetson AGX Xavier device.
Prerequisites
This post uses the following resources:
- A Jetson AGX Xavier device. The instructions can be used on any Jetson devices or any datacenter GPU.
- The DeepStream SDK for real-time, video analytic application with TensorRT for deep learning inference.
Deployment
In this post, you take the trained ONNX model from part 1 and deploy it on an edge device. We explain how to deploy on a Jetson AGX Xavier device using the DeepStream SDK, but you can deploy on any NVIDIA-powered device, from embedded Jetson devices to large datacenter GPUs such as T4.
This post has three subsections:
- Hardware setup
- Building the TensorRT engine
- Deploying using DeepStream
The hardware setup is only required for Jetson devices. If you are using any other NVIDIA GPU, you can skip this step and go directly to building the TensorRT engine, to be used for low-latency real-time inference. Finally, the last task is to build the entire video analytic pipeline using DeepStream. You take the streaming video data at the input, use TensorRT to detect faces, and use the features of the DeepStream SDK to redact the faces.
Hardware Setup: Jetson devices
Download the latest JetPack using the NVIDIA SDK Manager. Take a look at the Jetson download center for resources and tips on using Jetson devices. In the SDK manager, make sure that you tick the option to download DeepStream as well.
Build the TensorRT Engine
Here are the steps to build the TensorRT engine.
1. Build the RetinaNet C++ API
To convert ONNX to TensorRT, you must first build an executable called export. The RetinaNet C++ API to create the executable is provided in the RetinaNet GitHub repo. This is the same repo that you used for training. Now you must clone it on your edge device.
git clone https://github.com/NVIDIA/retinanet-examples.git
cd extras/cppapi
By default, the inference batch size is set to 1. To infer multiple streams simultaneously, change the batch size. Jetson AGX Xavier can infer four streams simultaneously for the given model. The batch size is dependent on the size of the model and the hardware that is being used. We recommend experimenting with batch size for your hardware to get the optimum performance.
Change the batch size to 4 in export.cpp:
int batch = 4;
Now build the API to generate the executable.
mkdir build && cd build
cmake -DCMAKE_CUDA_FLAGS="--expt-extended-lambda -std=c++11" ..
make
2. Build the TensorRT engine
TensorRT creates an engine file or plan file, which is a binary that’s optimized to provide low latency and high throughput for inference. The optimizations are specific to the GPU architectures, so it is important that you create the TensorRT engine on the same device to be used for inference.
Copy the ONNX model generated in the “Export to ONNX” step from the training instructions.
Use the export executable from the previous step to convert the ONNX model to a TensorRT engine. The export process can take a few minutes. For this example, the engine has a batch size of 4, set in the earlier step.
./export redaction.onnx redaction_b4.plan
To make a new executable (for example, with a new batch size), edit export.cpp and re-run make within the build folder.
To export the ONNX model to INT8 precision, see the INT8 README file.
Deploy with DeepStream
The last step in the deployment process is to configure and run the DeepStream app. The main steps include installing the DeepStream SDK, building a bounding box parser for RetinaNet, building a DeepStream app, and finally running the app.

1. Install DeepStream
DeepStream is a streaming analytics toolkit that enables AI-based video understanding and multi-sensor processing. With DeepStream, the entire pipeline is processed on the GPU, with zero memory copy between CPU and GPU. This makes the entire pipeline fast and efficient.
If you installed DeepStream from the SDK manager in the Hardware setup step, then the sample apps and configuration are located in /opt/nvidia/deepstream/.
If you didn’t install DeepStream from the SDK manager or if you are using an x86 system with an NVIDIA GPU, then download DeepStream from the product page and follow the setup instructions from the DeepStream Developer Guide.
Tip: Test your DeepStream installation by running one of the DeepStream samples.
deepstream-app -c <path to deepstream>/configs/deepstream-app/source4_1080p_dec_infer-resnet_tracker_sgie_tiled_display_int8.txt
The first time that you run it, it takes a few minutes to generate the TensorRT engine file. You should see a tile of four videos with bounding boxes around cars and pedestrians. If you do not see this, then DeepStream was not properly installed. For more information, see the technical FAQ.
2. Build the RetinaNet custom parser
DeepStream uses TensorRT for inference. With DeepStream, you have an option of either providing the ONNX file directly or providing the TensorRT plan file. A TensorRT plan file was generated in the Build TensorRT engine step, so use that with DeepStream.
TensorRT takes the input tensors and generates output tensors. To detect an object, tensors from the output layer must be converted to X,Y coordinates or the location of the bounding box of the object. This step is called bounding box parsing.
By default, DeepStream ships with built-in parsers for DetectNet_v2 detectors. For other detectors, you must build a custom parser and use it in the DeepStream config file. For RetinaNet object detection, the code to parse the bounding box is provided in nvdsparsebbox_retinanet.cpp. The function to parse the box is called NvDsInferParseRetinaNet. This is used in the DeepStream application.
For YOLO, FasterRCNN, and SSD, DeepStream provides examples that show how to parse bounding boxes. For other detectors, you must create your own bounding box parsers. In this example, we show how to build a RetinaNet bounding box parser. This is not part of the DeepStream SDK but we provide the code to do it. You are encouraged to take this code and use it for your own model.
To build the custom parser:
cd /<path to retinanet-examples>/extras/deepstream/deepstream-sample
mkdir build && cd build
cmake -DCMAKE_CUDA_FLAGS="--expt-extended-lambda -std=c++11" ..
make
This creates a shared object file, libnvdsparsebbox_retinanet.so. This shared object file is referenced by the DeepStream app to parse bounding boxes.
3. Build the DeepStream app
The DeepStream redaction app is a slightly modified version of the main deepstream-app. The source code for the main deepstream-app can be found in the <path to deepstream>/sources/apps/sample_apps/deepstream-app directory. The source code for the DeepStream redaction app is in the redaction app repository. We made two modifications to perform redaction on the detected object.
Modification 1: Remove the detection text
In deepstream_redaction_app.c, change the show_bbox_text flag, so that the detection class is not displayed. For this application, you are not looking for the text of the detected object class, so you can remove this.
appCtx->show_bbox_text = 0;
Modification 2: Create a callback that adds a solid color rectangle. The solid color rectangle masks the detected object.
Comment out the following lines. These bounding box displays are not needed, as you define a solid color rectangle. Nvdsosd is a plugin that draws bounding boxes and polygons and displays texts. For more information about nvdsosd, see the plugins manual.
/*
if (gie_config != NULL) {
        if (g_hash_table_contains (gie_config->bbox_border_color_table,
                class_index + (gchar *) NULL)) {
          obj->rect_params.border_color =
              *((NvOSD_ColorParams *)
              g_hash_table_lookup (gie_config->bbox_border_color_table,
                  class_index + (gchar *) NULL));
        } else {
          obj->rect_params.border_color = gie_config->bbox_border_color;
        }
        obj->rect_params.border_width = appCtx->config.osd_config.border_width;

        if (g_hash_table_contains (gie_config->bbox_bg_color_table,
                class_index + (gchar *) NULL)) {
          obj->rect_params.has_bg_color = 1;
          obj->rect_params.bg_color =
              *((NvOSD_ColorParams *)
              g_hash_table_lookup (gie_config->bbox_bg_color_table,
                  class_index + (gchar *) NULL));
        } else {
          obj->rect_params.has_bg_color = 0;
        }
}
*/
Add the following lines, which define a callback that adds a black rectangle to any objects with class_id=0 (faces).
NvOSD_RectParams * rect_params = &(obj->rect_params);
      /* Draw black patch to cover faces (class_id = 0), can change to other colors */
      if (obj->class_id == 0) {
            rect_params->border_width = 0;
        rect_params->has_bg_color = 1;
        rect_params->bg_color.red = 0.0;
        rect_params->bg_color.green = 0.0;
        rect_params->bg_color.blue = 0.0;
        rect_params->bg_color.alpha = 1.0;
      }
To build this new app, first copy the src directory and makefile (src in the redaction app repository) to <path to deepstream>/deepstream_sdk_v4.0_jetson/sources/apps/ on the edge device.
Install the prerequisites:
$ sudo apt update
$ sudo apt install libssl1.0.0 libgstreamer1.0-0 gstreamer1.0-tools\
streamer1.0-plugins-good gstreamer1.0-plugins-bad \
gstreamer1.0-plugins-ugly gstreamer1.0-libav \
libgstrtspserver-1.0-0 libjansson4=2.11-1 \
librdkafka1=0.11.3-1build1
Build the app:
$ cd <path to deepstream>/deepstream_sdk_v4.0_jetson/sources/apps/
$ make
4. Run the app!
You are almost ready to run the app, but you must first edit the config files to make sure of the following:
- Your sources point to real mp4 files (or your webcam)
- The model-engine-file points to your TensorRT engine
- The bounding box shared object path to libnvdsparsebbox_retinanet.so is correct
- The tracker and tracking interval are configured, if required
The config files are in the /configs directory (/configs in the redaction app repository).
For the input source, you can stream from a mp4 file, over a webcam, or over RTSP. For this example, stream from a mp4 file. For more information about choosing different sources, see the DeepStream User Guide.
[source0]
enable=1
#Type - 1=CameraV4L2 2=URI 3=MultiURI 4=RTSP
type=3
uri=file://<Location of the mp4>
For inference, use the TensorRT engine/plan that was generated in earlier steps. For more information, see the config file options to use the TensorRT engine.
# Engine file from earlier step - Build TensorRT engine
model-engine-file=redaction_b4.plan

output-blob-names=boxes;scores;classes
Next, configure the parsing function that generates bounding boxes around detected objects. Use the libnvdsparsebbox_retinanet.so file that was generated in the earlier steps. The name of the function is NvDsInferParseRetinaNet. To see how the function is implemented, see the code in nvdsparsebbox_retinanet.cpp.
# Name of bbox parsing function from step 5 - RetinaNet custom parser
parse-bbox-func-name=NvDsInferParseRetinaNet
# Path to the parsing .so file from step 5 - RetinaNet custom parser
custom-lib-path=build/libnvdsparsebbox_retinanet.so
Run the application. You should see a video that has all faces redacted with a black rectangle.
$ ./deepstream-redaction-app -c configs/test_source*_<precision>.txt
Run the app with a tracker.
By default, DeepStream runs inference every frame. If you need to run inference on 10 streams running at 30 fps, the GPU has to do 300 inference operations per second. Depending on the size of the model and the size of the GPU, this might exceed the computing capacity.
One way to get around this is to infer every other or every third frame and use a high-quality tracker to predict the bounding box of the object based on previous locations. The tracker is generally less compute-intensive than doing a full inference. With a tracker, you can process more streams or even do a higher resolution inference.
DeepStream ships with three reference trackers that can perform trajectory tracking and predicting the location. For more information about the available trackers, see the tracker in the Plugins manual.
For this post, use the KLT-based tracker. To use a tracker, make the following changes in the config file. For all the options, see the NVIDIA DeepStream SDK Quick Start Guide.
[tracker]
enable=1
tracker-width=640
tracker-height=384
ll-lib-file=/opt/nvidia/deepstream/deepstream-4.0/lib/libnvds_mot_klt.so
gpu-id=0
The interval option under [primary-gie] controls how frequently to run inference. Interval means the number of frames to skip between inference. So, an interval of 0 means run inference every frame, an interval of 1 means infer every other frame, and an interval of 2 means infer every third frame.
[primary-gie]
interval=2
Results and conclusion
The samples are run on a Jetson AGX Xavier. The following table shows the performance for the RetinaNet model doing object detection and redaction.
| Precision | Number of streams | Model batch | Interval | Frame rate (FPS) | Model resolution |
| FP16 | 1 | 1 | 0 | 38 | 864 x 512 |
| FP16 | 4 | 4 | 2 | 30 | 864 x 512 |
| INT8 | 6 | 6 | 2 | 33 | 864 x 512 |
| INT8 | 8 | 8 | 2 | 26 | 864 x 512 |
Video: After redaction. We are redacting four copies of the video simultaneously on a Jetson AGX Xavier device.
The post-redaction video shows the real-time redaction of faces using the DeepStream SDK. It’s able to detect most faces in the sample video. A lower precision for inference and a tracker are used to improve the performance of the application. Going from FP16 to INT8 provides a 73% increase in FPS, and increasing the interval number with a tracker provides up to 3x increase in FPS.
Next steps
The purpose of this post is to acquaint you with the available NVIDIA resources on training and deploying deep learning applications. The model trained in this work is based on the training data from Open Images [1] and the accuracy might be different for your use case. We encourage you to build on top of this work.
Get started with RetinaNet examples >>
Download DeepStream >>
Free online course on DeepStream SDK
If you are a student or a developer interested in learning more about intelligent video analytics and gaining hands-on experience using DeepStream, we have a free self-paced online Deep Learning Institute (DLI) course available.
Enroll in the free DLI course on DeepStream >>
References
Ethical AI:
NVIDIA’s platforms and application frameworks enable developers to build a wide array of AI applications. Consider potential algorithmic bias when choosing or creating the models being deployed. Work with the model’s developer to ensure that it meets the requirements for the relevant industry and use case; that the necessary instruction and documentation are provided to understand error rates, confidence intervals, and results; and that the model is being used under the conditions and in the manner intended.
