

Advances in computer vision models are providing deeper insights to make our lives increasingly productive, our communities safer, and our planet cleaner.
We’ve come a long way from object detection that tells us whether a patient is walking or sitting on the floor but can’t alert us if the patient collapsed, for example. New computer vision models are overcoming these types of challenges by processing temporal information and predicting actions.
Building these models from scratch requires AI expertise, large amounts of training data, and loads of compute power. Fortunately, transfer learning enables you to build custom models with a fraction of these resources.
In this post, we walk through each step to build and deploy a computer vision application with NVIDIA AI software from the NGC catalog and run it on Google Cloud Vertex AI Workbench.
Software and infrastructure
The NGC catalog provides GPU-optimized AI frameworks, training and inference SDKs, and pretrained models that can be easily deployed through ready-to-use Jupyter notebooks.
Google Cloud Vertex AI Workbench is a single development environment for the entire AI workflow. It accelerates data engineering by deeply integrating with all of the services necessary to rapidly build and deploy models in production.
Accelerating application development by taking care of the plumbing
NVIDIA and Google Cloud have partnered to enable easy deployment of the software and models from the NGC catalog to Vertex AI Workbench. It’s made easy through ready-to-use Jupyter notebooks with a single click, instead of a dozen complex steps.
This quick deploy feature launches the JupyterLab instance on Vertex AI with an optimal configuration, preloads the software dependencies, and downloads the NGC notebook in one go. This enables you to start executing the code right away without needing any expertise to configure the development environment.
A Google Cloud account with free credits is plenty to build and run this application.
Live webinar
You can also join us on June 22 during our live webinar where we will walk you step-by-step through how to build your computer vision application that recognizes human action, using software from the NGC catalog and Vertex AI Workbench.
Get started
To follow along, you need the following resources:
- Register or sign in to the NGC catalog
- Sign in to Google Cloud or sign up to receive free credits
Software
- NVIDIA TAO Toolkit: An AI-model-adaptation framework to fine-tune pretrained models with custom data and produce highly accurate computer vision, speech, and language understanding models.
- Action Recognition model: A five-class action recognition network to recognize what people do in an image.
- Action Recognition Jupyter Notebook: An example use case of Action_Recognition_Net using TAO Toolkit.
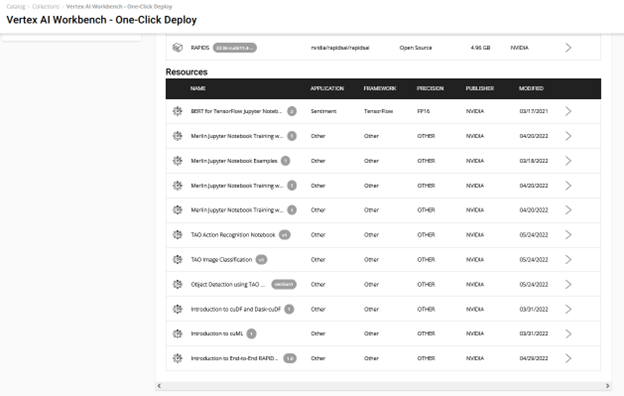
When you sign into the NGC catalog, you’ll see the curated content.

All Jupyter notebooks on NGC are hosted under Resources on the left pane. Find the TAO Action Recognition notebook.
There are a couple of ways to get started using the sample Jupyter notebooks from this resource:
- Download the resource, set up the GPU instance (cloud or local), and run the setup commands to start Jupyter notebook.
- Choose Deploy to Vertex AI on the notebook product page or through the Vertex AI collection entities (Figure 2).
Take the easy route with quick deploy. It takes care of the end-to-end setup requirements like fetching the Jupyter notebook, configuring the GPU instance, installing dependencies, and running a JupyterLab interface to quickly get started with the development! Try it out by choosing Deploy on Vertex AI.
You see a window with detailed information about the resource and AI platform. The Deploy option leads to the Google Cloud Vertex AI platform Workbench.
The following information is preconfigured but can be customized, depending on the requirements of the resource:
- Name of the notebook
- Region
- Docker container environment
- Machine type, GPU type, Number of GPUs
- Disk type and data size
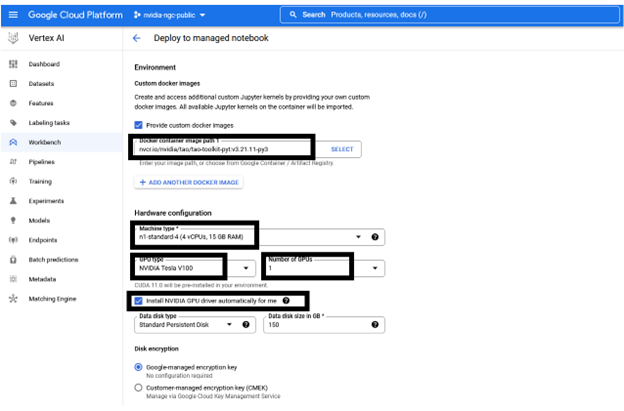
You can keep the recommended configuration as-is or change as required before choosing Create. Creating the GPU compute instance and setting up the JupyterLab environment takes about a couple of minutes.
To start up the interface, choose Open, Open JupyterLab. The instance loads up with the resources (Jupyter notebooks) pulled and the environment set up as a kernel in the JupyterLab.
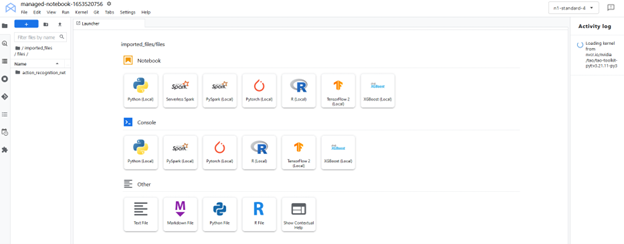
The JupyterLab interface pulls the resources (custom container and Jupyter notebooks) from NGC. Select the custom kernel tao-toolkit-pyt in the JupyterLab interface.
Run the notebook
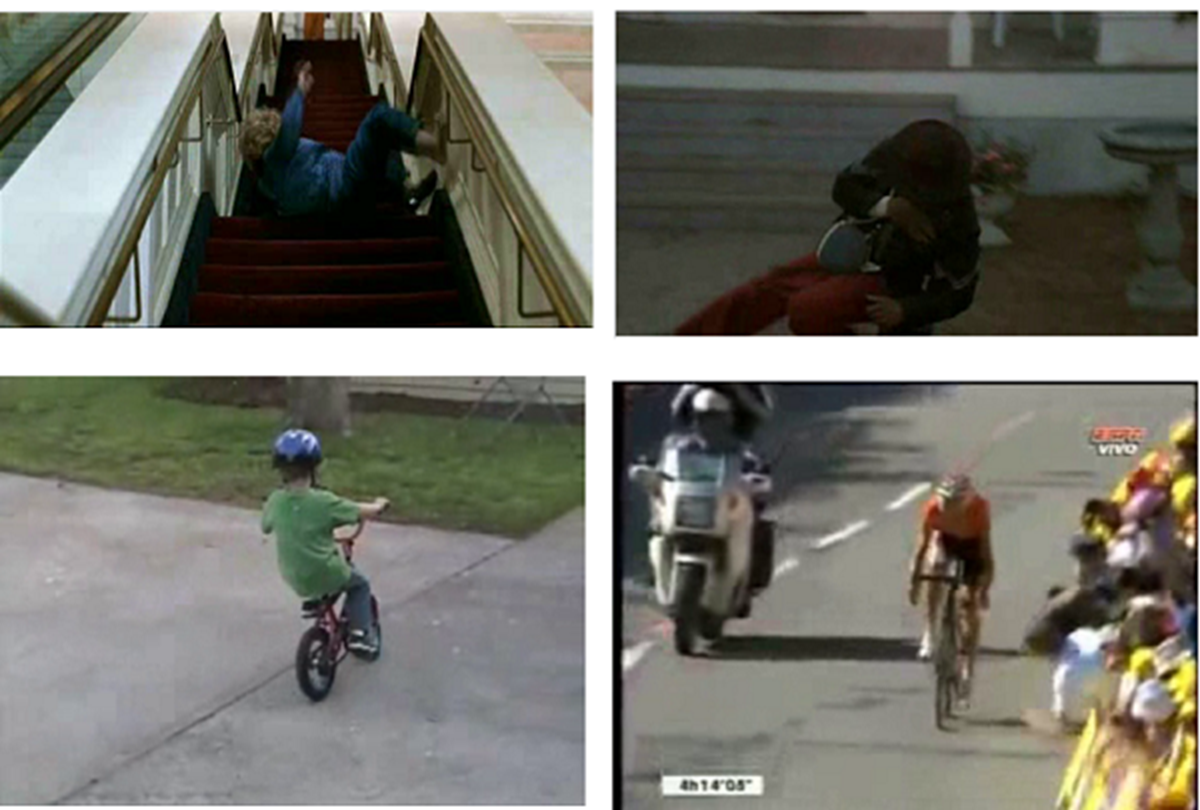
This action recognition Jupyter notebook showcases how to fine-tune an action recognition model that identifies five human actions. You use it for two actions in this dataset: fall-floor and ride-bike.
The notebook makes use of the HMDB51 dataset to fine-tune a pretrained model loaded from the NGC catalog. The notebook also showcases how to run inference on the trained model and deploy it into the real-time video analytics framework NVIDIA DeepStream.
Set up the env variables
Set the HOST_DATA_DIR, HOST_SPECS_DIR, HOST_RESULTS_DIR and env-key variables, then execute the cell. The data, specs, results folder, and Jupyter notebook are inside the \action-recognition-net folder.
%env HOST_DATA_DIR=/absolute/path/to/your/host/data
# note: You could set the HOST_SPECS_DIR to folder of the experiments specs downloaded with the notebook
%env HOST_SPECS_DIR=/absolute/path/to/your/host/specs
%env HOST_RESULTS_DIR=/absolute/path/to/your/host/results

# Set your encryption key, and use the same key for all commands
%env KEY = nvidia_tao
Run the subsequent cells to download the HMDB51 dataset and unzip it into $HOST_DATA_DIR. The preprocessing scripts clip the video and generate optical flow out of it, which gets stored in the $HOST_DATA_DIR/processed_data directory.
!wget -P $HOST_DATA_DIR "https://github.com/shokoufeh-monjezi/TAOData/releases/download/v1.0/hmdb51_org.zip"
!mkdir -p $HOST_DATA_DIR/videos && unzip  $HOST_DATA_DIR/hmdb51_org.zip -d $HOST_DATA_DIR/videos
!mkdir -p $HOST_DATA_DIR/raw_data
!unzip $HOST_DATA_DIR/videos/hmdb51_org/fall_floor.zip -d $HOST_DATA_DIR/raw_data
!unzip $HOST_DATA_DIR/videos/hmdb51_org/ride_bike.zip -d $HOST_DATA_DIR/raw_data
Finally, split the dataset into train and test and verify the contents by running the following code cell example, as given in the Jupyter notebook:
# download the split files and unrar
!wget -P $HOST_DATA_DIR https://github.com/shokoufeh-monjezi/TAOData/releases/download/v1.0/test_train_splits.zip

!mkdir -p $HOST_DATA_DIR/splits && unzip  $HOST_DATA_DIR/test_train_splits.zip -d $HOST_DATA_DIR/splits

# run split_HMDB to generate training split

!cd tao_toolkit_recipes/tao_action_recognition/data_generation/ && python3 ./split_dataset.py $HOST_DATA_DIR/processed_data $HOST_DATA_DIR/splits/test_train_splits/testTrainMulti_7030_splits $HOST_DATA_DIR/train  $HOST_DATA_DIR/test
Verify the final test and train datasets:
!ls -l $HOST_DATA_DIR/train
!ls -l $HOST_DATA_DIR/train/ride_bike
!ls -l $HOST_DATA_DIR/test
!ls -l $HOST_DATA_DIR/test/ride_bike
Download the pretrained model
You use the NGC CLI to get the pre-trained models. For more information, go to NGC and on the navigation bar, choose SETUP.
!ngc registry model download-version "nvidia/tao/actionrecognitionnet:trainable_v1.0" --dest $HOST_RESULTS_DIR/pretrained
Check the downloaded models. You should see resnet18_3d_rgb_hmdb5_32.tlt and resnet18_2d_rgb_hmdb5_32.tlt.
print("Check that model is downloaded into dir.")
!ls -l $HOST_RESULTS_DIR/pretrained/actionrecognitionnet_vtrainable_v1.0
Training specification
In the specs folder, you can find different specs files related to train, evaluate, infer, and export functions. Choose the train_rgb_3d_finetune.yaml file and you can change hyperparameters, such as the number of epochs, in this specs file.
Make sure that you edit the path in the specs file based on the path to the data and results folders in your system.
Train the model
We provide a pretrained RGB-only model trained on HMDB5 dataset. With the pretrained model, you can even get better accuracy with fewer epochs.
print("Train RGB only model with PTM")
!action_recognition train \
                  -e $HOST_SPECS_DIR/train_rgb_3d_finetune.yaml \
                  -r $HOST_RESULTS_DIR/rgb_3d_ptm \
                  -k $KEY \
                  model_config.rgb_pretrained_model_path=$HOST_RESULTS_DIR/pretrained/actionrecognitionnet_vtrainable_v1.0/resnet18_3d_rgb_hmdb5_32.tlt  \
                  model_config.rgb_pretrained_num_classes=5
Evaluate the model
We provide two different sample strategies to evaluate the pretrained model on video clips.
- center mode: Pick up the middle frames of a sequence to do inference. For example, if the model requires 32 frames as input and a video clip has 128 frames, then choose the frames from index 48 to index 79 to do the inference.
- conv mode: Sample 10 sequences out of a single video and do inference. The final results are averaged.
Next, evaluate the RGB model trained with PTM:
!action_recognition evaluate \
                    -e $HOST_SPECS_DIR/evaluate_rgb.yaml \
                    -k $KEY \
                    model=$HOST_RESULTS_DIR/rgb_3d_ptm/rgb_only_model.tlt  \
                    batch_size=1 \
                    test_dataset_dir=$HOST_DATA_DIR/test \
                    video_eval_mode=center
video_eval_mode=center
Inferences
In this section, you run the action recognition inference tool to generate inferences with the trained RGB models and print the results.
There are also two modes for inference just like evaluation: center mode and conv mode. The final output shows each input sequence label in the videos: [video_sample_path] [labels list for sequences in the video sample]
!action_recognition inference \
           -e $HOST_SPECS_DIR/infer_rgb.yaml \
           -k $KEY \
           model=$HOST_RESULTS_DIR/rgb_3d_ptm/rgb_only_model.tlt \
           inference_dataset_dir=$HOST_DATA_DIR/test/ride_bike \
           video_inf_mode=center
You can see an example of the results of the inference function on this dataset.
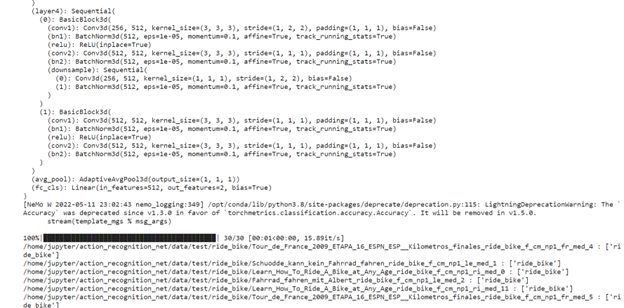
Conclusion
NVIDIA TAO and the pretrained models help you accelerate your custom model development by eliminating the need for building models from scratch.
With the NGC catalog’s quick deploy feature, you can get access to an environment to build and run your computer vision application in a matter of minutes. This enables you to focus on development and avoid spending time on infrastructure setup.
