
Ray tracing in Unreal Engine 4 is a powerful and flexible lighting system. It’s powerful because of its accuracy and quality. Never have you had the ability to do things like shadows and reflections like this in real time.
It’s flexible because you can mix raster and ray tracing rendering features together as you see fit, crafting the scene that you want, achieving the performance and quality that you want.
What’s raster, you ask? Basically, raster rendering is everything you’ve been doing in the past 20-30 years to get image-based rendering to the screen. All the tricks and methods with which you’ve become familiar, like cascaded shadow maps, postprocess image adjustments, screen space reflections, and ambient occlusion, even basic 3D lighting and rendering techniques—these all fall under this umbrella of rasterized rendering.
This is partly why ray tracing isn’t a hard shift. Keeping the old methods available allows for a transition phase in rendering technology, and that’s where we are today.
With few exceptions, enabling ray tracing in your project doesn’t exclude the familiar methods of rendering. For example, you can use baked lightmaps and add in ray tracing reflections, or you can add in ray tracing dynamic shadows and do reflections with cube maps and SSR. The system even goes a step further and allows you to control how the scene is rendered with PostProcessVolumes and commands, so that you can enable and disable what you want on the fly.
This post looks at the ray tracing and raster features item by item. I talk about what they do and help you understand the system better.
For the latest code efforts, see the NVIDIA RTX UE4 branch. Not only does it contain optimized ray tracing, it also gives you access to DLSS rendering technology running on top of the latest Unreal Engine 4.25. Our optimizations can improve ray tracing performance by up to 30%, and DLSS can double your frame rate over that. The capability for dramatically improved performance is there, and we are constantly working to take that further. For more information, see the DLSS product page.
System requirements
To enable ray tracing in your project, your system and drivers need to be up-to-date with the latest software.
- Required resources:
- DX12
- The latest version of Windows 10
- NVIDIA drivers
- Any RTX card or GTX 1060 and later
- Enable ray tracing in Project Preferences.
- This also enables the GPU skin cache and is required for ray tracing to work.
- Change your default RHI to DX12 as well:
- Choose Project Settings, Platform, Windows, Targeted RHIs, and then for Default RHI, choose DX12.
Comparing ray tracing and rasterization
It’s worth noting that ray tracing features can be controlled with your PostProcessVolume, or more granularly with console commands. This allows you to have different setups per area, situation, or level. Ray tracing features can be fully enabled and disabled on the fly.
| Ray tracing feature | Raster equivalent |
| Ray tracing reflections | SSR or cube maps |
| Ray tracing shadows | Shadow maps or DFS |
| Ray tracing ambient occlusion | SSAO or DFAO |
| Ray tracing translucency | Raster translucency |
| Ray tracing skylight | Raster skylight |
| Ray tracing global illumination | SSGI or LPV |
As I pointed out earlier, almost all these features can be mixed in different ways. There are some exceptions and details worth noting, and I list them later in this post.
Ray tracing reflections
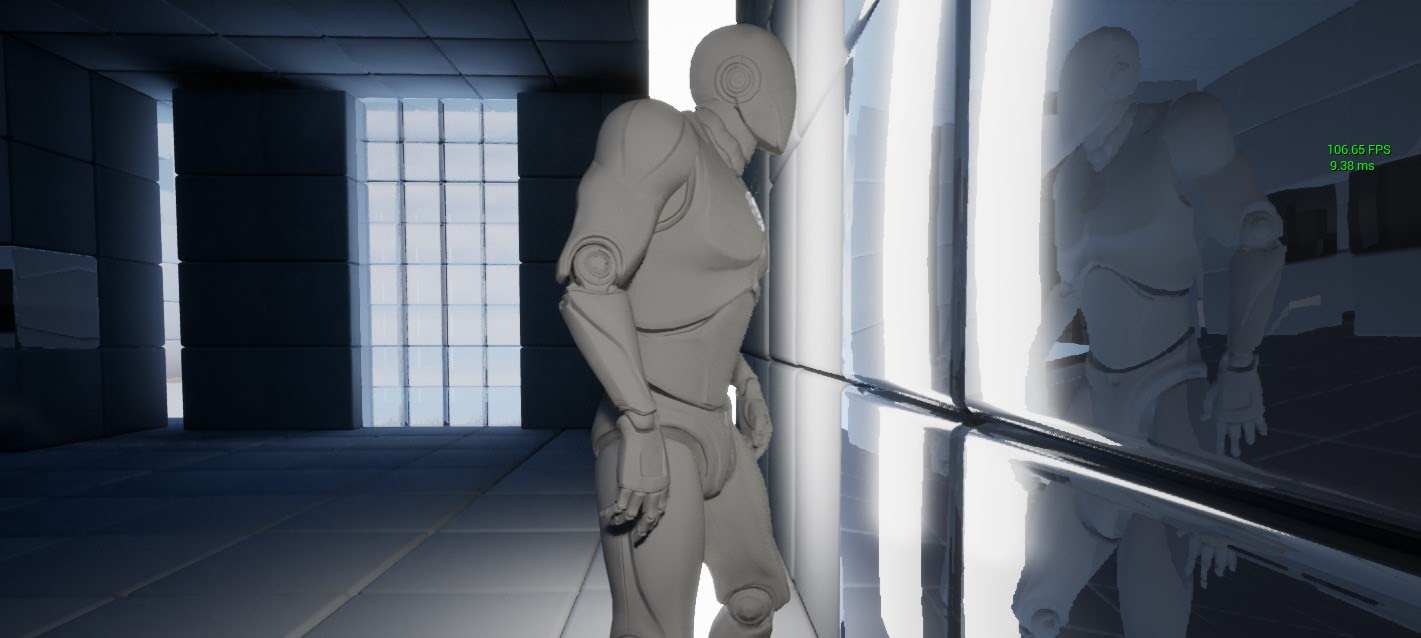
Ray tracing reflections are one of the biggest visual benefits to ray tracing and one of the highest performance costs. Because ray tracing reflections can exist on any surface and reflect the scene accurately based on geometry, normal maps, and material roughness value, logically they can get expensive. However, there are many fine-tuning controls for getting the performance target that you want.
Ray tracing shadows
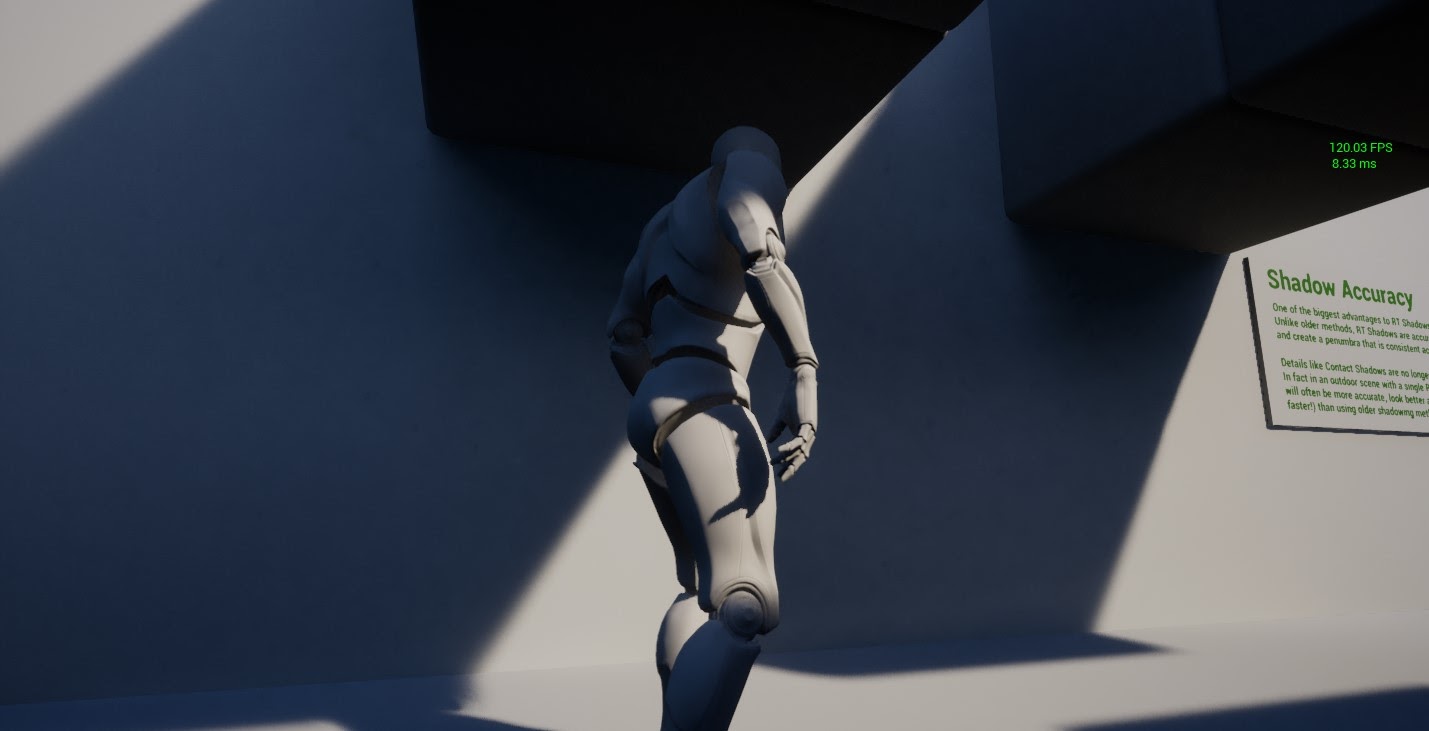
Ray tracing shadows benefit from being the most accurate form of shadowing that you can do. Dynamic ray tracing shadows are more accurate than other options and perform relatively well compared to dynamic raster equivalents.
One of the big differences between raster and ray tracing shadows is artist time. With raster shadows, there would often need to be many small adjustments to either the cascade steps and transition distances, or tweaks like contact shadow adjustments for small geometry. In the case of Distance Field Shadows (DFS), you must spend time adjusting static mesh and skeleton mesh penumbra separately to try and find values that work well together, as each mesh type in this method produces different shadowing results.
Another problem with raster methods can be the size of your scene or geometry. Shadows might look right in a corridor, but not over a 2-km patch of ground. Getting shadows to look consistent and right across a range of scenes and geometry scales requires some time and effort. It might require different lighting values for different types of levels.
Ray tracing shadows are not only more visually consistent, but they can save you valuable time. If you can plug in one set of values for your dynamic lights and have them look correct no matter how big or small your scene is, you don’t have to mess with different shadow method settings to get it looking correct.
Ray tracing ambient occlusion
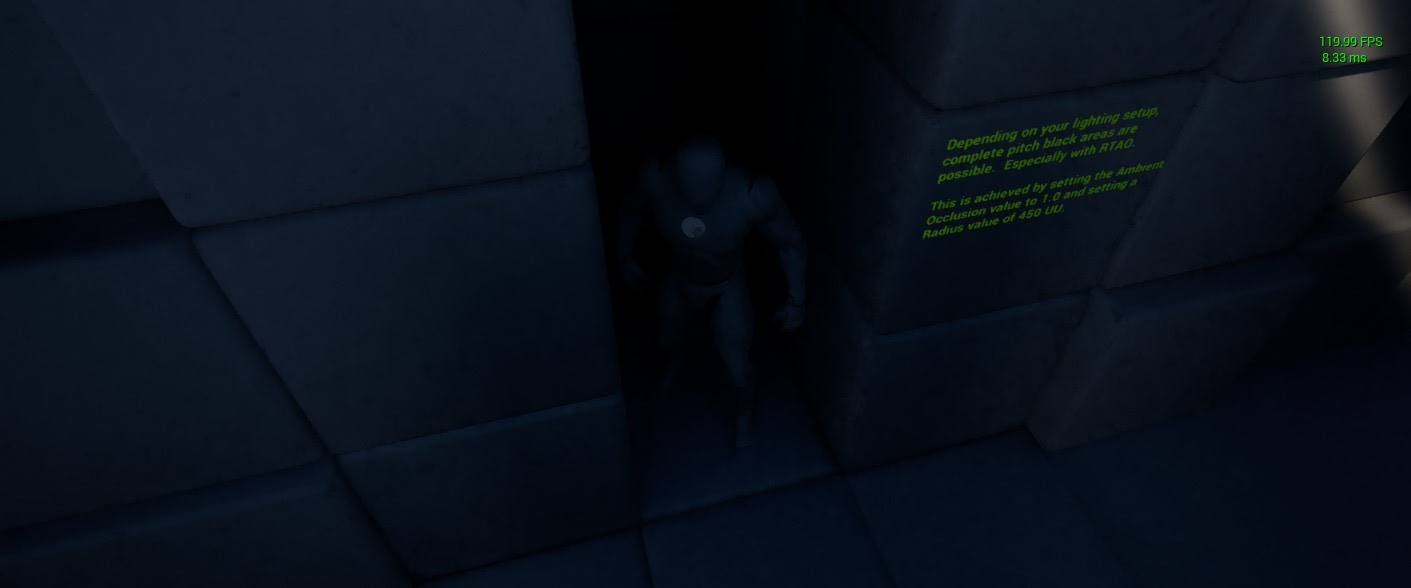
Just like ray tracing shadows, ray tracing ambient occlusion (RTAO) benefits from accuracy. In short, RTAO is more physically accurate than screen space ambient occlusion (SSAO) with a higher cost. This can be +1-2ms or more, depending on your settings. Like everything else with ray tracing, you can mix and match features. Your scene can have ray tracing shadows and SSAO, and this is completely valid.
It’s possible that RTAO may benefit from different numerical values than SSAO or DFAO. This is because RTAO, in addition to having accuracy that DFAO doesn’t, is not limited to screen space rendering like SSAO. You may get a better look with it by using larger numbers that exceed your screen space.
Ray tracing translucency
Ray tracing translucency might be one of the more amazing visual possibilities. Traditionally, in real-time graphics, translucency has been one of the hardest things to pull off. It’s slow, it doesn’t depth-sort correctly, and it often has limits that are constraining to artists. Ray tracing translucency has the potential to completely change how you think about these graphics.
While it still can be expensive to render, ray tracing does new things. Because you are firing rays and photons through geometry accurately and per-pixel, depth sorting issues are resolved. This takes some of the limits off artists who can easily use translucent effects in more situations. Ray tracing translucent surfaces can be lit, reflect light, and easily do things that rasterization has trouble with.
Ray tracing translucency can also do refraction, bending the light rays that pass through translucent surfaces. Some things have been faked in rasterization, like refraction, through material effects. Even in rasterization, it may have accuracy issues. Surfaces often must be adjusted per-material to get it looking just right.
The NVIDIA RTX UE4 branch contains another option, hybrid translucency. It offers a blend between ray tracing and raster translucency, with improved compatibility and performance.
Ray tracing skylight

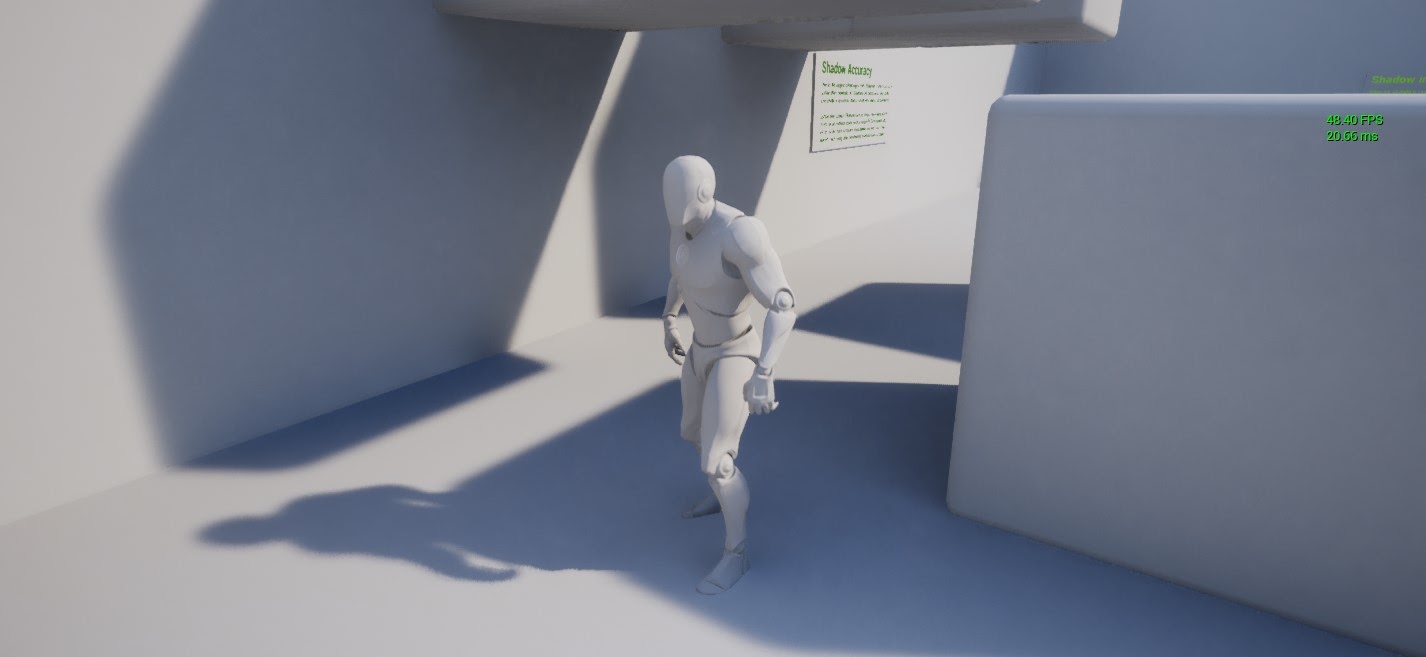
A ray tracing skylight has the potential to create soft lighting and shadow from a skydome. When the skylight is set to cast ray tracing shadows and is flagged to be either stationary or dynamic, it generates shadows from photons cast from the sky.
This does mimic some of the elements you would expect in global illumination, namely the soft shadow ambient term. It contributes light and shadow to any scene where the sky is visible.
Ray tracing global illumination
Global illumination is the process of bouncing light photons in a scattered, reflective way, to create ambient shadows and color bleeding between nearby surfaces. As you can imagine, this is challenging to do in a scanline ray tracer, let alone in real time! But development moves forward on ray tracing global illumination (RTGI) to make it a reality.
In Unreal Engine 4.25, there is an implementation of RTGI that is good for usage today. RTGI has a Final Gather method that provides a good balance between performance and quality. Feel free to experiment with it and see what it does for your scene. You can increase the sample rate higher to help eliminate the visual issues, but that comes with incrementally higher performance costs.
NVIDIA is working on a new form of GI called RTXGI. For more information, see RTX Global Illumination SDK Now Available.
Using raster methods
Can you still use raster methods? The short answer is yes (mostly), but some systems are either redundant in a ray-tracing setting or not 100% implemented.
Ninety percent of all systems, materials, and object types are supported in ray tracing, with just a few exceptions. Spline meshes are rendered but won’t cast dynamic ray tracing shadows. The same goes for BSP, but the BSP system is old and few games make use of it today. Epic maintains a list of compatible object and material types in their documentation.
LPV is another edge case. Light Propagation Volumes are a technique to use voxels to simulate the color bounce of GI. Like many rasterized methods of rendering, it is approximate and often low-resolution. With ray tracing on, LPV does not work. This won’t affect most projects, as most games probably don’t use the LPV. Going forward, there will be better GI solutions specifically for ray tracing.
Optimizing scenes
Here are six good optimizations or considerations to help keep your scene running well:
- Troubleshoot with STAT GPU
- Monitor STAT RHI
- Use the r.RayTracing console commands
- Cull dynamic shadow casting lights by distance
- Clamp your ray tracing reflection roughness globally
- Use half-resolution reflections
Troubleshoot with STAT GPU
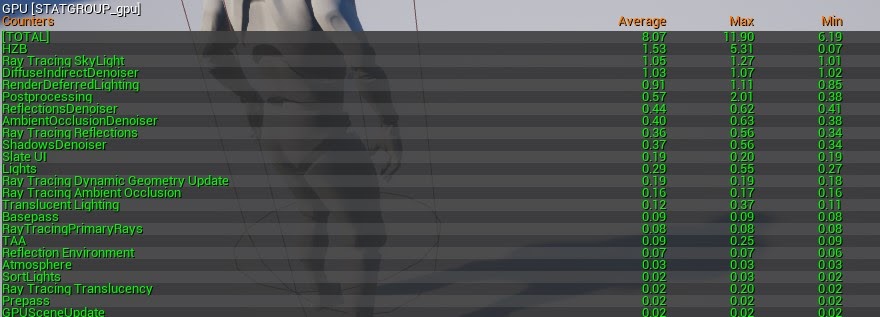
It’s a good idea to get a handle on what is costing performance in your scene and target optimizations based on that. Lots of individual items are tunable, so the first and most important step is just being informed.
Use STAT GPU to get a handle on that information. STAT GPU provides a high-level breakdown of each category of rendering, including rendering costs specific to ray tracing.
Every scene is different. If something about your scene is running poorly, look at STAT GPU to give you a sense of what needs to be done. Even if you don’t know how to fix the particular category, having this information makes it easier for you to find subject matter experts on that specific category and ask them how to improve it.
Monitor STAT RHI
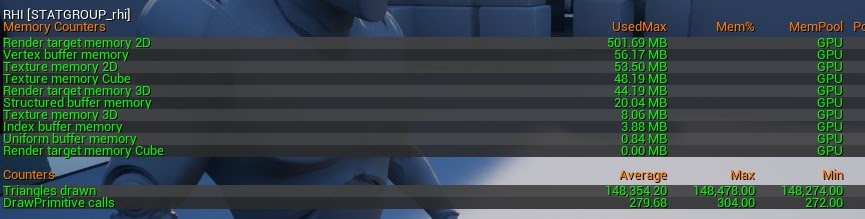
I like this one because it essentially just shows you at the highest level what is going on. Roughly how much GPU memory are you using, how many triangles are drawn, and perhaps most importantly what are your DrawPrimitive calls (a.k.a. drawcalls)?
In modern rendering, triangle counts have become less relevant. A powerful GPU can blast triangles all day long, but drawcalls are often the more relevant limiter on performance. If it hurts your scene in raster, it will hurt it in ray tracing. Keeping drawcalls under control is valuable.
Rendering as few meshes as possible continues to be relevant and keeping multi-material objects to a minimum continues to be good to do. One trick is to simply make lower LODs that use less materials, so that you are performing fewer drawcalls at long range. One of the best things you can do is simply make use of culldistance volumes and keep the number of drawn meshes as low as you can. Another is to make use of the HISM-instanced mesh system. It’s built into UE4 and gives you another way to reduce drawcalls at runtime.
Use the r.RayTracing console commands
There are several useful commands in the r.RayTracing category and they’re worth playing with to see what the various effects are. I just want to call out one in particular: r.RayTracing.ForceAllRayTracingEffects. It does exactly what you’d think:
- Set it to 0 and all ray tracing effects are turned off.
- Set it to 1 and all ray tracing effects are forced on.
- Set it to -1 to put it back to your setup defaults.
This command can be a quick way to figure out what’s going on. If you set it to 0 and your scene is still running poorly, you know that ray tracing is not the culprit.
Cull dynamic shadow casting lights by distance
Another optimization that is generally good to do continues to be relevant in ray tracing. Set the max distance value on shadow casting dynamic lights—it has a big impact on performance.
There is no explicit guidance on how many shadowcasters you can have in your scene. It largely depends on how big those lights are and how many objects they touch. The more you can tighten that up and cull them based on the distance factor, the better your scene performs.
The NVIDIA RTX UE4 branch has additional optimizations to clamp the number of shadow casting lights and prioritize how they fall back from denoised shadows to sharp shadows. These global CVARs can greatly improve performance in a project that makes extensive use of dynamic shadow-casting lights.
Clamp your ray tracing reflection roughness globally
This is a quick and dirty optimization and may not be suitable for all projects. However, it is easy to try and may help you figure out if ray tracing reflections are costing you.
In your PostProcessVolume under Ray Tracing Reflections, the max roughness value defaults to 0.6. The lower that you can set this number, the less costly ray tracing reflections may be overall because any reflective surface above this roughness value uses cube maps instead. Try setting it to something like 0.2 or 0.3 instead, which helps isolate ray tracing reflections to your mirror-like surfaces.
You can also control this value globally with the r.RayTracing.Reflections.MaxRoughness (0-1) console command. Rougher reflections are blurrier, and a rough reflection may be visually indistinguishable from a cube map. This is a real potential performance saving.
Use half-resolution reflections
Reflections have many options and controls, as do most of the various ray tracing effects. But one is an easy win: Try setting r.RayTracing.Reflections.ScreenPercentage from its default of 100 to a value of 50. This renders any ray tracing–reflected pixel at quarter resolution and upscales it, usually resulting in a significant boost to reflection performance.
In the NVIDIA RTX UE4 branch, we provide the additional option of using a value of 70, which renders reflections at half-resolution for higher quality while still netting significant performance.
In some cases, the quality difference may be barely noticeable. At a minimum, it’s a good option to give to users who want maximum frame rate. Combined with intelligent upscaling methods like DLSS, lower resolution reflections may be an obvious choice to keep ray tracing running fast.
What’s next?
Some of the tips mentioned earlier, like setting reflection resolution to 70%, are exclusive to this branch. For more information, see the NVIDIA RTX UE4 branch.
Thank you for reading. If there are issues in your game that I can help you with, feel free to reach out in the comments or in the forums.
