At SIGGRAPH2019, NVIDIA Engineers helped the development community get up-to-speed on the newest graphics techniques during an advanced real-time ray tracing tutorial. They shared their experiences integrating, debugging, and profiling ray tracing while working with commercial engines and their content pipelines. This session can be viewed in its entirety here.
Below is an excerpt from the full talk, which provides guidance on optimizing the performance of Path Roughness and Clearcoat BDRF in UE4.
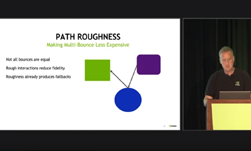
Path Roughness
Multiple bounces is a feature of UE4 reflections.
Path roughness is a feature NVIDIA has added to a branch of UE4 reflections, which offers several optimizations.
One useful trick to decrease the cost performance of ray tracing is to make multiple bounces less expensive using path roughness. In UE4.22, you can apply this optimization to achieve a 3X speed-up over realistic 3-bounce rendering.
“Every time you bounce, you hit a potentially rougher surface, and that reduces the fidelity of what you can see in that bounced reflection. As we do multiple bounces, we think about what the total roughness across the path is. We’ve done this with path roughness optimization,” explains Evan Hart, Principal Engineer at NVIDIA. “We accumulate roughness along the ray, while we’re tracing the reflection. And we test against the roughness of every bounce. It terminates the bounce early if it’s rough enough.”
As a developer, if you have content that requires a couple of bounces in a few specific cases, you can get the bounces you need (in those instances) without having to pay as much for everything else that’s going on in the scene.
Clearcoat BDRF
Clearcoat BDRF is a two layer material model in UE4, like clear coat paint in the real world. It’s often used to give environments a wet look. Hart offers guidance on how to optimize the model’s performance:
“Full evaluation requires two rays in the reflections: a top and a bottom ray. This is actually more than 2X the cost, because you’ve got an extra state that is being saved to composite the results between the two.The clear coat optimizations come in two layers. Treat the material as a normal material – not a clear coat material – if the clear coat is below a threshold. If the clear coat has less than a 2% effect on the material, you’re not going to be able to see it, so just fall back and use the underlayer, and you’re going to get exactly what you want.”
After the end bounce, developers should fall back to a reflection probe for the bottom layer. This is what screen space reflection has been doing for a long time in UE4. It’s not as accurate, but typically it’s good enough.
“In your racing game, you probably don’t care about the undercoat bounce when you’re driving around the track,” says Hart. “You care that it’s there, but a probe is probably good enough to give you good fidelity. But when you’re in the showroom mode, you might want to turn the undercoat bounce back on.”


The entire 1:15 hour talk, “Advanced Real Time Ray Tracing Tutorial”, is available here.
