Extract More Kernel Performance with NVIDIA CompileIQ Auto-Tuning
NVIDIA CompileIQ tackles one of the hardest problems in performance engineering: finding the compiler options that unlock the best performance for a specific...
Advanced Strategies for High-Performance GPU Programming with NVIDIA CUDA
Stephen Jones, a leading expert and distinguished NVIDIA CUDA architect, offers his guidance and insights with a deep dive into the complexities of mapping...
Improving GPU Performance by Reducing Instruction Cache Misses
GPUs are specially designed to crunch through massive amounts of data at high speed. They have a large amount of compute resources, called streaming...
Differentiable Slang easily integrates with existing codebases—from Python, PyTorch, and CUDA to HLSL—to aid multiple computer graphics tasks and enable novel...
Differentiable Slang: A Shading Language for Renderers That Learn
NVIDIA just released a SIGGRAPH Asia 2023 research paper, SLANG.D: Fast, Modular and Differentiable Shader Programming. The paper shows how a single language...
CUDA Toolkit 12.2 Unleashes Powerful Features for Boosting Applications
The latest release of CUDA Toolkit 12.2 introduces a range of essential new features, modifications to the programming model, and enhanced support for hardware...
CUDA 12.0 Compiler Support for Runtime LTO Using nvJitLink Library
CUDA Toolkit 12.0 introduces a new nvJitLink library for Just-in-Time Link Time Optimization (JIT LTO) support. In the early days of CUDA, to get maximum...
To best ensure the security and reliability of our RPM and Debian package repositories, NVIDIA is updating and rotating the signing keys used by the apt,...
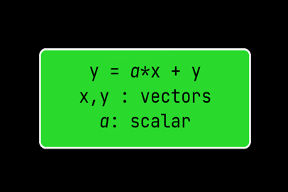
N Ways to SAXPY: Demonstrating the Breadth of GPU Programming Options
Back in 2012, NVIDIAN Mark Harris wrote Six Ways to Saxpy, demonstrating how to perform the SAXPY operation on a GPU in multiple ways, using different...
Accelerating Fortran DO CONCURRENT with GPUs and the NVIDIA HPC SDK
Fortran developers have long been able to accelerate their programs using CUDA Fortran or OpenACC. For more up-to-date information, please read Using Fortran...
Historically, accelerating your C++ code with GPUs has not been possible in Standard C++ without using language extensions or additional libraries: CUDA C++...
High-Performance GPU Computing in the Julia Programming Language
Julia is a high-level programming language for mathematical computing that is as easy to use as Python, but as fast as C. The language has been created with...
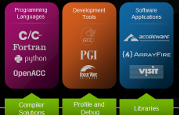
12 Things You Should Know about the Tesla Accelerated Computing Platform
You may already know NVIDIA Tesla as a line of GPU accelerator boards optimized for high-performance, general-purpose computing. They are used for parallel...
For even more ways to SAXPY using the latest NVIDIA HPC SDK with standard language parallelism, see N Ways to SAXPY: Demonstrating the Breadth of GPU...