
This post is part of a series about optimizing end-to-end AI.
The performance of AI models is heavily influenced by the precision of the computational resources being used. Lower precision can lead to faster processing speeds and reduced memory usage, while higher precision can contribute to more accurate results. Finding the right balance between precision and performance is crucial for optimizing AI applications.
NVIDIA GPUs, equipped with specialized hardware such as Tensor Cores, have become a key component in accelerating AI workloads. To use their capabilities fully, it’s important to satisfy certain constraints and optimize the hardware based on the specific AI application.
In this post, we discuss how to optimize your GPU for AI by transitioning from FP32 (single-precision floating-point format) to FP16 (half-precision floating-point format). We cover the advantages of using FP16, the methods for converting your model, and the implications of this conversion on the quality and performance of AI applications.
Initial performance: A simple unoptimized model

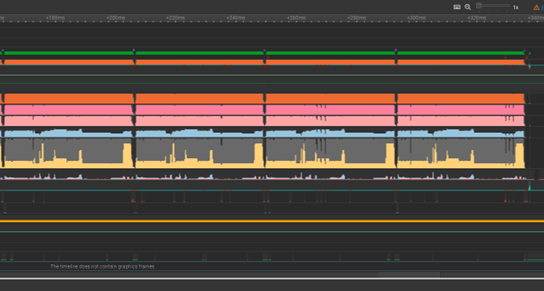
Begin with a simple unoptimized model in the ONNX format. The Nsight Systems profile shows that the execution time for four runs is 173 ms. Although this may appear fast, this is for a single image. Imagine if you were mass-processing 500 images, as photographers often have to do. This would take almost a minute and a half.
Transitioning from FP32 to FP16
Currently, the model is in FP32 precision, using 32 bits per single floating-point value. This is likely more precision than necessary. By transitioning to FP16, you enable Tensor Cores and enhance floating-point throughput.
Python ONNX modules offer two solutions: Float_to_float16 and auto-mixed precision.
Float_to_float16 method
Located in onnxconverter_common, the Float_to_float16 method can convert all the floating point values in a model to FP16.
import onnx
from onnxconverter_common.float16 import convert_float_to_float16

model_FP32 = onnx.load("model.onnx")
model_FP16 = convert_float_to_float16(copy.deepcopy(model_FP32))
onnx.save(model_FP16, "model_FP16.onnx")
If the weight in the original model exceeds the dynamic range of FP16, there will be overflow.
Auto-mixed precision method
Any unwanted behavior can be overcome by using the auto-mixed precision method. Also found in onnxconverter_common, this method applies mixed precision conversion. This method only converts layers where FP16 does not affect the output and it requires test data along with an optional validation method.
import onnx
import numpy as np
from onnxconverter_common.auto_mixed_precision import auto_convert_mixed_precision

# Could also use rtol/atol attributes directly instead of this
def validate(res1, res2):
    for r1, r2 in zip(res1, res2):
        if not np.allclose(r1, r2, rtol=0.01, atol=0.001):
            return False
    return True

model_FP32 = onnx.load("model.onnx")
feed_dict = {"input": 2*np.random.rand(1, 3, 128, 128).astype(np.float32)-1.0}
model_amp = auto_convert_mixed_precision(model_FP32, feed_dict, validate)
onnx.save(model_amp, "model_amp.onnx")
Improved performance with FP16
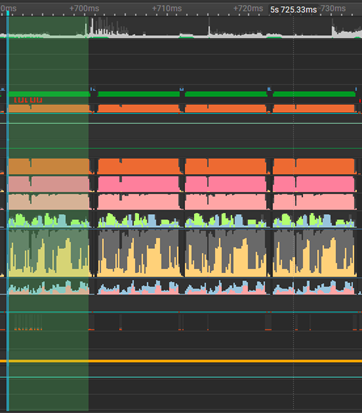
After using the first method for conversion, the model now takes only 42 ms to run, making it 4x faster than before. For 500 images, this takes the time down from close to 90 seconds to only 21 seconds.
Quality comparison: FP32 vs. FP16
Concerned about losing quality with lower precision? As you can see from the side-by-side image comparison (Figure 4), the denoised images output from the FP32 and FP16 models are identical. There is no discernible visual difference between them even though a lower precision method was used.

Conclusion
By converting to FP16 with just a few extra lines of code, we achieved a 4x speedup. This enables Tensor Cores and increases data throughput while reducing video memory usage.
Ready to optimize your AI? For more information, see the NVIDIA/ProViz-AI-Samples GitHub repo and try it out yourself. If you have any questions, reach out on the Data Processing developer forum.
