
NVIDIA SDK Manager is the go-to tool for installing the NVIDIA JetPack SDK on NVIDIA Jetson Developer Kits. It provides a guided and simple way to install the development environment and get started with the developer kits in a matter of minutes. SDK Manager handles the dependencies between the components and brings the latest software to NVIDIA Jetson with every JetPack release.
Previously, this seamless installation experience provided by SDK Manager was limited to NVIDIA developer kits. We are expanding support across the Jetson community. To create the same seamless experience across Jetson partner products and custom carrier boards, we are enabling Jetson ecosystem partners and customers to integrate support for their Jetson-based carrier boards into NVIDIA SDK Manager. This update also gives users the ability to customize JetPack installation.
You can modify installation steps and the binaries of the NVIDIA JetPack software stack to fit your needs and overwrite NVIDIA Jetson hardware information to use your own carrier boards.
Tailor your package
You can configure the development environment by providing an extra configuration file to the SDK Manager application. This enables you to use SDK Manager to support the installation of your carrier board, customize packages, and more.
To get started, follow these steps:
- Create the extra configuration file customized to your needs.
- Using the SDK Manager and the extra configuration file you created, configure, and set up the development environment.
Extra configuration file
The extra configuration file provides a way for you to customize your installation packages, processes, and hardware using SDK Manager.
SDK Manager uses data (hardware and software information) that is dynamically obtained for each SDK release. The data is stored in JSON manifest files that are loaded as needed during the installation session. When you supply an extra configuration file, it overwrites the original values (stored in the JSON manifest files) for the selected object or adds new objects to the installation session.
To modify objects to create your own extra config file, you must allocate the objects that need modifications from the original release manifest. The easiest way to do this is by inquiring about the original release manifest files, along with the provided example file.
For more information, see The Extra Configuration File in the NVIDIA SDK Manager documentation.
Example walkthrough
In this example, we use the following configuration to create a custom development environment:
- Jetpack 5.1.1 (rev. 1) with customized BSP and flashing commands.
- Customized NVIDIA Jetson AGX Xavier module.
- SDK Manager version 1.9.3.
Create the extra configuration file
- Download the software JSON manifest file (using the user interface or command line):
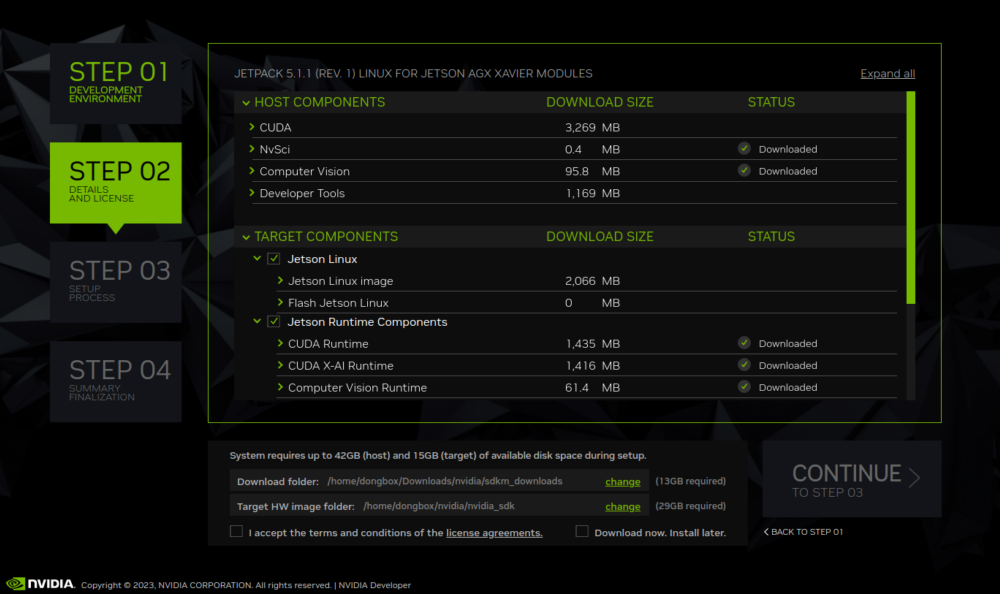
- Using the SDK Manager user interface, run the NVIDIA SDK Manager, select the JP 5.1.1 (rev. 1)
- Go to STEP 2 to review the list of components.
- When finished, exit SDK Manager.
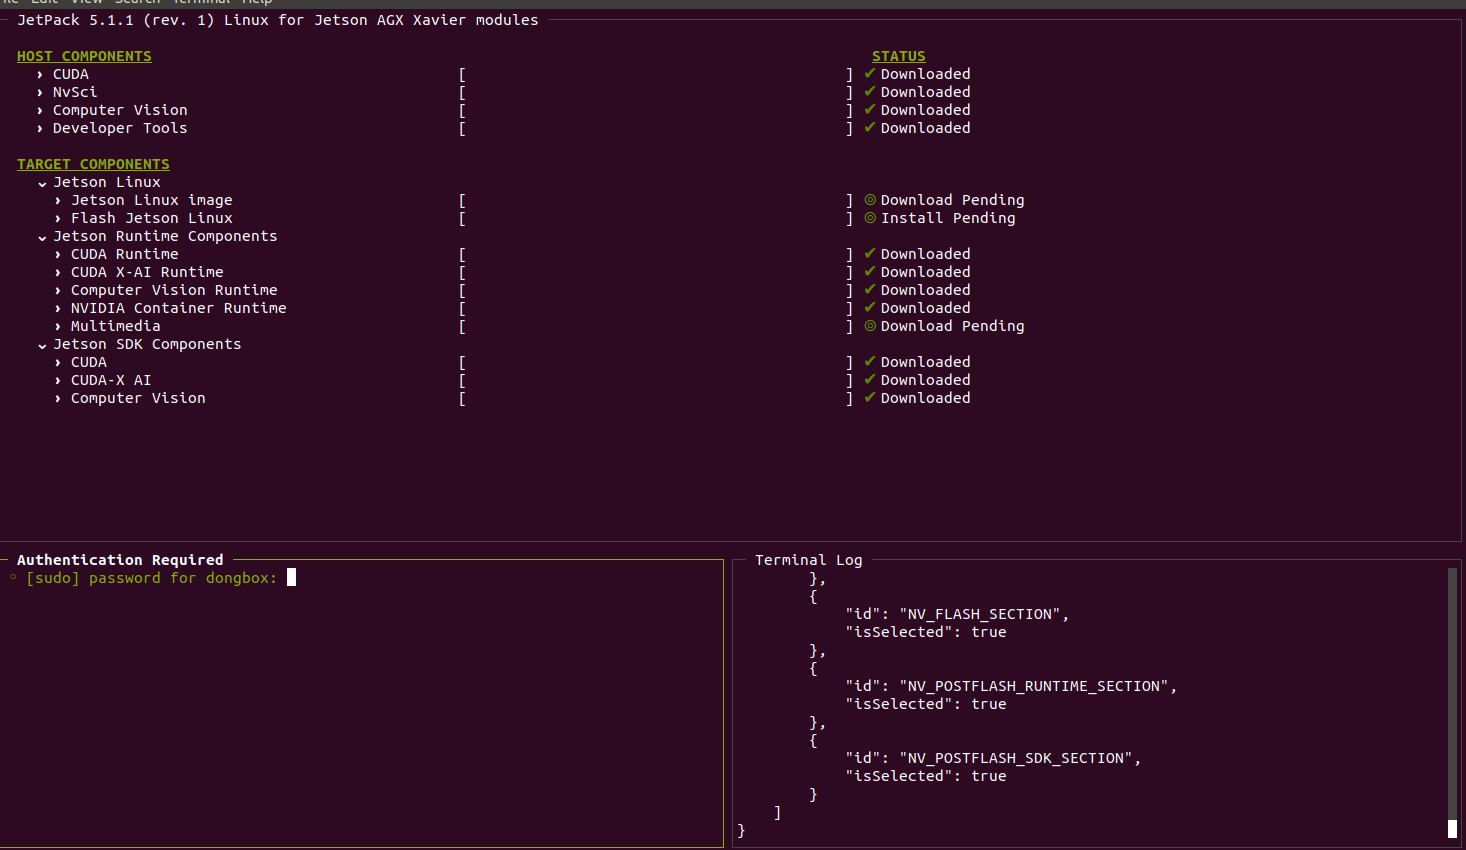
- To use the SDK Manager command-line interface, run the NVIDIA SDK Manager CLI with specific parameters, such as:
# sdkmanager --cli install --logintype devzone --product Jetson --host --targetos Linux --version 5.1.1 --target JETSON_AGX_XAVIER_TARGETS --flash all - Review the list of components in the main window.
- When finished, exit SDK Manager.
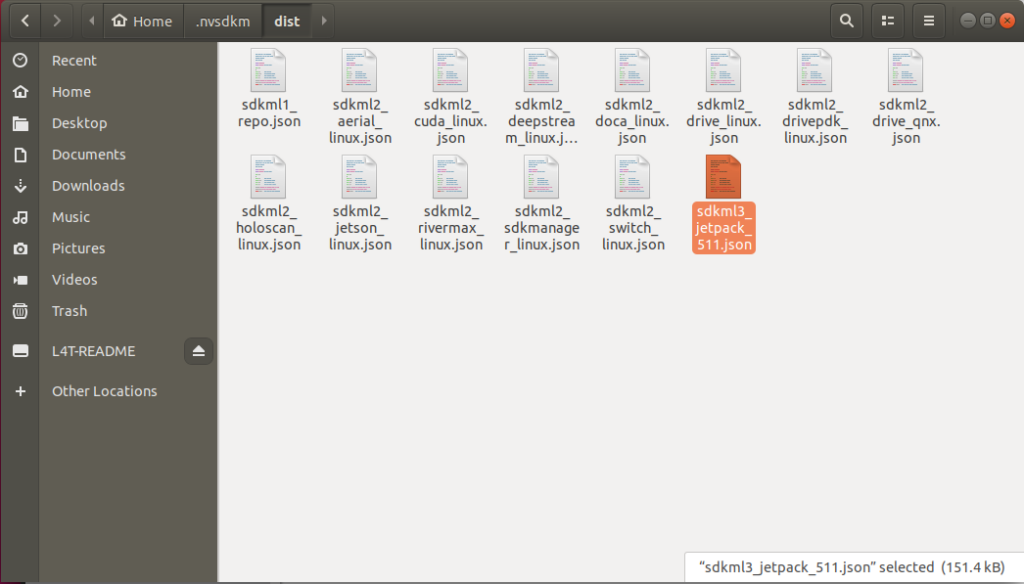
- Obtain the software reference file (
sdkml3_jetpack_511.json) from the~/.nvsdkm/dist/ directory.
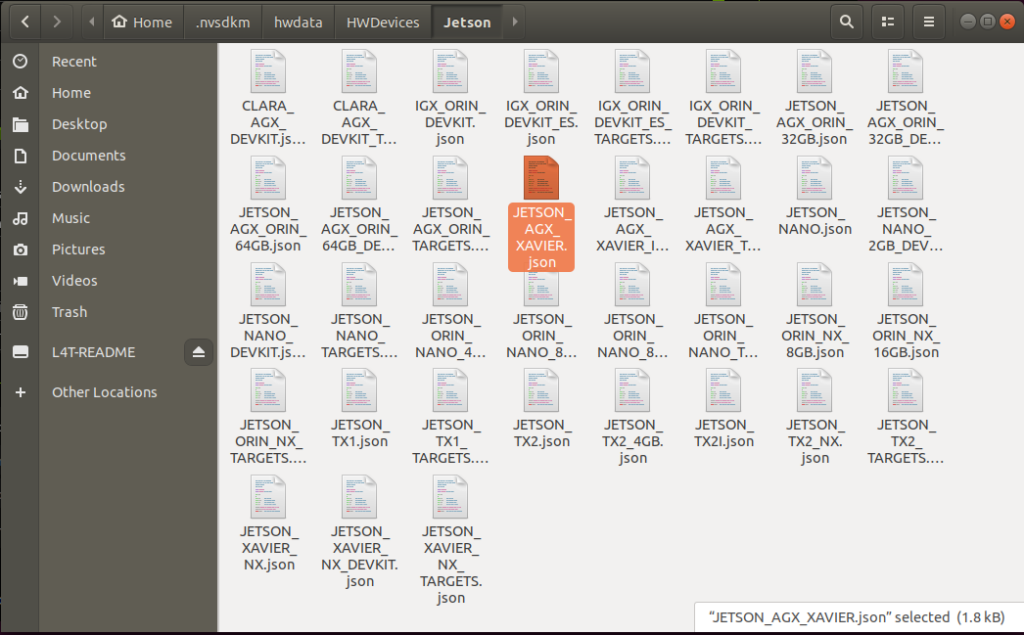
- Obtain the hardware reference file from the
~/.nvsdkm/hwdata/ directory.
- Download the example configuration file
(extraconfig) based on JetPack 5.1.1 (rev. 1) from the JetPack 5.1.1 sample file.- For this example, we renamed it:
extra_config_jetpack_511_xavier.json
- For this example, we renamed it:
- Overwrite the information section.
- From the software reference file, copy the version-related keys and values from the information section to your extra configuration file. For this example, it is:
"information": {

        "release": {

            "releaseVersion": "JetPack 5.1.1",

            "releaseEdition": "",

            "releaseRevision": 1

        }

},- Overwrite the software section. This step overwrites specific component installation with your customized software and installation steps. The components are located in the
componentsobject in the s reference file.- In this example, we are modifying JetPack 5.1.1 (rev. 1) to support a customized BSP and flashing command, so the relevant components are:
components.NV_L4T_FILE_SYSTEM_AND_OS_COMP(used for the BSP)components.NV_L4T_FLASH_JETSON_LINUX_COMP(used for the flash command)
- In this example, we are modifying JetPack 5.1.1 (rev. 1) to support a customized BSP and flashing command, so the relevant components are:
- Copy both of the components into the software section in the extra configuration file.
NV_L4T_FILE_SYSTEM_AND_OS_COMP: Update thedownloadFilesobject with the customized BSP file information and correct installation commands for it. Refer to the schema object for details.NV_L4T_FLASH_JETSON_LINUX_COMP: Update thecomponentInstallParameters.installCommandsobject with the correct flashing commands for the customized Jetson AGX Xavier board. Refer to the schema object for details.
- Overwrite the hardware section. This step overwrites specific hardware device parameters with your customized hardware device. The hardware device is located in the
hwobject in the hardware reference file and should be copied into thehwobject at the extra configuration file.- In this example, the closest file would be Jetson AGX Xavier:
~/.nvsdkm/hwdata/HWDevices/Jetson/JETSON_AGX_XAVIER.json - Copy the
JETSON_AGX_XAVIERobject from the hardware reference file to thehwobject in the extra config file, and then modify it per the customized hardware information with the guide from schema object.
- In this example, the closest file would be Jetson AGX Xavier:
Configure and set up the development environment
- Share the extra configuration file you created with your customers. They can:
- Download the extra configuration file and run SDK Manager with the following command:
sdkmanager --extraconfig [local path to extra_config_jetpack_511_xavier.json]
This can be used along with other command-line arguments as needed.
Learn more
Get started with SDK Manager to customize the installation packages for JetPack that support your developer community.
For more information about supported arguments, see Install with the Command Line.
Share your ideas in the Jetson developer forum.
