Test Specific Setup
The following sections describe how to set up the tests.
AURIX Tests
- Connect harness H1 to H1/CN2 port (see Image 1)
- Connect harness H2 to H2/CN1 port (see Image 1)
CAN Test
- Connect CAN loopback connectors to H1/H2 harness as per image below:
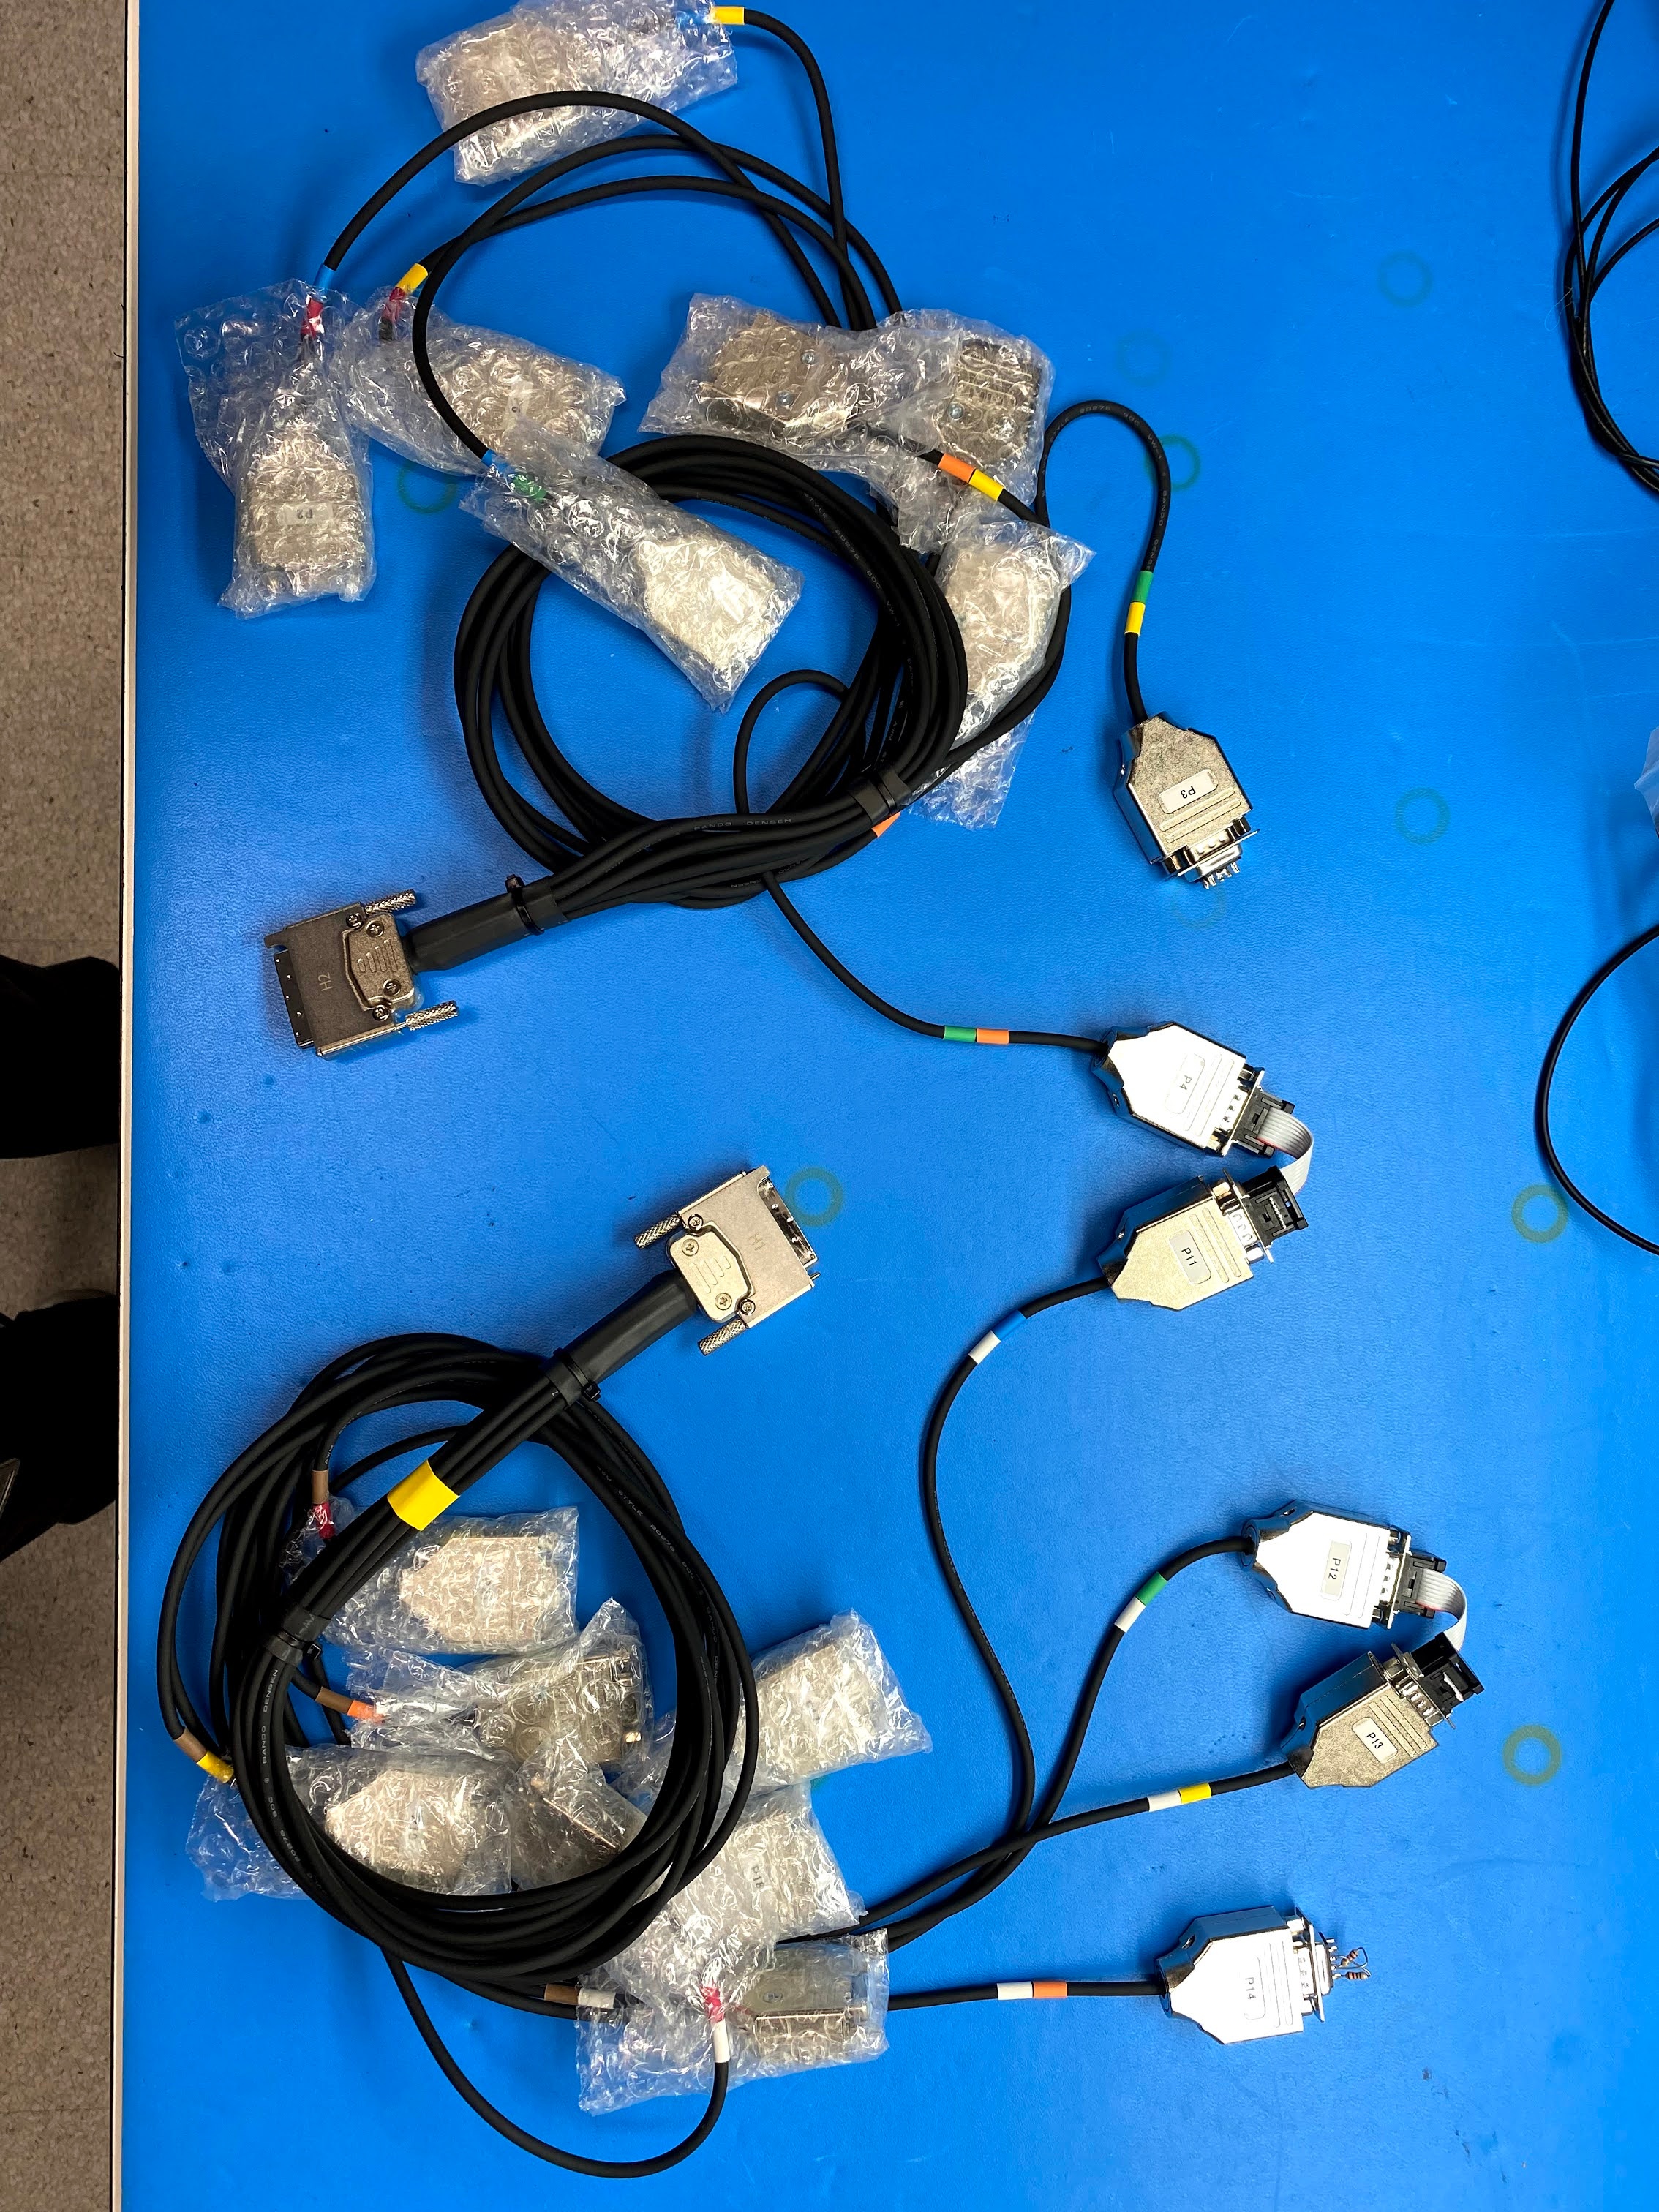
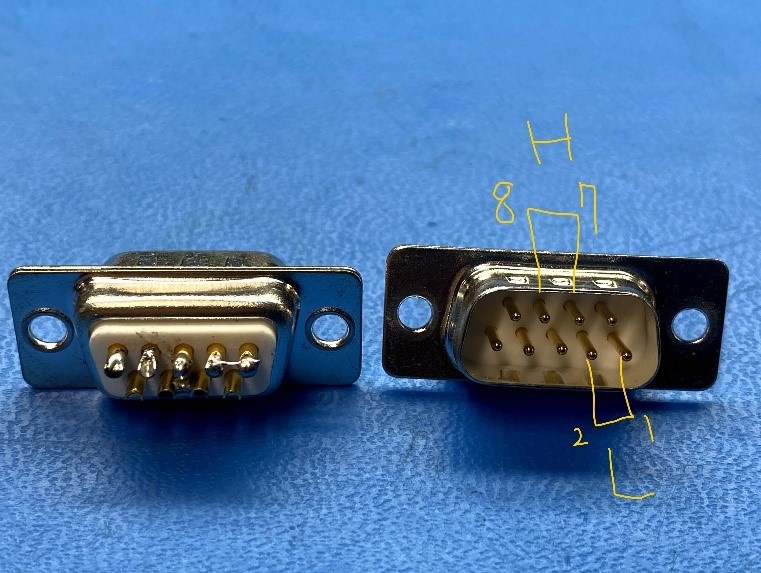
Connector 1: (P3 on harness 2)
Bridge Dongle(Dsub9 Male): Connect pin 1 and 2, connect pin 7 and 8
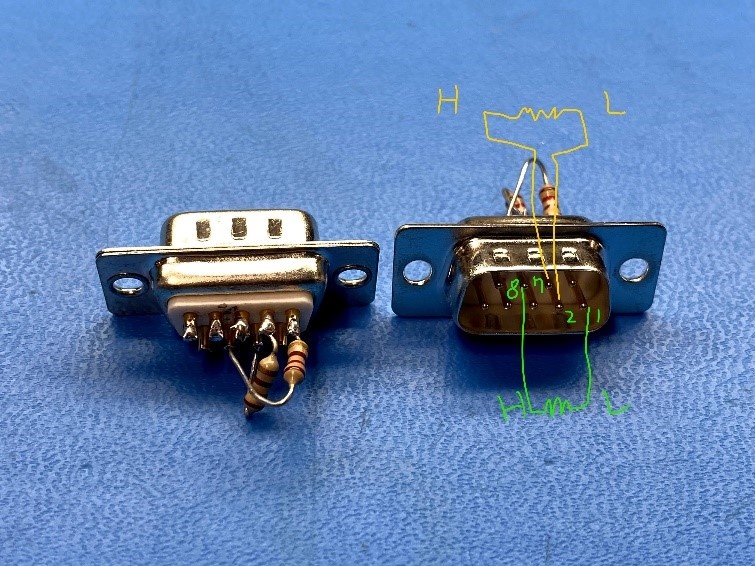
Connector 2: (P14 on Harness 1)
Termination dongle(Dsub9 Male): connect 120 ohm btw pin 1 and 8 and connect 120 ohm btw pin2 and 7
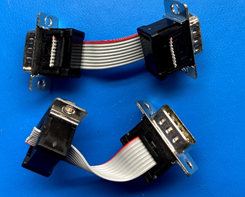
Connector 3: (P12 - P13 on harness 2 AND P4 of harness 1 to P11 of Harness 2)
x2 CAN cable(Male to Male): Connect pin 1-pin 1, pin 2-pin 2, pin 7-pin 7, pin 8-pin 8
Ethernet Tests
Switch Loopback Tests
- Matenet Ports on 3718 (see image 1)
- Connect port 3 to port 4 via matenet cable to matenet cable
- Connect port 2 to port 5 via matenet cable to matenet cable
- Connect port 1 to port 6 via matenet cable to matenet cable
- HMTD ports on 3718 (see image 1)
- Connect J3 to J4 via Quad HMTD to Quad HMTD cable
- Port J3.1 to Port J4.1
- Port J3.2 to Port J4.2
- Port J3.3 to Port J4.3
- Port J3.4 to Port J4.4
- Connect J3 to J4 via Quad HMTD to Quad HMTD cable
Rework:
- MGBE 2/3 rework
LAN7431 Test
- Connect Port HMTD-LAN7431 (see image 1) to HMTD port in E3459
- Connect RJ45 port of E3459 to host PC
USB Test
- Connect USB C 3.1 flash drive to port USB-C J8 port ( USB-C host port in image 1)
- Connect USB A 2.0 flash drive to port USB-A J11 port ( USB type A (left) in image 1)
- Connect USB A 2.0 flash drive to port USB-A J23 port ( USB type A (right) in image 1)
Rework:
- USB 2.0 Type A