How-to
Power ON/OFF
Power ON
By default, Jetson Orin Nano Developer Kit turns on automatically as soon as the bundled DC power supply is connected on the DC power jack. You can change this behavior with the jumper on Button header.
For details, see NVIDIA Jetson Orin Nano Developer Kit Carrier Board Specification .
Power Off
To power down the developer kit, complete the Ubuntu shutdown sequence using the shutdown button on the GUI.
Or using a command on the terminal.
sudo shutdown -h now
Force Recovery Mode
The developer kit must be in Force Recovery Mode (RCM) to enabled the flashing of Jetson module.
To put the developer kit in RCM:
-
Check you have terminal access to the Jetson and the root password
- If not, try other methods on the different tabs ("Developer Kit powered off", "Developer Kit already powered on").
- Issue the following command on the terminal.
sudo reboot --force forced-recovery
-
While connecting pins
9and10of the Button Header , - Insert the DC power plug to turn on the system.
For Button Header details, see NVIDIA Jetson Orin Nano Developer Kit Carrier Board Specification .
-
While connecting pins
9and10of the Button Header , -
Temporaily connect pins
7and8to reset system.
For Button Header details, see NVIDIA Jetson Orin Nano Developer Kit Carrier Board Specification .
CSI Camera
Hardware connection
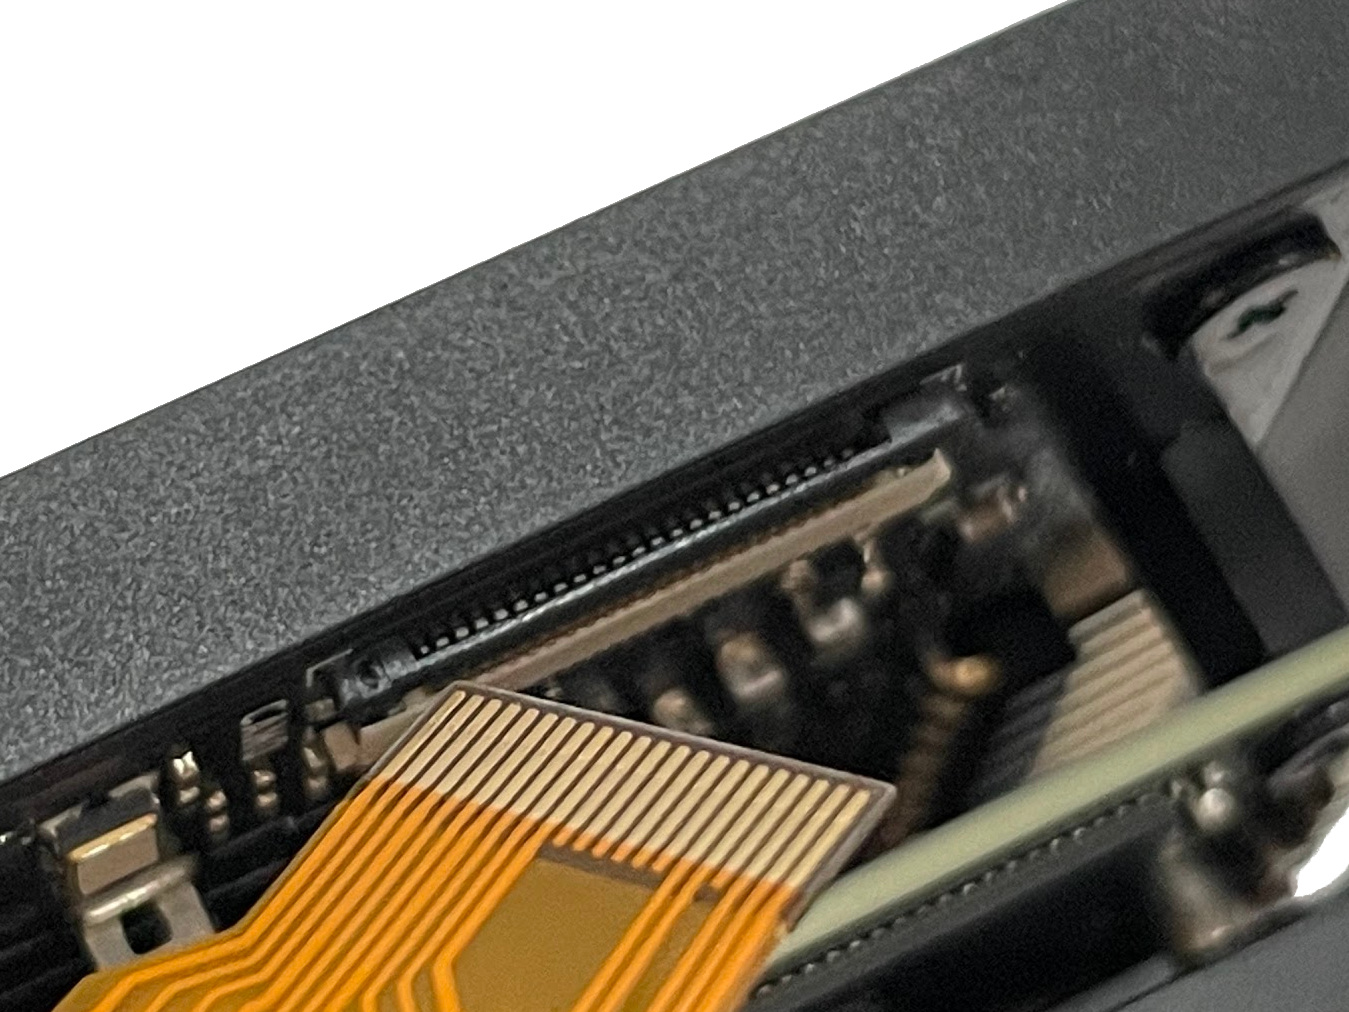
To connect a Raspberry Pi Camera Module v2 to Jetson Orin Nano Developer Kit, use a 15-pin to 22-pin conversion cable like this .
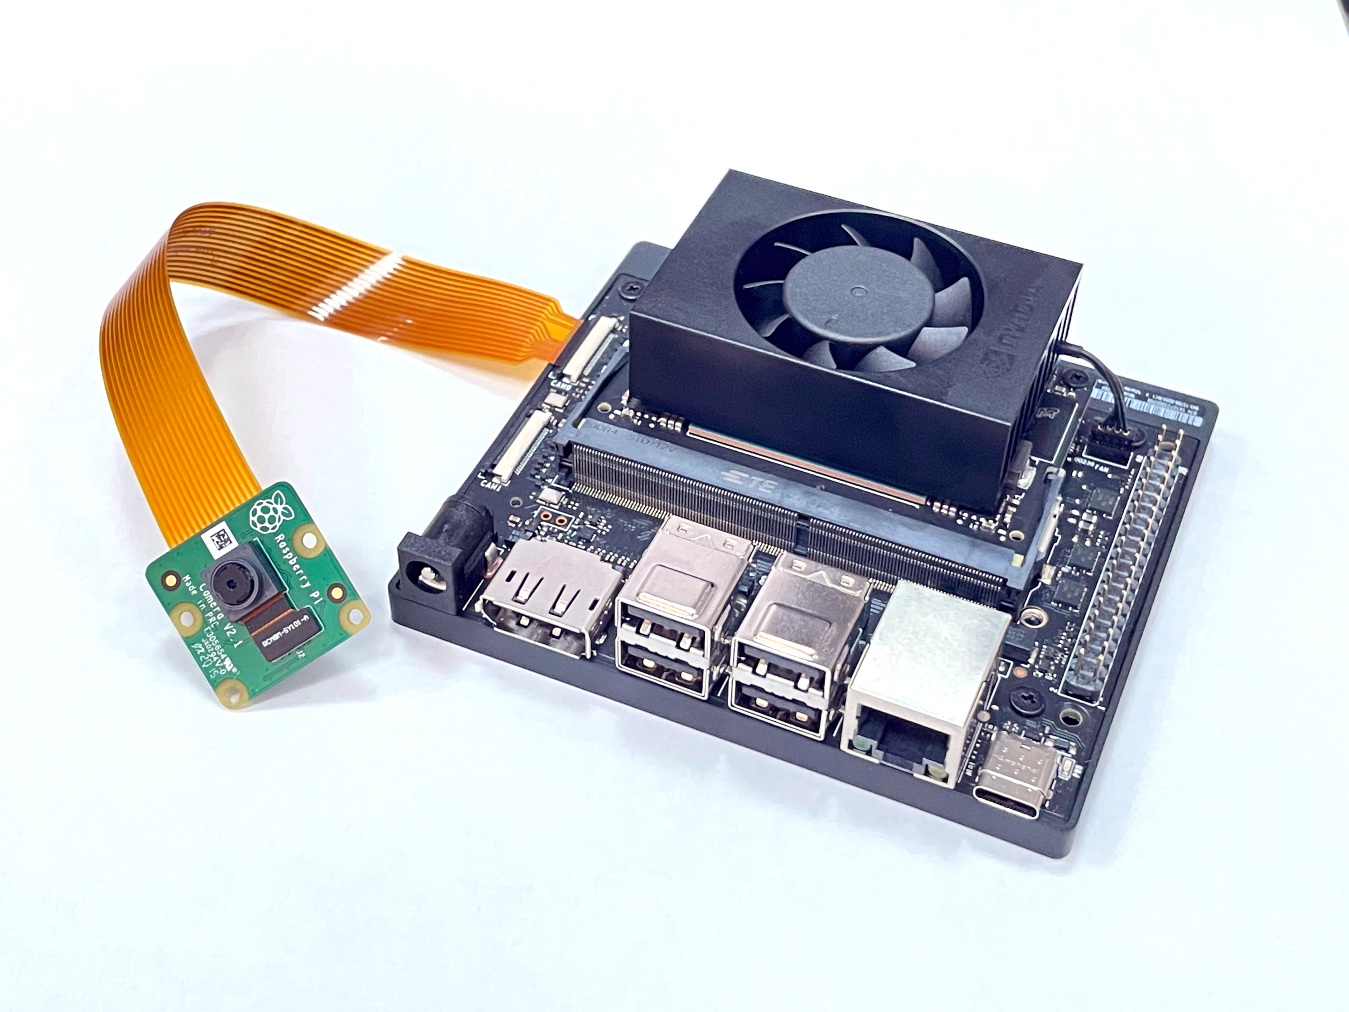
The narrower side (but has 22 contacts, 0.5mm pitch) is to go to Jetson Orin Nano Developer Kit side.
Make sure the gold contact is on the bottom side.
Software check
Check if you find the camera device on the system.
$ sudo apt update; sudo apt-install -y v4l-utils
$ v4l2-ctl --list-devices
NVIDIA Tegra Video Input Device (platform:tegra-camrtc-ca):
    /dev/media0

vi-output, imx219 9-0010 (platform:tegra-capture-vi:1):
    /dev/video0
Run the following command to capture a video, and check the recoded video file (
output.mp4
).
gst-launch-1.0 nvarguscamerasrc ! \
     'video/x-raw(memory:NVMM), width=(int)1920, height=(int)1080, \
     format=(string)NV12, framerate=(fraction)30/1' ! nvvidconv ! \
     video/x-raw, format=I420 ! x264enc ! \
     h264parse ! qtmux ! filesink \
     location=output.mp4 -e
Other Jetson modules
You can use the carrier board of Jetson Orin Nano Developer Kit to power, test and develop on Jetson Orin NX modules.
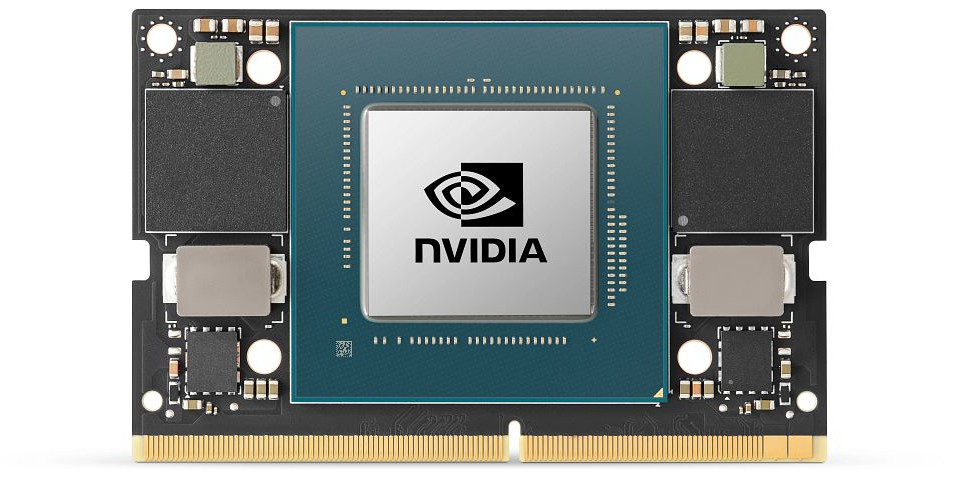
Make sure you have a thermal solution (heatsink and fan) for your Orin NX module, and insert it into the SODIMM socket while the system is powered off.
Connect the fan cable to the connector on the carrier board, and then power it on.
The fresh Orin NX module from the factory does not have the bootloader written in, so for the first time use, you need to run SDK Manager on your Ubuntu PC to flash L4T (Jetson Linux) on the Jetson Orin NX module.