Lens Matched Shading and Unreal Engine 4 Integration Part 3
Optimizations
Boundary Masks
One important thing that we have left out until now is that the w modification alone will not reduce any shading
For this purpose we render a boundary mask to the depth buffer, even before the Z pre-pass, setting the depth value outside of the octagon to the near plane, so no subsequent passes will render to those pixels. For detailed implementation details please refer to the source code in ModifiedWBoundaryMask.cpp and ModifiedWBoundaryMask.usf.
Deferred Light Stencil Culling
One of the things that the boundary mask in the depth buffer couldn’t help with is deferred lighting. When rendering a stenciled light geometry such as a sphere or a cone, the engine determines whether the camera is inside the light geometry or not. If the camera is inside the geometry, we will have to set the depth test to always pass. So the boundary mask will be trivially passed as well. We could choose to do the octagon inside-outside test in the lighting shader, however this solution is less than optimal, because of the expensive per-pixel LMS remapping
Instead we can populate a stencil buffer with the same octagonal boundary and ust it to cull cull away those regions out of the octagon during the lighting pass.
Super-sampling During Linear Resampling
As we have shown, LMS reduces the sampling rate in the peripheral area, but can also increase it around the fovea. before applying the final lens distortion to our final frame, we have to convert render target from LMS back into linear space. However, if we were to convert the LMS octagon to the original viewport size, we would lose the benefits of having super-sampled the central area. Ideally, we’d like to fuse our resampling to linear step together with the HMD lens distortion function, although it is difficult because the latter is typically locked inside the HMD run-time compositor software and it performs other optimizations like time warp for us.
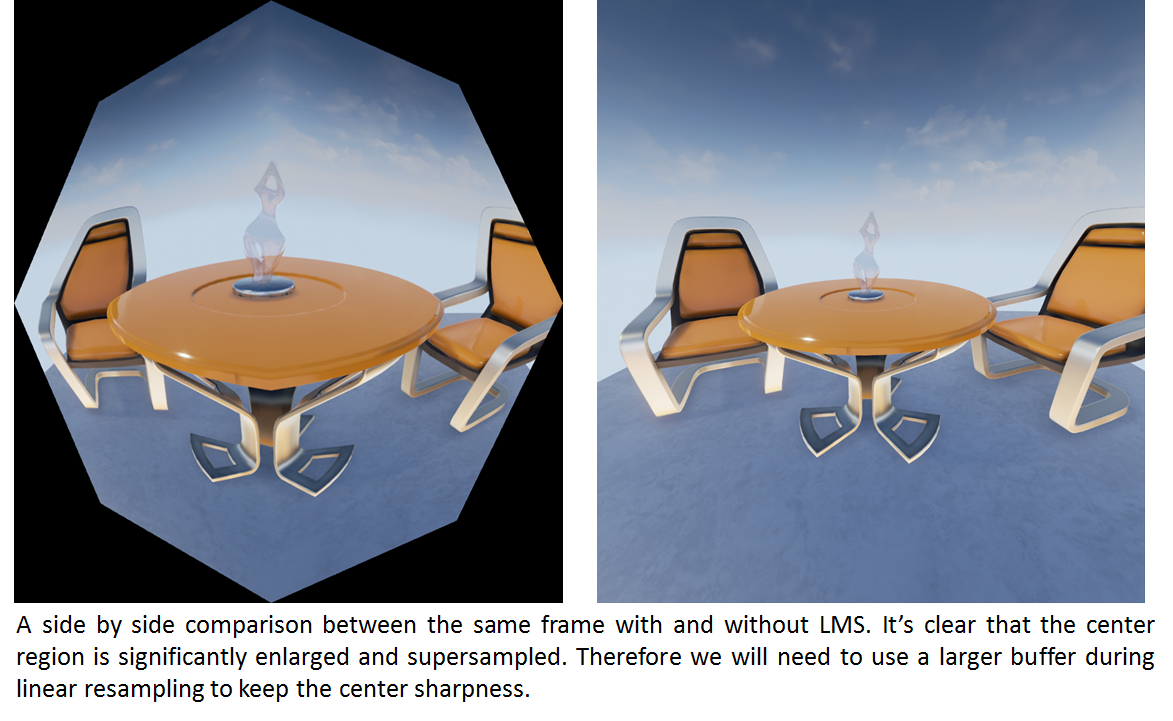
Instead, we work around this limitation by resampling the LMS buffer into a target that is larger than the original buffer size. We have added another console variable, vr.LensMatchedShadingUnwarpScale, to scale the resolution of the buffer. Typically, values between 1.3 to 1.5 would maintain the center sharpness reasonably well, while not impacting performance too much.
Miscellaneous Things
Viewport Size Quantization
When calculating the viewport sizes, the UE4 always quantizes it to make both the width and height divisible by 4. However, because LMS calculates a new viewport based on the quantized viewport size, the result will not be divisible by 4. For this reason, we will have to quantize the size of the LMS viewport to multiples of 4, otherwise we will have lots of artifacts like bloom not being aligned with the image, decals being offset slightly and so on.
However, we can’t simply adjust the viewport width and height, since doing that will make the LMS configuration inconsistent with the actual calculated viewport. So we will have to adjust the corresponding fields in the LMS configuration as well. Please refer to implementation in FSceneView::SetupVRProjection for details.
Viewport Gap
Some HMD headsets like the Oculus Rift put a gap of a certain number of pixels between the left and right views, which UE4 takes into account when calculating the viewports for both the left and right view. LMS obviously needs to be aware of this too when calculating its viewport.
In the
Performance
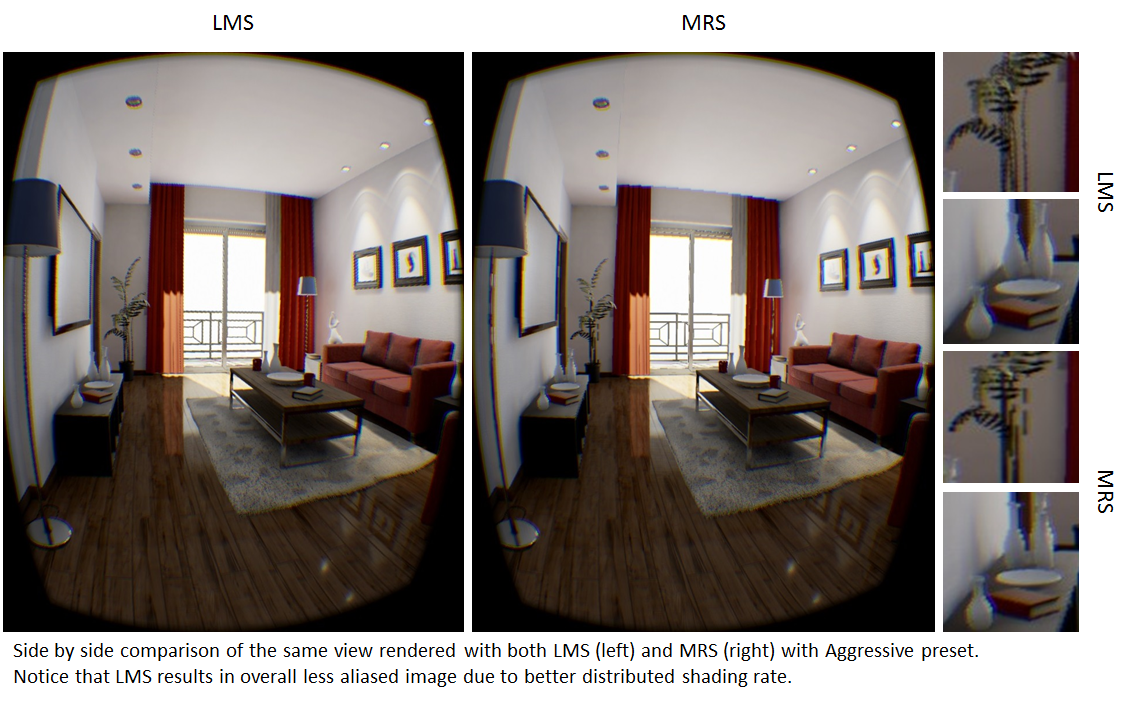
The following chart demonstrates some performance statistics of running LMS on a number of UE4 scenes. All the data below was collected using GTX1080, rendering at 1512x1680 resolution as recommended by Vive. We can clearly see that LMS provide a big shrink in terms of frame time, while subjectively also increasing perceived rendering quality. We also compare the most aggressive setting between LMS and MRS, and demonstrate that LMS produces better performance and perceived quality.
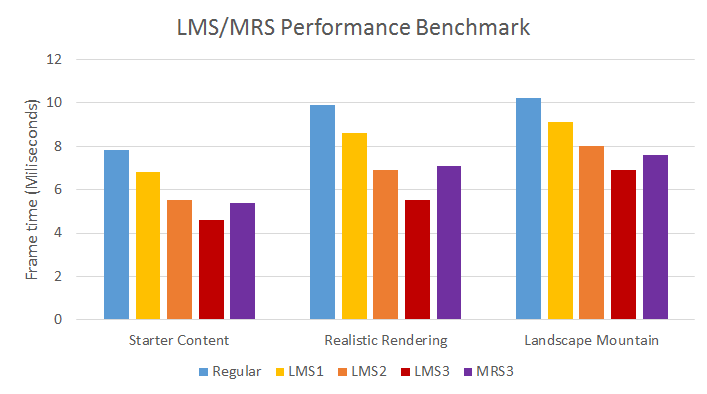
Of note, reduced frame time isn’t as much as the amount of pixels shaded. There are many reasons for this:
- Pixel shading is only part of the frame. If your pipeline is geometry bound or even CPU bound, Lens Matched Shading isn’t likely to help.
- The coordinate remap between linear space and LMS space definitely isn’t free, and we have to do it quite a few times in passes like SSR and SSAO.
- The additional pass for resampling to linear space, especially when done at a much higher resolution in order to maintain center sharpness can impact performance too.
Nonetheless, we believe that in most circumstances LMS will deliver faster rendering and higher quality at the same time.
Future Work and Conclusion
We believe that with the trend of higher and higher resolution displays and virtual reality, uniform shading rate across the image will become too expensive and unnecessary. Lens Matched Shading with clip space w modification is one way to manipulate the shading rate distribution to match what the viewer is actually looking at. As future work, we are actively exploring other potentially more effective ways to redistribute shading rate, such as foveated rendering also can potentially be combined with LMS.