Data Center Networking at Your Fingertips
NVIDIA is the leader in open networking, end-to-end at all layers of software and hardware. NVIDIA combines the benefits of Mellanox Spectrum-based switches and ConnectX-based SmartNICs, providing the industry's best performing ASICs, with the latest network operating system advances including NVIDIA Cumulus Linux, SONiC and NVIDIA Mellanox Onyx. Here you can learn how to provision, configure and deploy an Ethernet switch using one of two free virtualized data center options.
Get Started
Innovative Data Center Network Solutions Using NetDevOps Principles
NetDevops is a variation of the popular DevOps mentality. DevOps embraces the ideology of interoperability and communication between the development and operations teams in order to break down silos and create better products. The movement also encourages automation and monitoring in order to increase efficiency and reduce error.
Much like DevOps, NetDevOps is the process of making managing a network at scale as efficient as managing servers at scale. NetDevOps is a culture, movement, or practice that emphasizes the collaboration and communication of both network architects and operators while automating the process of network design and changes. It establishes an environment where building, testing, and releasing network changes can happen rapidly, frequently, and more reliably. It emphasizes the use of modern automation tools to make network management simple and easy to use. NVIDIA Cumulus Linux, a modern, Linux-based operating system, is founded in these key principles of NetDevOps.
The Architecture of NVIDIA Cumulus Linux
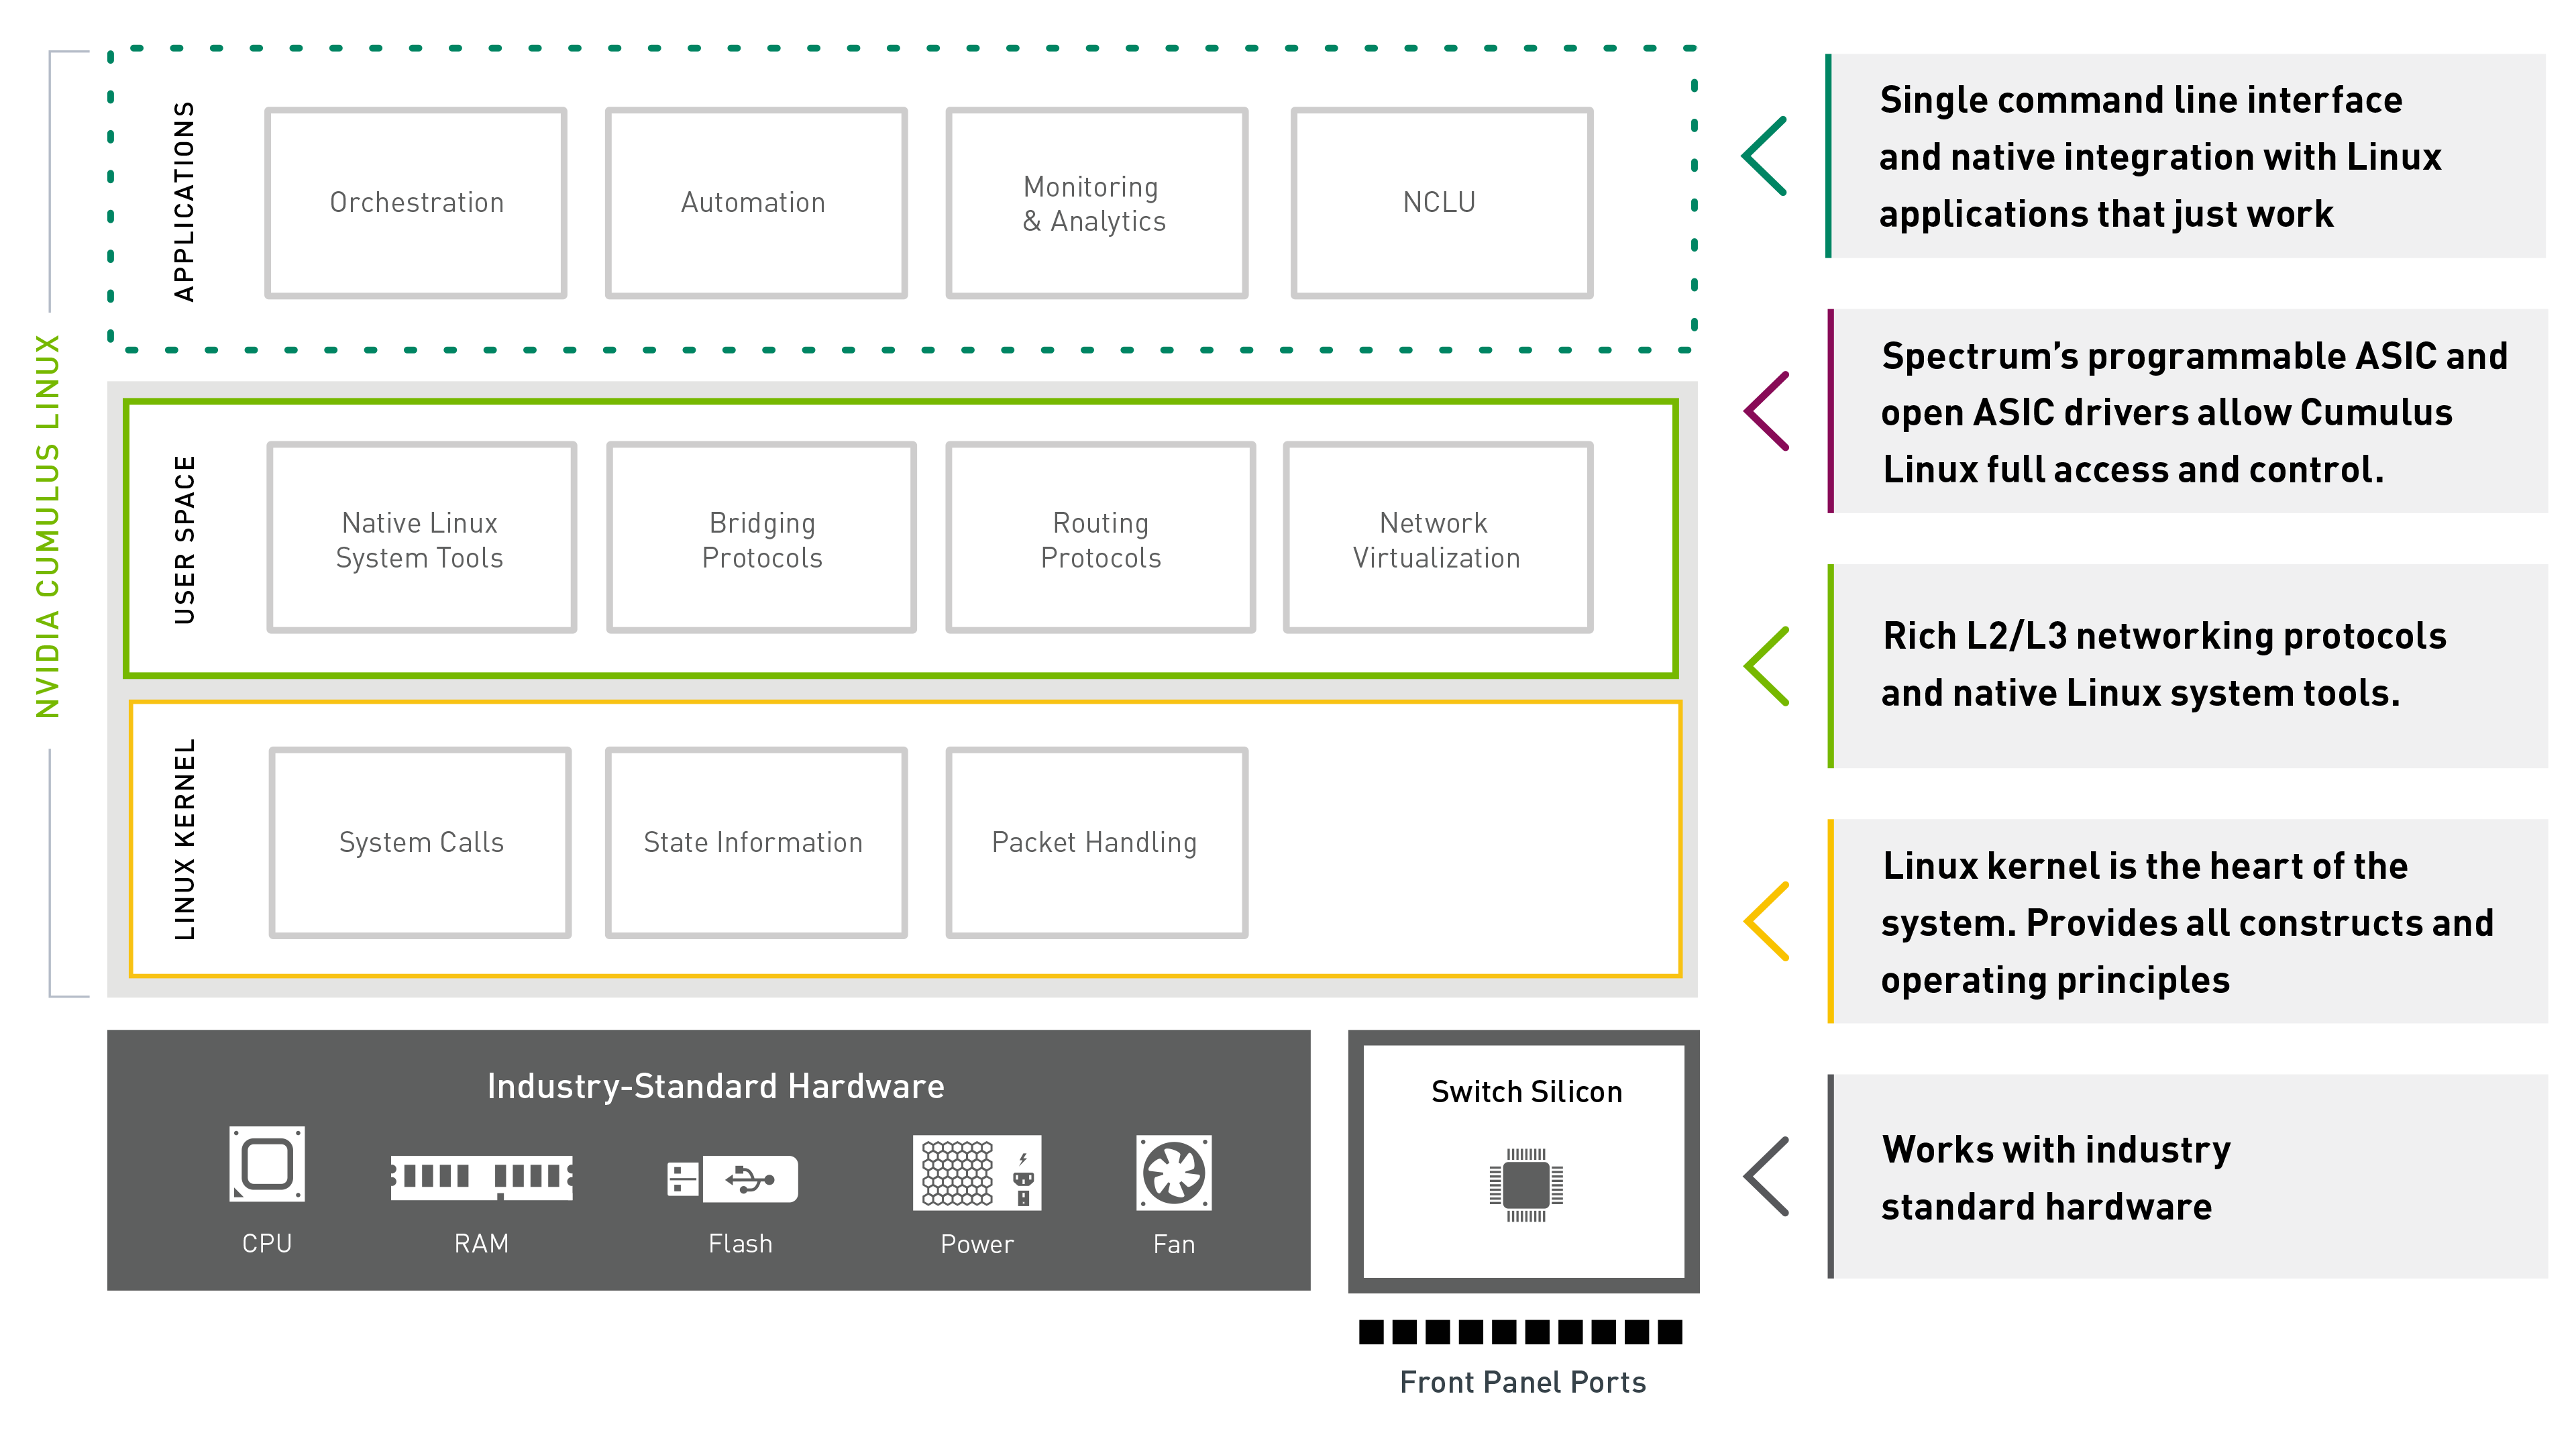
Nearly all NVIDIA networking features, from adapters to switches to data processing units (DPU’s) can be accessed and managed with open interfaces. In fact, NVIDIA is a top contributor to projects such as SONiC, the Data Plane Developers Kit (DPDK), and Free Range Routing (FRR).
Hardware
At the hardware level, the Spectrum programmable ASIC enables flexibility to handle evolving networking technologies including new protocols that may be developed in the future. The Spectrum family is enabled with Mellanox FlexFlow™ — a set of advanced network functions that future-proof the switch, enabling custom applications, advanced telemetry, and new tunneling/overlay capabilities. FlexFlow combines a programmable, flexible and massively parallel packet processing pipeline with a fully shared & stateful forwarding database. Spectrum also features What Just Happened (WJH), the world’s most useful switch telemetry technology, which integrates with NVIDIA Cumulus Linux. Check out the FlexFlow overview to learn more. Or learn more about What Just Happened.
Operating System
Both NVIDIA Cumulus Linux and SONiC work with Spectrum ASICs through their unique driver solutions. While NVIDIA Cumulus Linux was designed to work with Mellanox switches, SONiC uses the Switch Abstraction Interface (SAI), an opens source driver solution co-invented by NVIDIA. This open capability of Spectrum also means that any Linux distribution can run on a Spectrum switch. In fact, NVIDIA is the only switch silicon vendor that has contributed their ASIC driver directly to the Linux kernel allowing support for any standard Linux distribution like Red Hat or Ubuntu to run directly on the switch.
Application
Spectrum’s Open SDK API enables the Ethernet community to build open source networking applications and protocols faster than ever and can be a base for a standard Ethernet switch interface, since NVIDIA does not restrict usage or programming of the ASIC. Users can develop their own applications to interact directly with the switch data plane, allowing the network infrastructure to respond more quickly and efficiently.
Learn to configure a switch for free
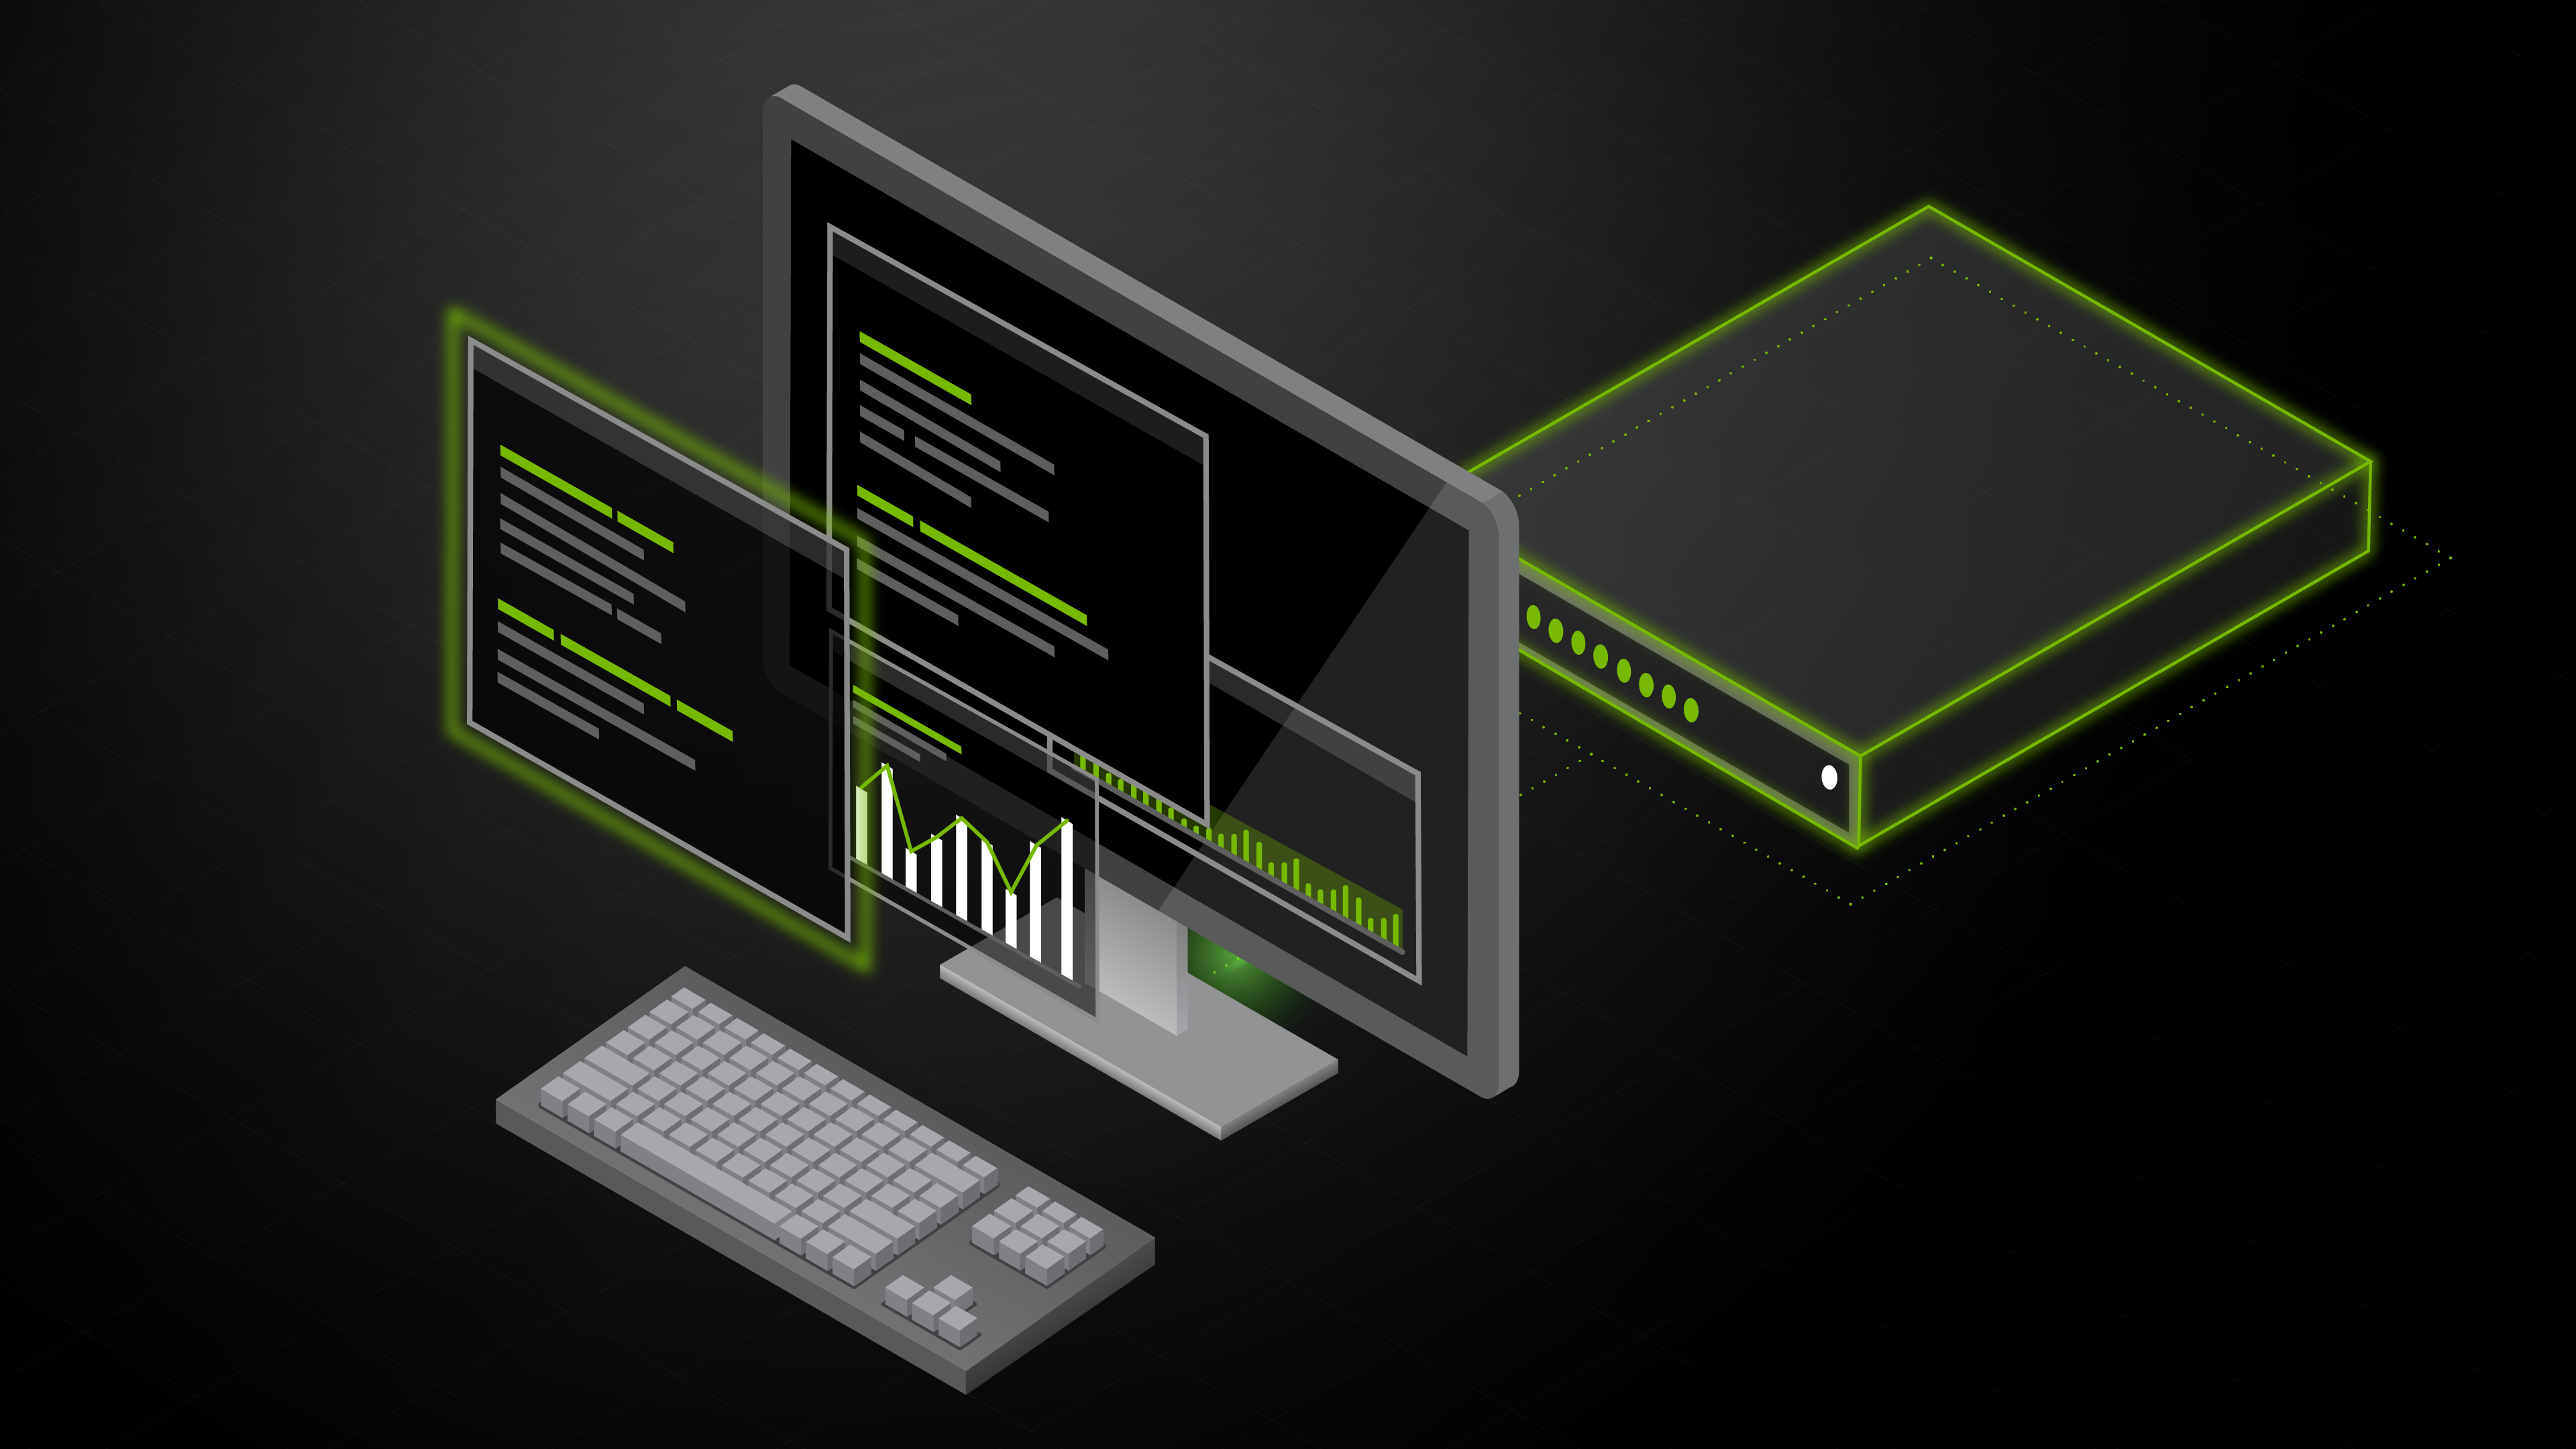
Simulated Data Center
Download this free virtual appliance and use any hypervisor to build a data center network. Download or read the documentation.
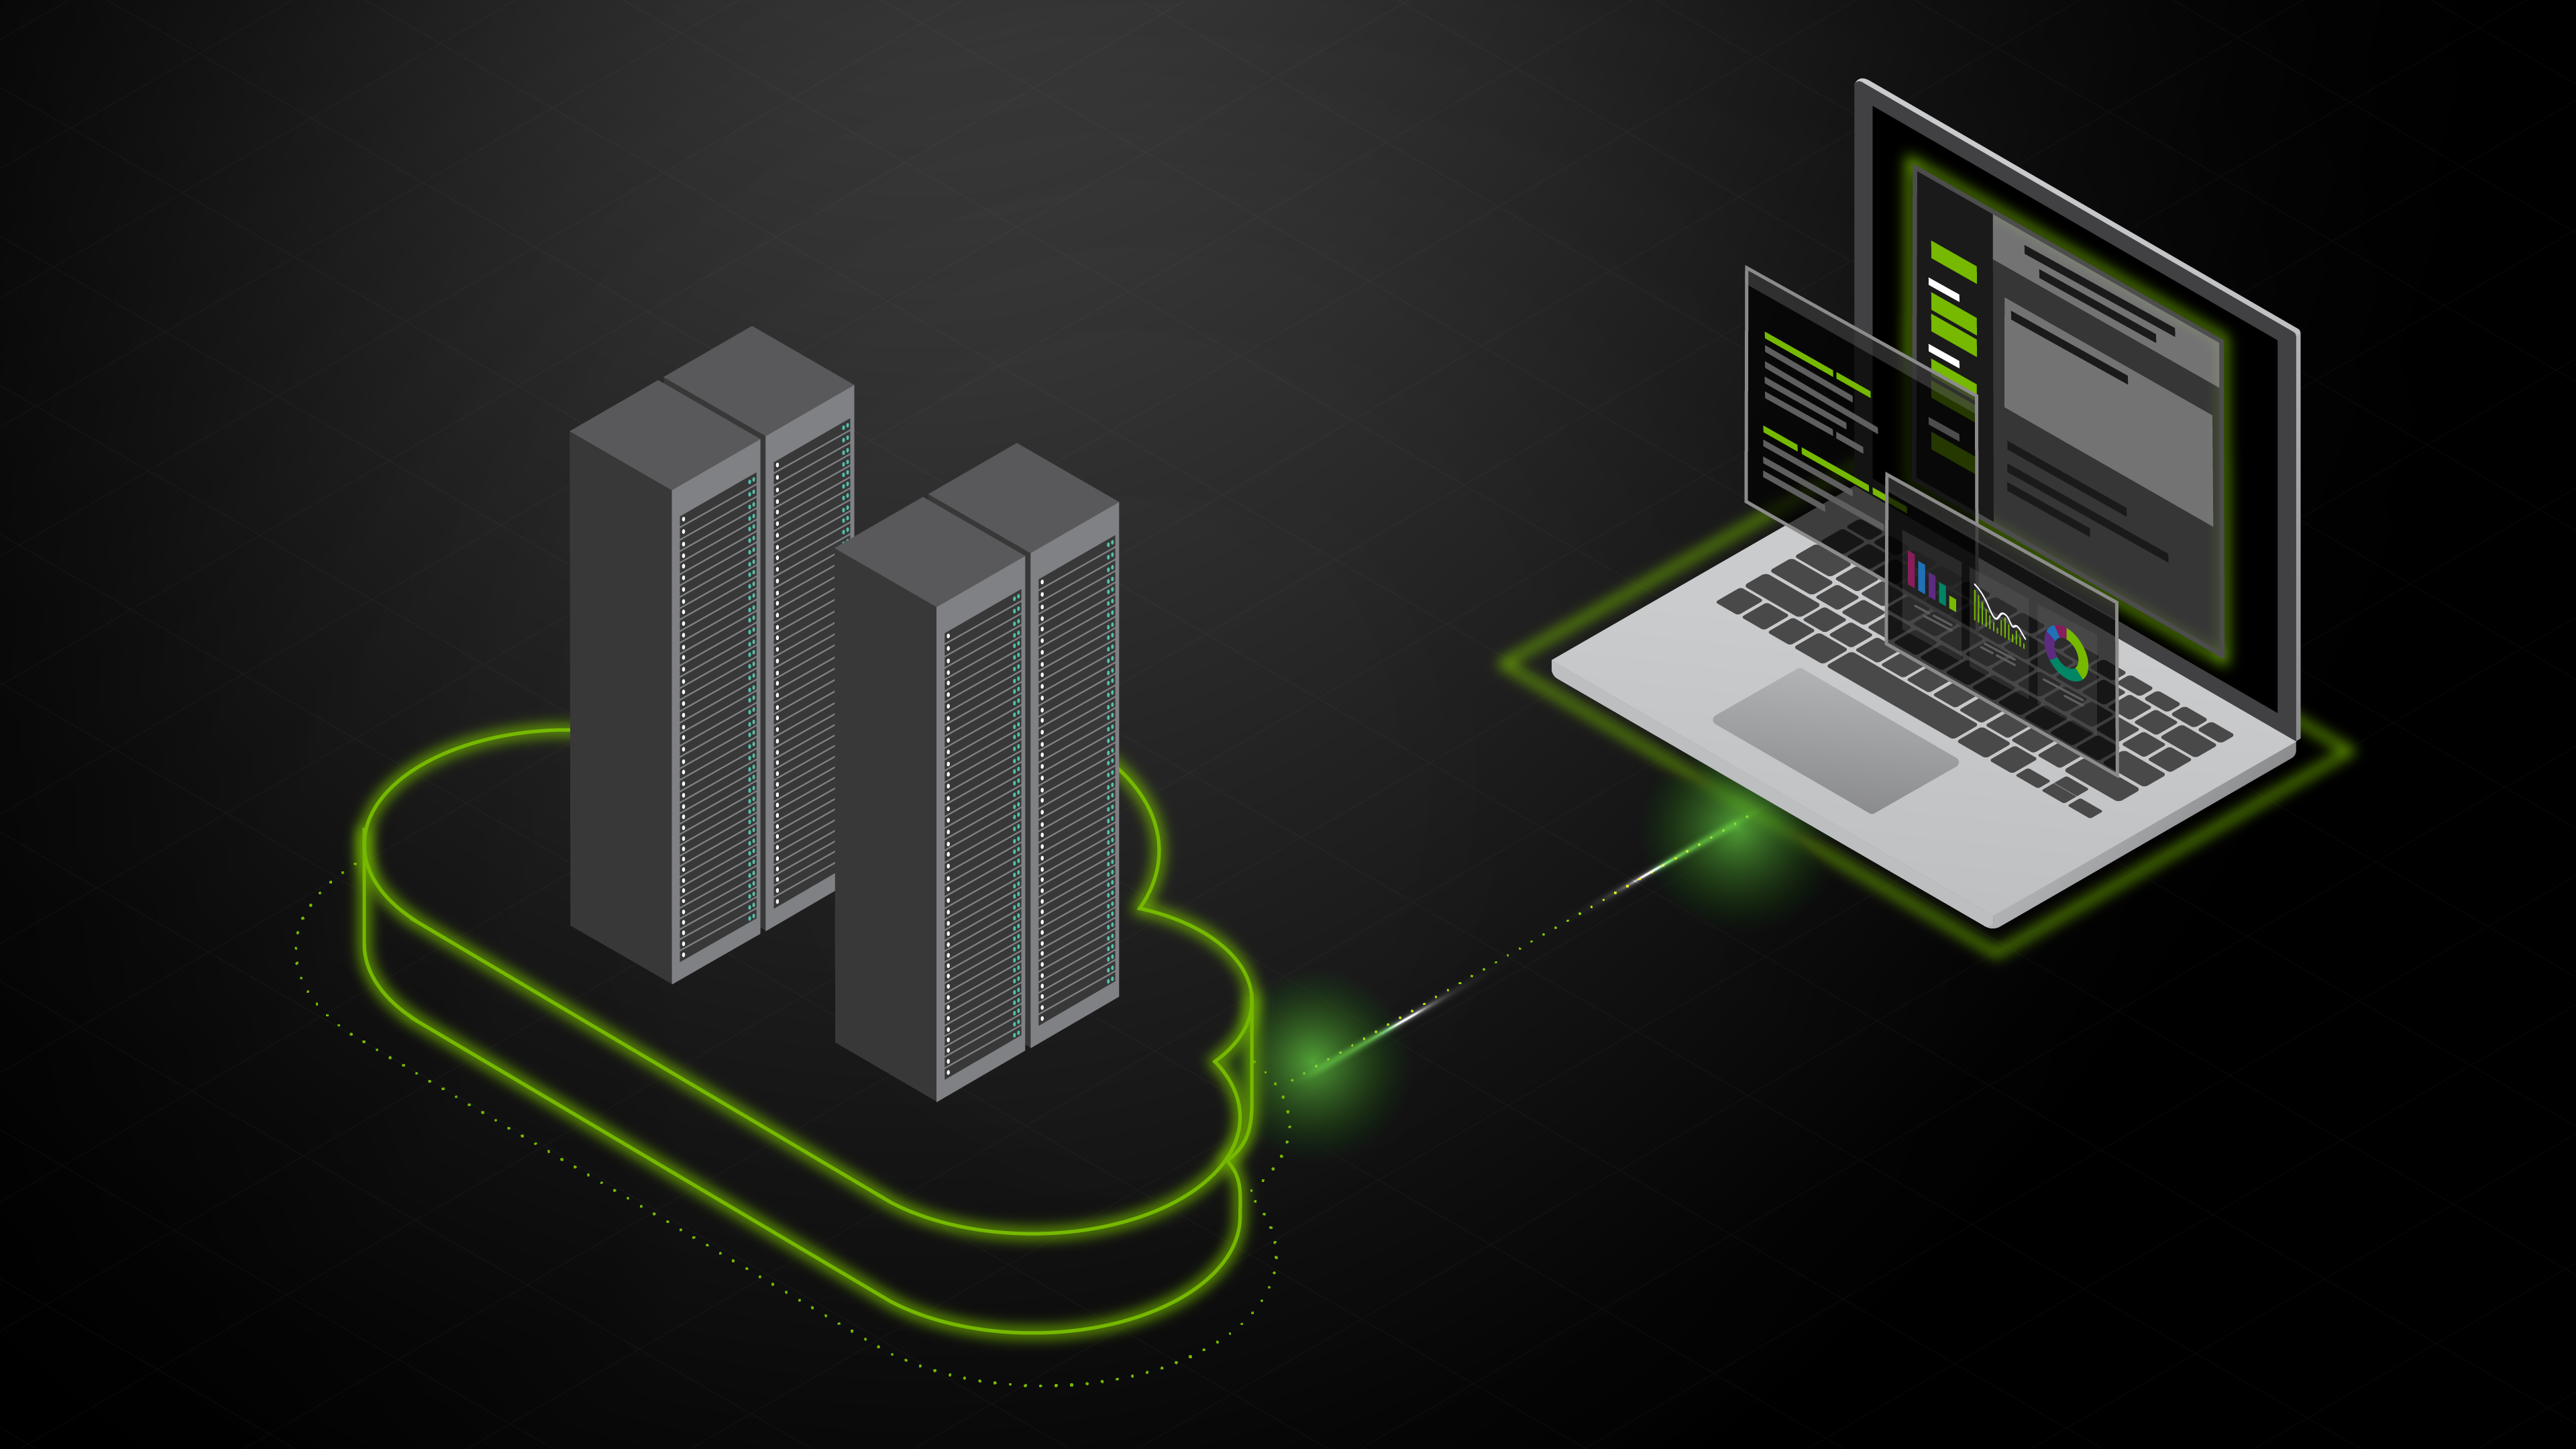
Cloud-based Virtual Data Center
This cloud-based data center is pre-built and ready for you to configure and deploy however you see fit. Looking for a guided tour? Sign up for a test drive instead.

Getting Started with Networking Basics

Start Configuring Now
Ready to start coding? Get started with this simple tutorial. Use with NVIDIA Cumulus in the Cloud or NVIDIA Cumulus VX!
Verifying Connectivity
Verify Connectivity with LLDP
First, we can do a simple validation of the connectivity in our lab.
1. Connect to spine01
2. Run net show lldp to view the LLDP peers of spine01
We should see the oob-mgmt-switch on eth0, leafs01-04 and then border01-02.
cumulus@spine01:mgmt-vrf:~$ net show lldp
| LocalPort --------- eth0 swp1 swp2 swp3 swp4 swp5 swp6 |
Speed ----- 1G 1G 1G 1G 1G 1G 1G |
Mode ------- Mgmt Default Default Default Default Default Default |
RemoteHost --------------- oob-mgmt-switch leaf01 leaf02 leaf03 leaf04 border01 border01 |
RemotePort ---------- swp14 swp51 swp51 swp51 swp51 swp51 swp51 |
Verify Connectivity with NetQ
Cumulus NetQ is a streaming telemetry tool that is installed on all devices in this lab. We can leverage NetQ to see data about any device in the network from anywhere. For example, while still on spine01 run the command:
netq leaf04 show lldp
This will show us all of the LLDP peers on leaf04. You can do this for any device in the entire lab, including the servers.
cumulus@spine01:mgmt-vrf:~$ netq leaf04 show lldp
Matching lldp records:
| Hostname ----------------- leaf04 leaf04 leaf04 leaf04 leaf04 leaf04 leaf04 leaf04 leaf04 leaf04 |
Interface ------------------------- swp49 swp2 swp53 swp50 swp3 swp52 eth0 swp1 swp54 swp51 |
Peer Hostname ----------------- leaf03 server05 spine03 leaf03 server06 spine02 oob-mgmt-switch server04 spine04 spine01 |
Peer Interface ------------------------ swp49 mac:ca:8c:e5:47:35:55 swp4 swp50 mac:e2:89:01:3e:19:d8 swp4 swp13 mac:2a:a6:4a:54:01:7e swp4 swp4 |
Next, check that the BGP underlay is operational.
From spine01 use the command:
net show bgp summary
To view the summary output of the BGP neighbors.
cumulus@spine01:mgmt-vrf:~$ net show bgp sum
show bgp ipv4 unicast summary
=============================
BGP router identifier 10.10.10.101, local AS number 65199 vrf-id 0
BGP table version 18
RIB entries 19, using 2888 bytes of memory
Peers 6, using 116 KiB of memory
Peer groups 1, using 64 bytes of memory
| Neighbor leaf01(swp1) leaf02(swp2) leaf03(swp3) leaf04(swp4) border01(swp5) border02(swp6) |
V 4 4 4 4 4 4 |
AS 65101 65101 65102 65102 65254 65254 |
MsgRcvd 6123 6121 6128 6128 6139 6133 |
MsgSent 6150 6149 6149 6149 6149 6138 |
TblVer 0 0 0 0 0 0 |
InQ 0 0 0 0 0 0 |
OutQ 0 0 0 0 0 0 |
Up/Down 05:00:58 05:00:59 05:00:59 05:00:59 05:00:59 05:00:57 |
State/PfxRcd 3 3 3 3 3 3 |
show bgp ipv6 unicast summary
=============================
% No BGP neighbors found
show bgp l2vpn evpn summary
===========================
BGP router identifier 10.10.10.101, local AS number 65199 vrf-id 0
BGP table version 0
RIB entries 35, using 5320 bytes of memory
Peers 6, using 116 KiB of memory
Peer groups 1, using 64 bytes of memory
| Neighbor leaf01(swp1) leaf02(swp2) leaf03(swp3) leaf04(swp4) border01(swp5) border02(swp6) |
V 4 4 4 4 4 4 |
AS 65101 65101 65102 65102 65254 65254 |
MsgRcvd 6123 6121 6128 6128 6139 6133 |
MsgSent 6150 6149 6149 6149 6149 6138 |
TblVer 0 0 0 0 0 0 |
InQ 0 0 0 0 0 0 |
OutQ 0 0 0 0 0 0 |
Up/Down 05:00:59 05:01:00 05:01:00 05:01:00 05:01:00 05:00:58 |
State/PfxRcd 18 18 18 18 6 6 |
At the top we see the IPv4 Address Family which is the BGP Address family used to carry IP addresses used in the EVPN underlay, like loopback IPs.
Next we see the l2vpn evpn Address Family which are the endpoint MAC and IP routes. This would include data like the server MAC addresses and any subnets the servers are members of. We will look more closely at EVPN shortly.
USING NETQ FOR BGP
Similar to LLDP we can look at the BGP state information from any device. While still on spine01 run the command
netq leaf01 show bgp
You see that leaf01 has BGP peers with all four spines and it's partner leaf, leaf02.
cumulus@spine01:mgmt-vrf:~$ netq leaf01 show bgp
Matching bgp records:
| Hostname ----------------- leaf01 leaf01 leaf01 leaf01 leaf01 |
Neighbor ---------------------------- swp53(spine03) swp51(spine01) swp54(spine04) swp52(spine02) peerlink.4094(leaf02) |
VRF --------------- default default default default default |
ASN ---------- 65101 65101 65101 65101 65101 |
Peer ASN ---------- 65199 65199 65199 65199 65101 |
PfxRx ------------ 7/-/36 7/-/36 7/-/36 7/-/36 12/-/- |
NetQ also provides the ability to dynamically check the state of the entire fabric with a single command. For example, we can cause a failure of a BGP peer on spine01 with the commands:
net add bgp neighbor swp1 shutdown
net commit
We can verify the neighbor on swp1 has been shutdown with the command:
net show bgp summary
In the output we should see the peer leaf01(swp1) in the Idle (Admin) state.
| Neighbor leaf01(swp1) leaf02(swp2) leaf03(swp3) leaf04(swp4) border01(swp5) border02(swp6) |
V 4 4 4 4 4 4 |
AS 65101 65101 65102 65102 65254 65254 |
MsgRcvd 7426 7426 7444 7444 7455 7443 |
MsgSent 7455 7456 7456 7456 7456 7445 |
TblVer 0 0 0 0 0 0 |
InQ 0 0 0 0 0 0 |
OutQ 0 0 0 0 0 0 |
Up/Down 00:00:04 06:06:13 06:06:13 06:06:13 06:06:13 06:06:11 |
State/PfxRcd Idle (Admin) 3 3 3 3 3 |
Now with Netq we can check the state of BGP across the fabric with the command:
netq check bgp
NetQ will look at the state of BGP on every node in the network and report back any failures it has found. It may take up to 10 seconds for NetQ to report the failures on both leaf01 and spine01
cumulus@spine01:mgmt-vrf:~$ netq check bgp
bgp check result summary:
Checked nodes : 10
Total nodes : 10
Rotten nodes : 0
Failed nodes : 2
Warning nodes : 0
Additional summary:
Total Sessions : 54
Failed Sessions : 2
Session Establishment Test : 0 warnings, 2 errors
Address Families Test : passed
Router ID Test : passed
Session Establishment Test details:
| Hostname ----------------- leaf01 |
VRF --------------- default |
Peer Name ----------------- swp51 |
Peer Hostname ----------------- spine01 |
Reason --------------------------------------------- BGP session with peer spine01 (swp51 vrf default) failed, reason: Peer closed the session |
| spine01 | default | swp1 | leaf01 | BGP session with peer leaf01 (swp1 vrf default) failed, reason: Admin. shutdown |
NetQ also has the ability to look at the state of the environment at any point in the past. We can do this for both the netq show and netq check commands.
For example, what was the output of netq check bgp 5 minutes ago, before we shut the neighbor down? We can do this with the command:
netq check bgp around 5m
This will look at the historic data NetQ has collected and report the state.
cumulus@spine01:mgmt-vrf:~$ netq check bgp around 5m
bgp check result summary:
Checked nodes : 10
Total nodes : 10
Rotten nodes : 0
Failed nodes : 0
Warning nodes : 0
Additional summary:
Total Sessions : 54
Failed Sessions : 0
Session Establishment Test : passed
Address Families Test : passed
Router ID Test : passed
We can also see the specific BGP data at that time with the command:
netq spine01 show bgp around 5m
Again, we will look at the state of the BGP neighbors on spine01, but in this instance, we are looking at the state 5 minutes ago, and not the live view.
cumulus@spine01:mgmt-vrf:~$ netq spine01 show bgp around 5m
Matching bgp records:
| Hostname ----------------- spine01 spine01 spine01 spine01 spine01 spine01 |
Neighbor ---------------------------- swp5(border01) swp1(leaf01) swp6(border02) swp2(leaf02) swp3(leaf03) swp4(leaf04) |
VRF --------------- default default default default default default |
ASN ---------- 65199 65199 65199 65199 65199 65199 |
Peer ASN ---------- 65254 65101 65254 65101 65102 65102 |
PfxRx ------------ 3/-/6 3/-/12 3/-/6 3/-/12 3/-/12 3/-/12 |
BGP UNNUMBERED
This lab is built using BGP Unnumbered. BGP unnumbered allows us to build BGP peerings without assigning IP addresses on the point-to-point routing links.
On spine01 we earlier saw that BGP peers exist on swp1, swp2, swp3 and swp4 (swp ports are the indication of front panel ports on switches with Cumulus Linux).
We can look at the interface configuration to see that no IP addresses have been assigned. First, look at the interfaces with the command:
net show interface
Notice that an IP address has been assigned to the lo loopback address and management eth0 interface, but no IPs are assigned to any of the swp ports.
cumulus@spine01:mgmt-vrf:~$ net show interface
| State ----- UP UP UP UP UP UP UP UP UP |
Name ---- lo lo lo eth0 eth0 swp1 swp2 swp3 swp4 swp5 swp6 mgmt |
Spd --- N/A 1G 1G 1G 1G 1G 1G 1G N/A |
MTU ----- 65536 1500 9216 9216 9216 9216 9216 9216 65536 |
Mode -------- Loopback Mgmt Default Default Default Default Default Default VRF |
LLDP ----------------------- oob-mgmt-switch (swp14) leaf01 (swp51) leaf02 (swp51) leaf03 (swp51) leaf04 (swp51) border01 (swp51) border02 (swp51) |
Summary --------------------------- IP: 127.0.0.1/8 IP: 10.10.10.101/32 IP: ::1/128 Master: mgmt(UP) IP: 192.168.200.21/24(DHCP) IP: 127.0.0.1/8 |
We can also look at the Linux configuration file of the network interfaces in /etc/network/interfaces to see that no IP addresses have been configured.
On spine01 run the command:
cat /etc/network/interfaces
to view the entire configuration file. At the bottom, you see the interface definitions with no addresses defined
# Edited for brevity
###############
# Fabric Links
###############
auto swp1
iface swp1
alias fabric link
auto swp2
iface swp2
alias fabric link
auto swp3
iface swp3
alias fabric link
BGP unnumbered relies on automatically assigned IPv6 Link Local addresses on the interfaces to connect to peers. We can see this information by looking at a specific peer on spine01 with the command
net show bgp swp1 This shows the BGP peer information, but at the bottom of this output we can see the Local host and Foreign host addresses
cumulus@spine01:mgmt-vrf:~$ net show bgp neighbor swp1
BGP neighbor on swp1: fe80::a4dc:bcff:fea5:fe28, remote AS 65101, local AS 65199, external link
Hostname: leaf01
# Cut for brevity
Local host: fe80::cae:46ff:fe3d:f8d2, Local port: 40349
Foreign host: fe80::a4dc:bcff:fea5:fe28, Foreign port: 179
Nexthop: 10.10.10.101
Nexthop global: fe80::cae:46ff:fe3d:f8d2
Nexthop local: fe80::cae:46ff:fe3d:f8d2
BGP connection: shared network
BGP Connect Retry Timer in Seconds: 10
Read thread: on Write thread: on
The local host is our IPv6 address and Foreign host is the peer's address.
Cumulus also automatically enables support for BGP hostnames as defined in the IETF draft, draft-walton-bgp-hostname-capability. Cumulus Network hosts automatically provide their LLDP hostname as part of the BGP neighbor process. This makes troubleshooting and operations much easier to see which peer maps to which interface in the topology. We can see this in any BGP output, for example, the summary BGP output on spine01
net show bgp summary
This again shows the list of BGP peers. Since we are using BGP unnumbered the interfaces are listed in parenthesis, to the left are the learned hostnames.
cumulus@spine01:mgmt-vrf:~$ net show bgp sum
show bgp ipv4 unicast summary
=============================
BGP router identifier 10.10.10.101, local AS number 65199 vrf-id 0
BGP table version 18
RIB entries 19, using 2888 bytes of memory
Peers 6, using 116 KiB of memory
Peer groups 1, using 64 bytes of memory
| Neighbor leaf01(swp1) leaf02(swp2) leaf03(swp3) leaf04(swp4) border01(swp5) border02(swp6) |
V 4 4 4 4 4 4 |
AS 65101 65101 65102 65102 65254 65254 |
MsgRcvd 7246 7244 7251 7251 7262 7257 |
MsgSent 7273 7272 7272 7272 7272 7262 |
TblVer 0 0 0 0 0 0 |
InQ 0 0 0 0 0 0 |
OutQ 0 0 0 0 0 0 |
Up/Down 05:57:08 05:57:09 05:57:09 05:57:09 05:57:09 05:57:07 |
State/PfxRcd 3 3 3 3 3 3 |
Total number of neighbors 6
A common reason for networks to deploy VXLAN-EVPN is to provide layer 2 extension, between racks, over a routed layer 3 core. In this environment a number of the servers in various racks are within the same layer 2 subnet. We will focus on server01 and server04.
Server01 has the IP address 10.1.10.101. Server04 has the IP address 10.1.10.104.
Since they are in different racks, with a layer 3 core, VxLAN will be used to communicate between them.
We can use NetQ to view information about the servers as well as the network. First, let's fine the MAC address of server04.
From any device run the command:
netq server01 show ip neighbors
From this output we can collect the MAC address of server04
Matching neighbor records:
| IP Address ------------------------- 10.1.10.104 |
Hostname ----------------- server01 |
Interface ------------------------- uplink |
MAC Address ------------------ ea:ef:27:44:4d:86 |
This output shows us that server01 has an IP neighbor for 10.1.10.104 at MAC address ea:ef:27:44:4d:86
Next we can look at the MAC Address Table of leaf01, where server01 is connected. Use the MAC address of server04 in the following command:
netq leaf01 show macs ea:ef:27:44:4d:86
This shows us that the MAC address is learned via vni30010 from leaf04 in VLAN 10.
cumulus@spine01:mgmt-vrf:~$ netq leaf01 show macs ea:ef:27:44:4d:86
Matching mac records:
| Origin ------ no |
MAC Address ------------------ ea:ef:27:44:4d:86 |
VLAN ------ 10 |
Hostname ----------------- leaf01 |
Egress Port ------------------------------ vni30010:leaf04 |
If we want to see exactly what path a packet would take through the network we can use netq trace command, which will show both underlay and overlay paths.
netq trace ea:ef:27:44:4d:86 vlan 10 from leaf01 pretty
Note, it may take up to 30 seconds for the command to complete, due to the resources allocated to the NetQ server in this lab environment.
cumulus@spine01:mgmt-vrf:~$ time netq trace ea:ef:27:44:4d:86 vlan 10 from leaf01 pretty
Number of Paths: 6
Number of Paths with Errors: 0
Number of Paths with Warnings: 6
Path: 1 Underlay mtu 9216 at leaf01:swp54 not enough encap headroom
Path: 2 Underlay mtu 9216 at leaf01:swp54 not enough encap headroom
Path: 3 Underlay mtu 9216 at leaf01:swp53 not enough encap headroom
Path: 4 Underlay mtu 9216 at leaf01:swp53 not enough encap headroom
Path: 5 Underlay mtu 9216 at leaf01:swp52 not enough encap headroom
Path: 6 Underlay mtu 9216 at leaf01:swp52 not enough encap headroom
Path MTU: 9216
| leaf01 vni: 30010 | swp54 -- swp1 spine04 swp4 -- swp54 vni: 30010 leaf04 bond1 -- uplink server04 swp54 -- swp1 spine04 swp3 -- swp54 vni: 30010 leaf03 bond1 -- uplink server04 |
| leaf01 vni: 30010 | swp53 -- swp1 spine03 swp4 -- swp53 vni: 30010 leaf04 bond1 -- uplink server04 swp53 -- swp1 spine03 swp3 -- swp53 vni: 30010 leaf03 bond1 -- uplink server04 |
| leaf01 vni: 30010 | swp52 -- swp1 spine02 swp4 -- swp52 vni: 30010 leaf04 bond1 -- uplink server04 swp52 -- swp1 spine02 swp3 -- swp52 vni: 30010 leaf03 bond1 -- uplink server04 |
First, we see warnings that the MTU of the server and core are the same, 9216. A full sized frame from server01 of 9216 bytes would not be supported when the VXLAN encapsulation is added. This is an example of how NetQ can proactively identify MTU issues in the network.
Next, we see that leaf01 has three paths available, via swp54, swp53 and swp52. Remember, earlier we disabled the BGP peer between spine01 and leaf01. Thankfully NetQ allows us to go back in time with trace commands as well with the around keyword.
cumulus@spine01:mgmt-vrf:~$ netq trace ea:ef:27:44:4d:86 vlan 10 from leaf01 around 10m pretty
Number of Paths: 8
Number of Paths with Errors: 0
Number of Paths with Warnings: 8
Path: 1 Underlay mtu 9216 at leaf01:swp54 not enough encap headroom
Path: 2 Underlay mtu 9216 at leaf01:swp54 not enough encap headroom
Path: 3 Underlay mtu 9216 at leaf01:swp53 not enough encap headroom
Path: 4 Underlay mtu 9216 at leaf01:swp53 not enough encap headroom
Path: 5 Underlay mtu 9216 at leaf01:swp52 not enough encap headroom
Path: 6 Underlay mtu 9216 at leaf01:swp52 not enough encap headroom
Path: 7 Underlay mtu 9216 at leaf01:swp51 not enough encap headroom
Path: 8 Underlay mtu 9216 at leaf01:swp51 not enough encap headroom
Path MTU: 9216
| leaf01 vni: 30010 | swp54 -- swp1 spine04 swp4 -- swp54 vni: 30010 leaf04 bond1 -- uplink server04 swp54 -- swp1 spine04 swp3 -- swp54 vni: 30010 leaf03 bond1 -- uplink server04 |
| leaf01 vni: 30010 | swp53 -- swp1 spine03 swp4 -- swp53 vni: 30010 leaf04 bond1 -- uplink server04 swp53 -- swp1 spine03 swp3 -- swp53 vni: 30010 leaf03 bond1 -- uplink server04 |
| leaf01 vni: 30010 | swp52 -- swp1 spine02 swp4 -- swp52 vni: 30010 leaf04 bond1 -- uplink server04 swp52 -- swp1 spine02 swp3 -- swp52 vni: 30010 leaf03 bond1 -- uplink server04 |
| leaf01 vni: 30010 | swp51 -- swp1 spine01 swp4 -- swp51 vni: 30010 leaf04 bond1 -- uplink server04 swp51 -- swp1 spine01 swp3 -- swp51 vni: 30010 leaf03 bond1 -- uplink server04 |
Here we see the L2+VXLAN trace before we shut down the BGP peer and we can see all 4 uplinks in use. Continuing down the path, from each of the spines the traffic will be ECMP load shared between leaf03 and leaf04 before arriving on server04.
Click Next to see where you can go from here with your lab or where you can learn more about Cumulus Linux and Cumulus NetQ.
Take your learning to the next level
From here you can continue to explore the lab. Break things, configure anything you'd like or try a different demo environment. If you'd like to learn more you can try our self-paced virtual test drive course that will teach you the basics of Cumulus Linux with additional hands-on labs.