Configuring NVIDIA GPU Cloud (NGC) Access for NVIDIA Developer Users#
To download NVIDIA DriveOS™ 7.0 Linux Docker images as an NVIDIA Developer user, you must configure access to NVIDIA GPU Cloud Access (NGC), which is the container registry that stores the images.
Ensure Docker Engine 19.03 or greater is installed on your host system:
Install the type of Docker software required for your organization (Enterprise, Desktop, etc.) from https://www.docker.com.
Alternatively, download an installation script from https://get.docker.com/ to install Docker on your host system by running a command similar to the following:
$ wget -qO- https://get.docker.com/ | ${SHELL}
On the host system, sign into NGC (https://ngc.nvidia.com) by using your NVIDIA Developer credentials.
After signing in, select your NGC Organization (for NVIDIA Developer users, the drive organization) and the driveos-sdk team in the upper-right drop-down menus:
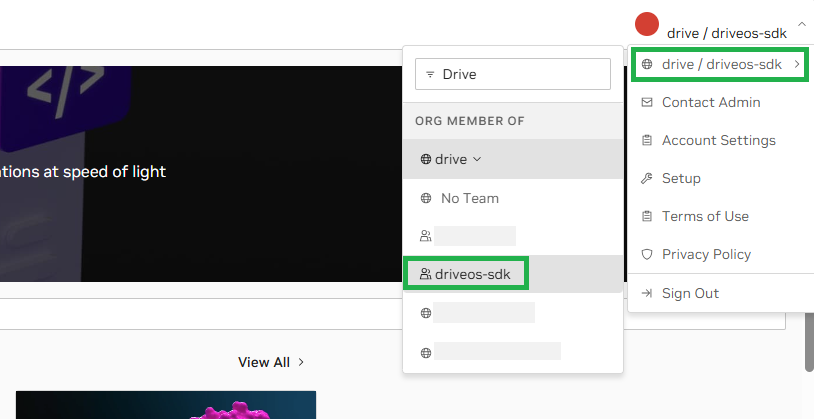
Select Private Registry in the upper-left drop-down menu.
Then, go to Containers in the left navigation and filter by
Thorto click on the card for the [Thor] DRIVE OS Linux SDK Build Docker image: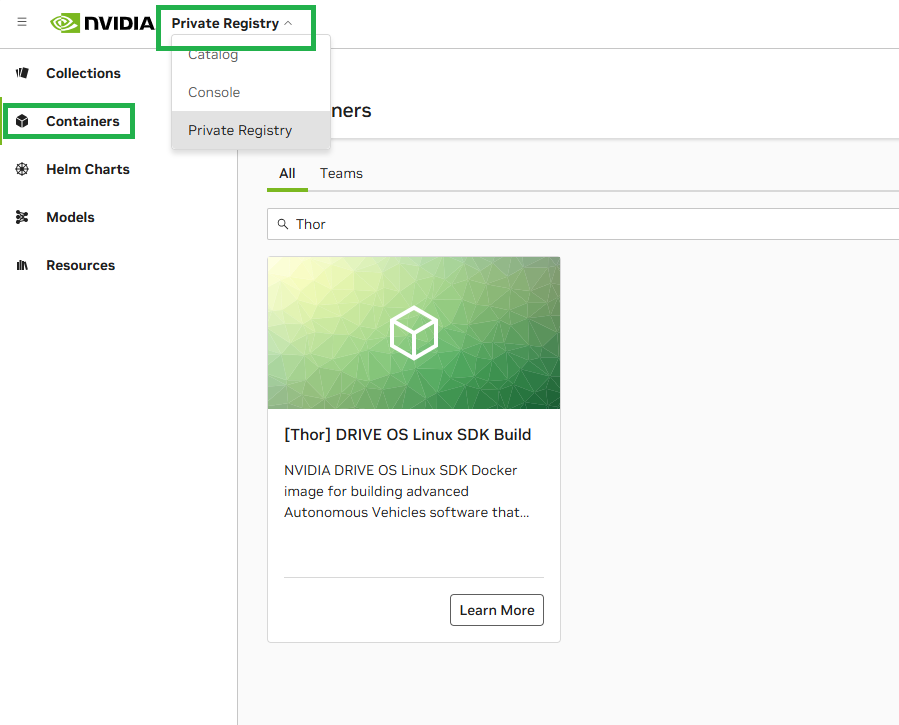
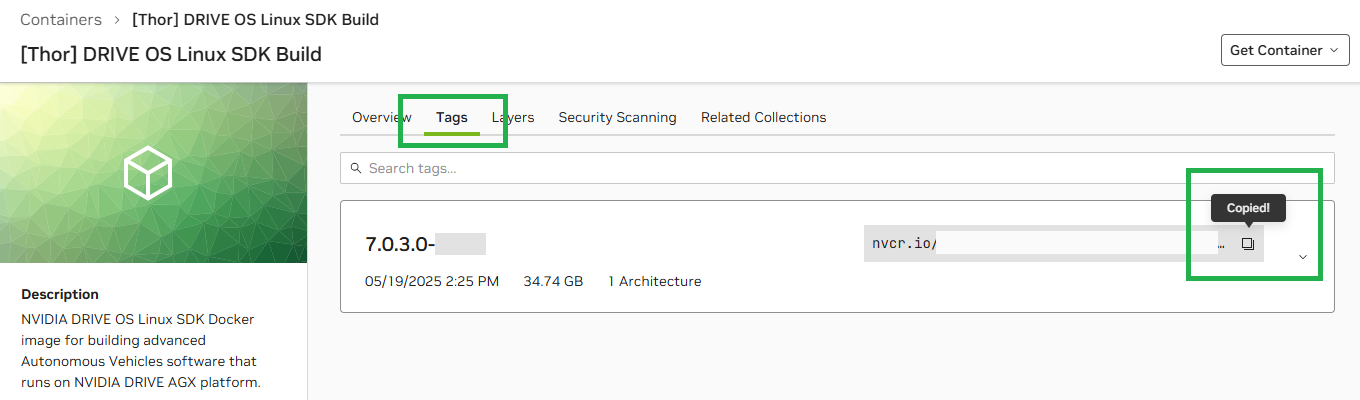
Go the Tags tab and click the copy icon on the right side of the desired image version, which copies the full image reference, including the version and build tag:
Important
Note this version and build tag for later use when referencing the image with
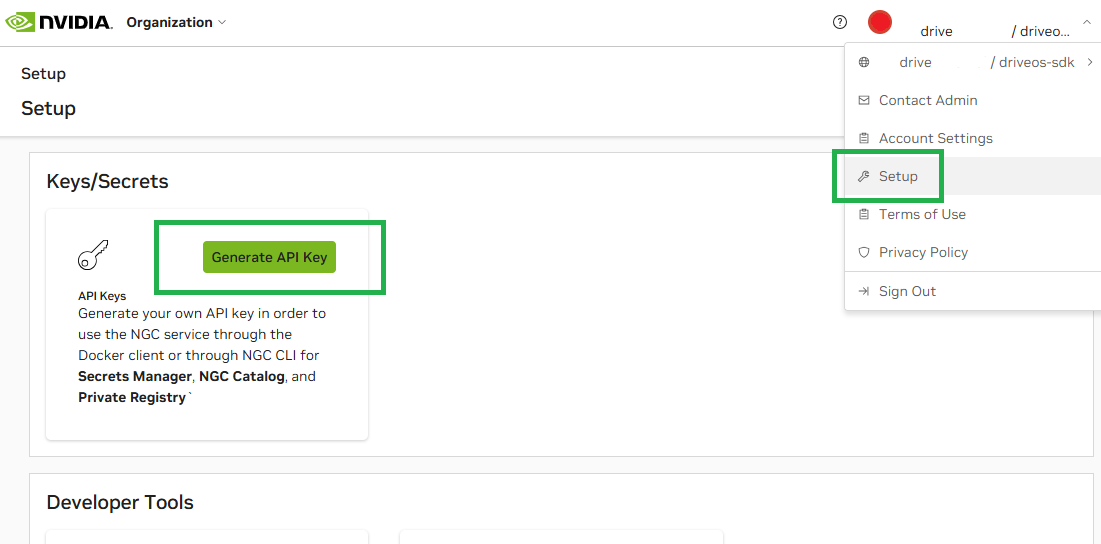
docker runcommands in Installing NVIDIA DriveOS for NVIDIA Developer Users.Select Setup in the upper-right drop-down menu, then click Generate API Key:
Tip
For more information on generating API keys, see the NGC User Guide.
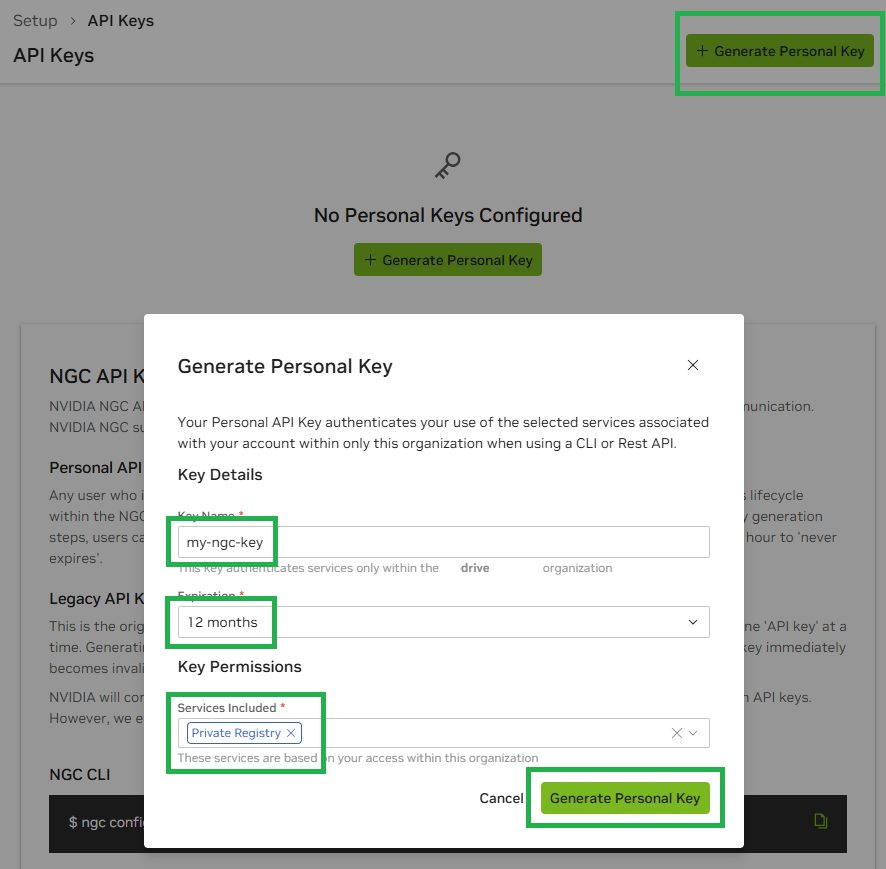
Click + Generate Personal Key, then complete the form in the window that appears:
Provide values for the Key Name and Expiration fields as desired.
In the Services Included drop-down menu, select Private Registry.
Click Generate Personal Key in the lower-right.
Your generated personal API key is displayed in the next window that appears; click Copy Personal Key or the copy icon and note your key for use in a later step:
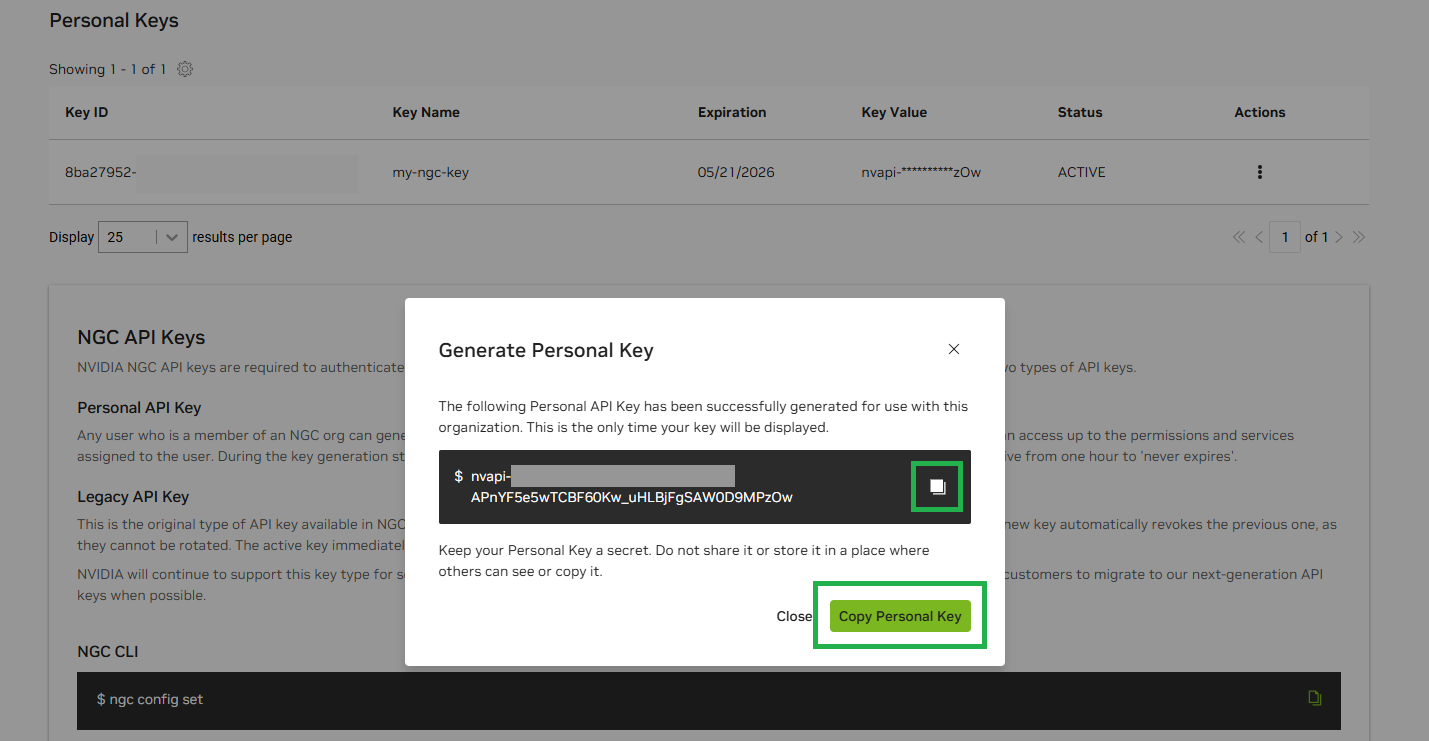
Important
This is the only time your key will be displayed. Ensure that you copy it to a secure place before closing this window.
On your host system, log in to the NGC container registry by running the following command:
$ sudo docker login nvcr.io
When prompted for your username, enter the following text:
$oauthtoken
Note
The
$oauthtokenusername is a special username that indicates that you will authenticate with an API key instead of a username and password.When prompted for your password, replace
<your_api_key>as shown in the following example with your personal API key that you generated from NGC:Username: $oauthtoken Password: <your_api_key>
Note
If there is an issue, request support at the NVIDIA Developer Forum.
After successfully logging in, you now have access to NVIDIA DriveOS Docker images, depending on your specific permissions in the registry, and can continue to Installing NVIDIA DriveOS for NVIDIA Developer Users.