With the growing interest in deep learning (DL), more and more users are using DL in production environments. Because DL requires intensive computational power, developers are leveraging GPUs to do their training and inference jobs.
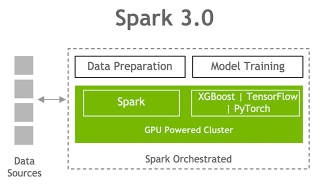
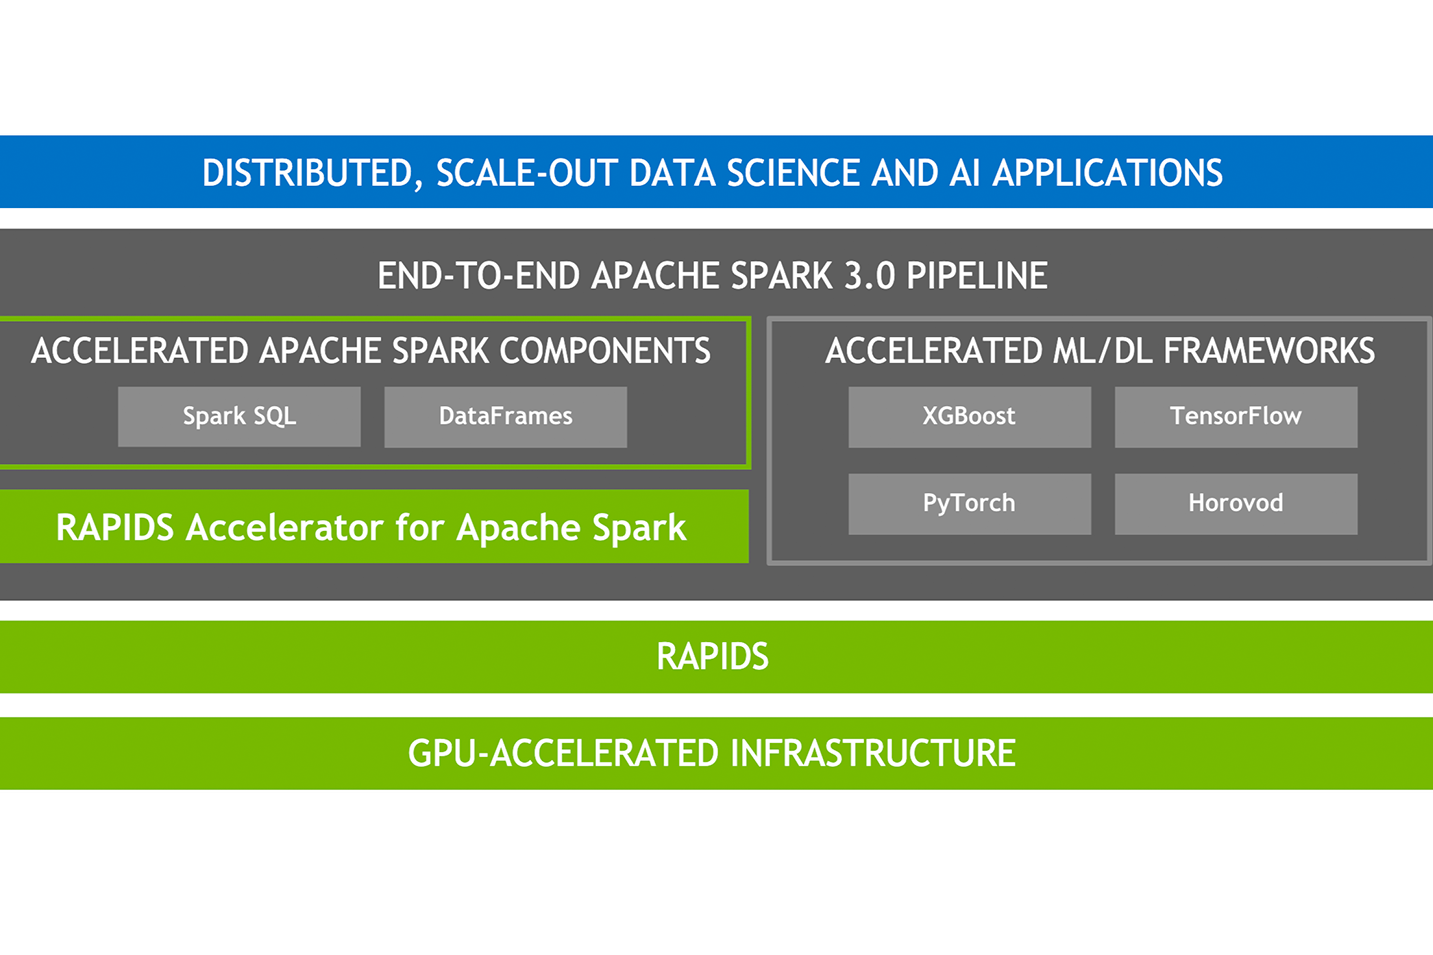
Recently, as part of a major Apache Spark initiative to better unify DL and data processing on Spark, GPUs became a schedulable resource in Apache Spark 3.0. Spark conveys these resource requests to the underlying cluster manager. Because this allows you to run distributed inference at scale, it could help accelerate big data pipelines to leverage DL applications.
Before Apache Spark 3.0, it was difficult to use GPUs. You had to manually assign GPU devices to a Spark job and hard-code all configurations for every executor or task to use different GPUs on a single machine. Because the Apache Hadoop 3.1 Yarn cluster manager allows GPU coordination among different machines, Apache Spark can now work alongside it to help pass the device arrangement to different tasks. After you submit an application with a GPU resource configuration discovery script, Spark handles the assignment and coordination of how the GPUs should be shared between tasks.
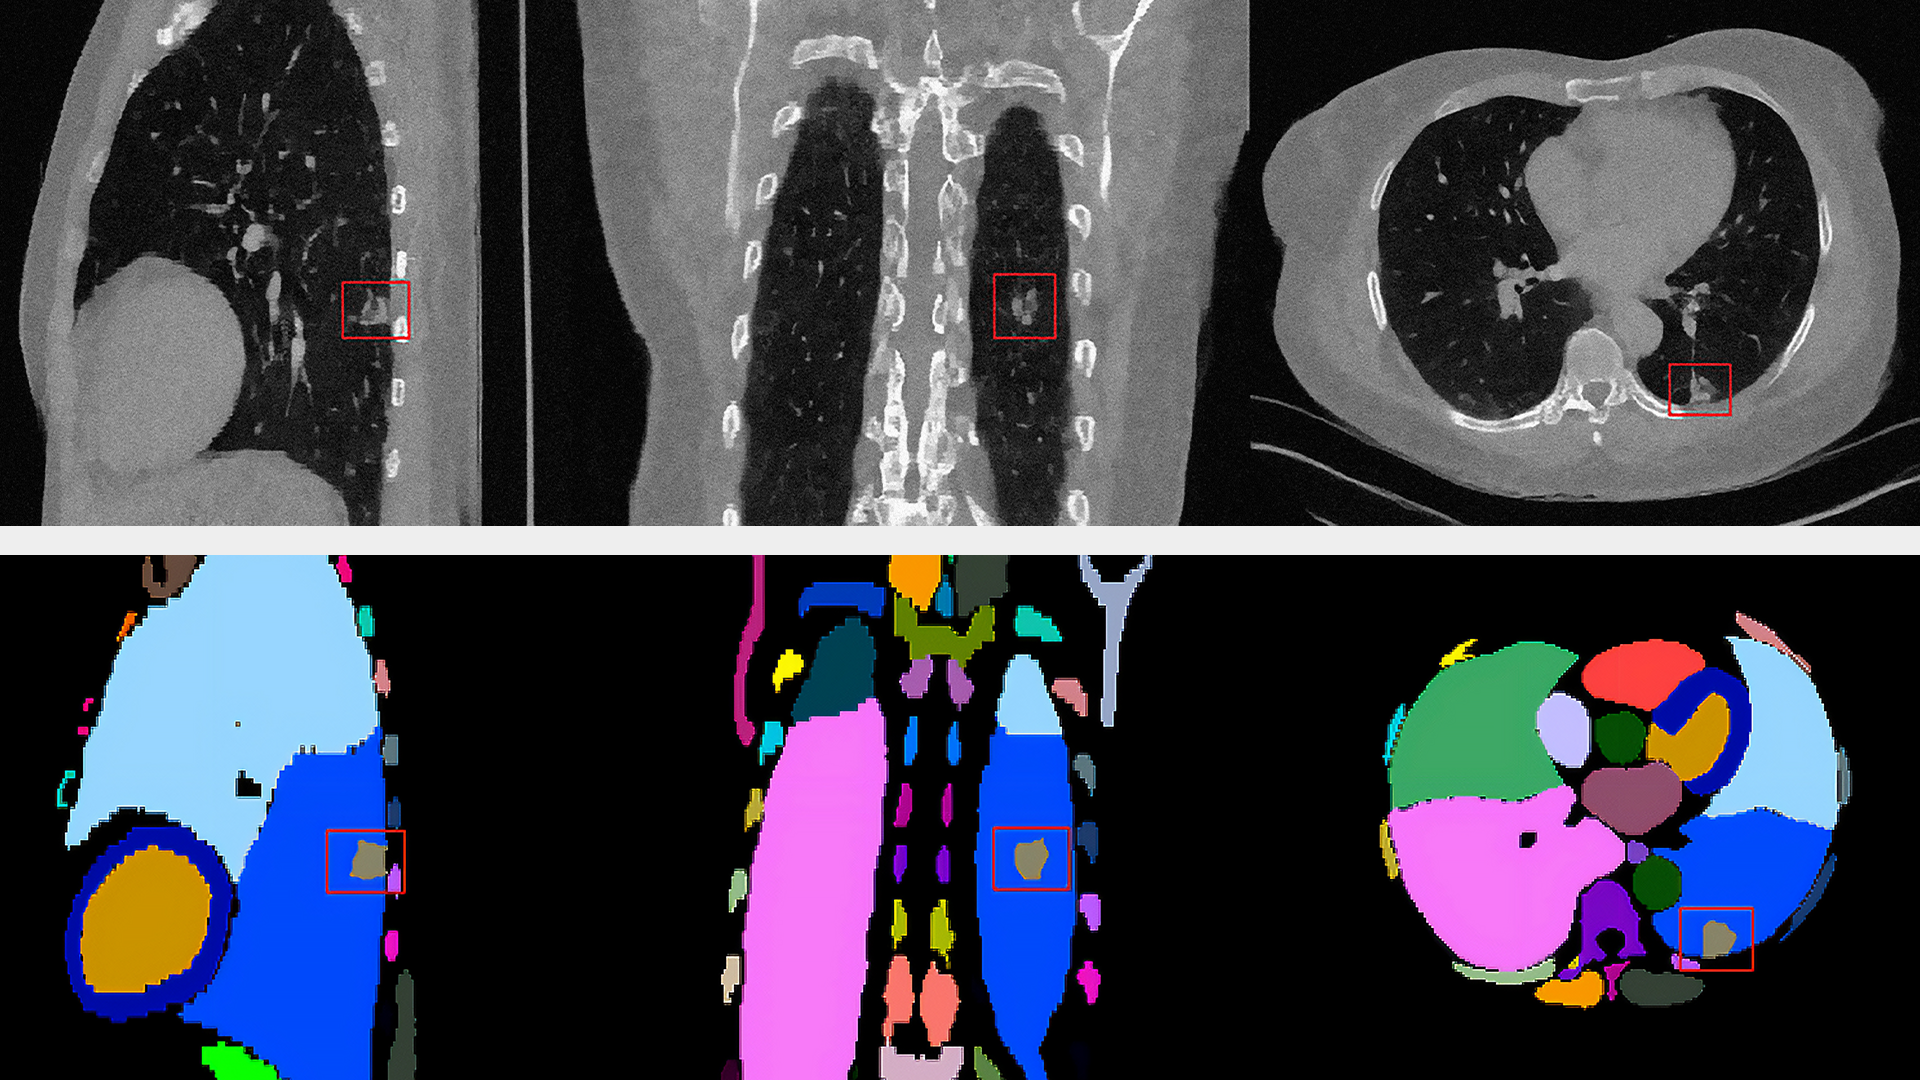
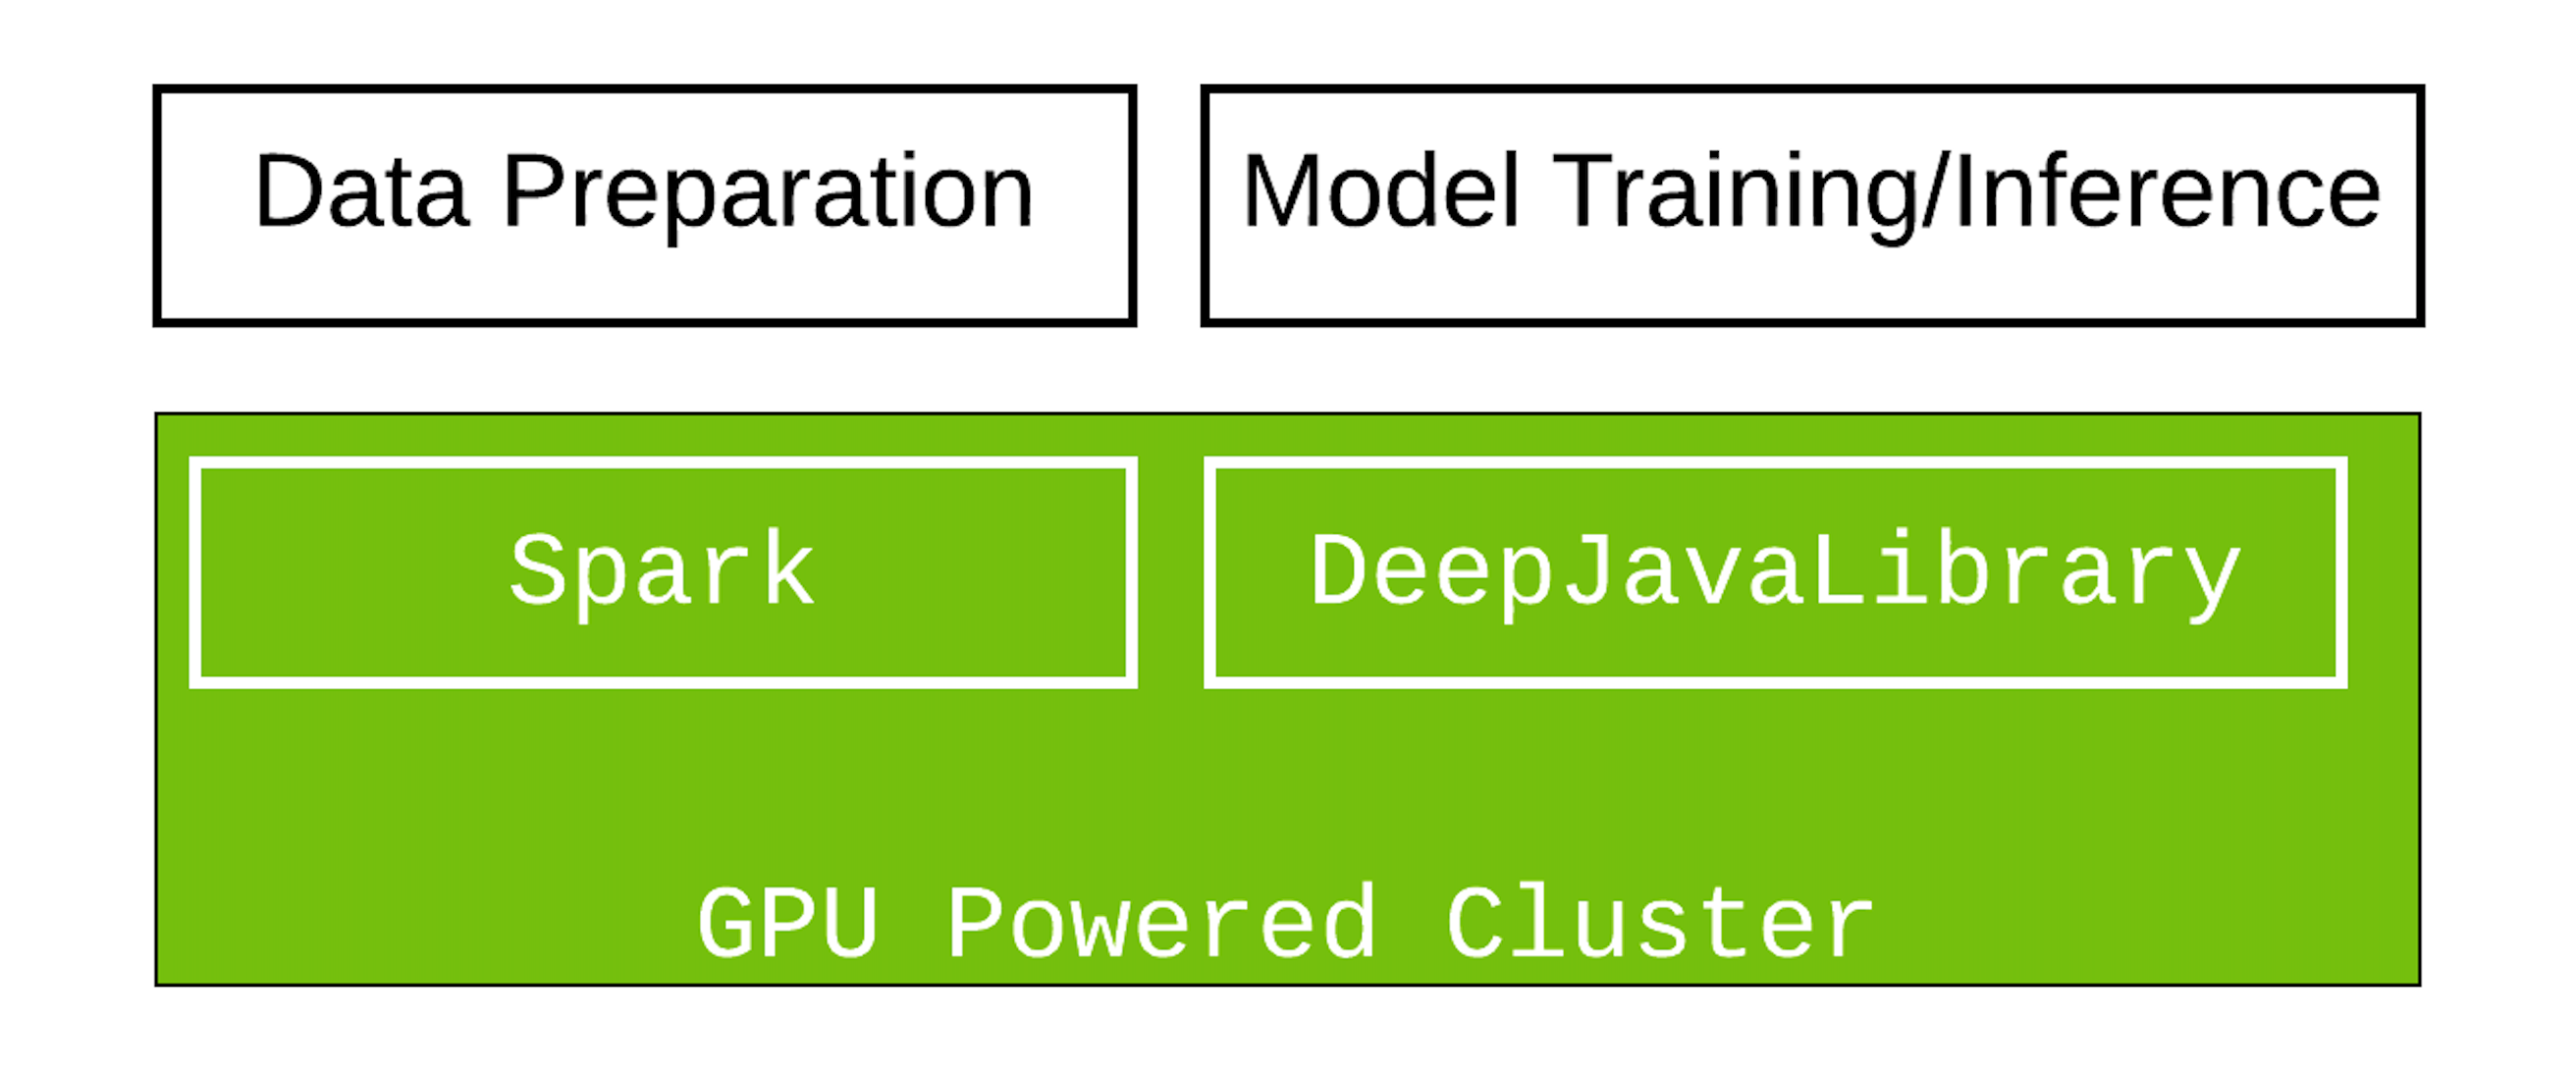
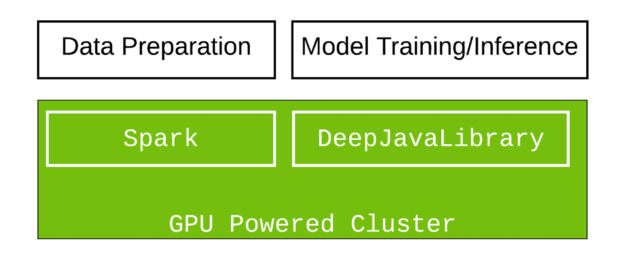
In this tutorial, we demonstrate how to create a cluster of GPU machines and use Apache Spark with Deep Java Library (DJL) on Amazon EMR to leverage large-scale image classification in Scala. DJL now provides a GPU-based, deep-learning Java package that is designed to work smoothly in Spark.
DJL provides a viable solution if you are interested in Scala and Java or are looking for a solution to integrate DL in Java into your big data pipeline. Because Python is the most used language for DL, while Java is the most popular language for enterprise developers and data engineers, DJL aims to make deep-learning, open-source tools accessible to Java developers, using familiar concepts and intuitive APIs. DJL is built on modern deep-learning frameworks (TensorFlow, PyTorch, Apache MXNet, and so on). You can easily use DJL to train your model or deploy your favorite models from a variety of engines without any additional conversion.
Set up the Spark application
For full setup information, see the gradle project setup. The following section highlights some key components that you should know.
First, import the Spark dependencies. Spark SQL and the ML library are used to store and process the images. The Spark dependencies are only used at compile time and are excluded in packaging because they are provided during runtime. The .jar task excludes them when everything is packaged.
configurations {
    exclusion
}
dependencies {
    implementation "org.apache.spark:spark-sql_2.12:3.0.1"
    implementation "org.apache.spark:spark-mllib_2.12:3.0.1"
    implementation "org.apache.hadoop:hadoop-hdfs:2.7.4"

    exclusion "org.apache.spark:spark-sql_2.12:3.0.1"
    exclusion "org.apache.spark:spark-mllib_2.12:3.0.1"
    exclusion "org.apache.hadoop:hadoop-hdfs:2.7.4"}
}
jar {
    from {
        (configurations.runtimeClasspath - configurations.exclusion).collect {
            it.isDirectory() ? it : zipTree(it)
        }
    }
}
Next, import DJL-related dependencies. You use DJL API and PyTorch packages. These provide the core DJL features and load a DL engine to run for inference. In addition, you also use pytorch-native-cu101 to run on GPU with CUDA 10.1.
    implementation platform("ai.djl:bom:0.8.0")
    implementation "ai.djl:api"
    runtimeOnly "ai.djl.pytorch:pytorch-model-zoo"
    runtimeOnly "ai.djl.pytorch:pytorch-native-cu101::linux-x86_64"
Load the model
To load a model in DJL, provide the URL (file://, hdfs://, s3://, https://) hosting the model. The model is downloaded and imported from that URL. DJL also offers a powerful zoo model. The zoo model allows you to manage pretrained models and load them in a single line. The built-in zoo model currently supports more than 70 pretrained and ready-to-use models from GluonCV, HuggingFace, TorchHub, and Keras.
def loadModel(device : Device): ZooModel[Row, Classifications] = {
    val modelUrl = "https://alpha-djl-demos.s3.amazonaws.com/model/djl-blockrunner/pytorch_resnet18.zip?model_name=traced_resnet18"
    val criteria = Criteria.builder
      .setTypes(classOf[Row], classOf[Classifications])
      .optModelUrls(modelUrl)
      .optTranslator(new MyTranslator())
      .optProgress(new ProgressBar)
      .optDevice(device)
      .build()
     ModelZoo.loadModel(criteria)
}
The input type here is a Row in Spark SQL. The output type is a Classification result. The MyTranslator function does preprocessing and post processing work. The model loaded is a pretrained PyTorch ResNet18 model from torchvision.
Main logic
In the following code example, the downloadImages function downloads demo images and stores them on the Hadoop file system (hdfs). Next, the spark.read.format("image") function uses the Spark image data source to load the image files from HDFS into a Spark DataFrame. After this step, mapPartition fetches the GPU information. As shown in the code example, the TaskContext.resources()("gpu") function stores the assigned GPU for this partition. This ensures that all GPUs on a single device are properly used. After the model is loaded to the assigned GPU, predictor.predict(row) returns the classification of the image (row) in the Spark DataFrame partition.
def main(args: Array[String]) {

    // download images
    val imagePath = downloadImages(new Path("hdfs:///images"))

    // Spark configuration
    val spark = SparkSession.builder()
      .appName("Image Classification")
      .config(new SparkConf())
      .getOrCreate()
    val df = spark.read.format("image").option("dropInvalid", true).load(imagePath)
    val result = df.select(col("image.*")).mapPartitions(partition => {
      val context = TaskContext.get()
      val gpu = context.resources()("gpu").addresses(0)
      val model = loadModel(Device.gpu(gpu.toInt))
      val predictor = model.newPredictor()
      partition.map(row => {
        predictor.predict(row).toString
      })
    })(Encoders.STRING)
    println(result.collect().mkString("\n"))
}
Wrap it up
Run ./gradlew jar to bundle everything into a single jar and run it in a Spark cluster.
Set up the Spark cluster with GPUs
Since the release of Amazon EMR 6.2.0, Spark 3.0 is available in all GPU instances.
To set up a Spark cluster, create a GPU cluster with three instances using the AWS CLI. To run the command successfully, you must change myKey to your EC2 key name. The --region option can also be removed if you have that preconfigured.
aws emr create-cluster \
    --name "Spark cluster" \
    --release-label emr-6.2.0 \
    --region us-east-1 \
    --ebs-root-volume-size 50 \
    --applications Name=Hadoop Name=Spark \
    --ec2-attributes KeyName=myKey \
    --instance-type g3s.xlarge \
    --instance-count 3 \
    --use-default-roles \
    --configurations https://raw.githubusercontent.com/aws-samples/djl-demo/master/aws/emr-distributed-inference/image-classification-gpu/configurations.json
You can choose from a variety of GPU instances that are available in AWS. This example uses the g3s.xlarge instance type for testing purposes.The total run time for the cluster setup is around 10–15 min.
Execute the Spark job
You can run this park job on the EMR console or from the command line.
The following command tells Spark to run a Yarn cluster and set up a script to find GPUs on different devices. The GPU amount per task is set to 0.5, which means that two tasks share one GPU. You may also have to set CPU numbers accordingly to ensure they match. For example, if you have an 8-core CPU and you set spark.task.cpus to 2, it means that four tasks can run in parallel on a single machine. To achieve the best performance, set spark.task.resource.gpu.amount to 0.25. This allows four tasks to share the same GPU. This helps to maximize performance because all cores in the GPU and CPU are used. Without a balanced setup, some cores are in an idle state, which wastes resources.
spark-submit \
    --master yarn \
    --conf spark.executor.resource.gpu.discoveryScript=/usr/lib/spark/scripts/gpu/getGpusResources.sh \
    --conf spark.worker.resource.gpu.discoveryScript=/usr/lib/spark/scripts/gpu/getGpusResources.sh \
    --conf spark.task.resource.gpu.amount="0.5" \
    --conf spark.task.cpus=2 \
    --conf spark.executor.resource.gpu.amount=1 \
    --conf spark.worker.resource.gpu.amount=1 \
    --class com.examples.ImageClassificationExample \
    build/libs/image-classification-gpu-1.0-SNAPSHOT.jar
This script takes around 4-6 minutes to finish, and you get a printout inference result as output.
Summary
In this tutorial, you built the package from scratch and submitted the work to a GPU cluster for inference tasks. Try to use the same setup for your own application. For more information, see the DJL Spark GPU Image Classification Example project. If you are interested in more features that DJL provides, follow our awslabs/djl and aws-samples/djl-demo GitHub repos, deepjavalibrary Slack channel, and @deepjavalibrary Twitter feed.