AI is going mainstream and is quickly becoming pervasive in every industry—from autonomous vehicles to drug discovery. However, developing and deploying AI applications is a challenging endeavor. The process requires building a scalable infrastructure by combining hardware, software, and intricate workflows, which can be time-consuming as well as error-prone. To accelerate the end-to-end AI workflow, there needs to be a unified platform that gets you to production faster.
In this post, we demonstrate how the integration between Amazon SageMaker and NGC helps data scientists accelerate their AI workflow, build powerful applications, and gather the valuable insights required to deliver on business goals.
Amazon SageMaker
Amazon SageMaker is a fully managed service that provides every developer and data scientist with the ability to build, train, and deploy machine learning models quickly. Amazon SageMaker removes the heavy lifting from each step of the machine-learning process to make it easier to develop high-quality models.
NVIDIA GPUs and NGC
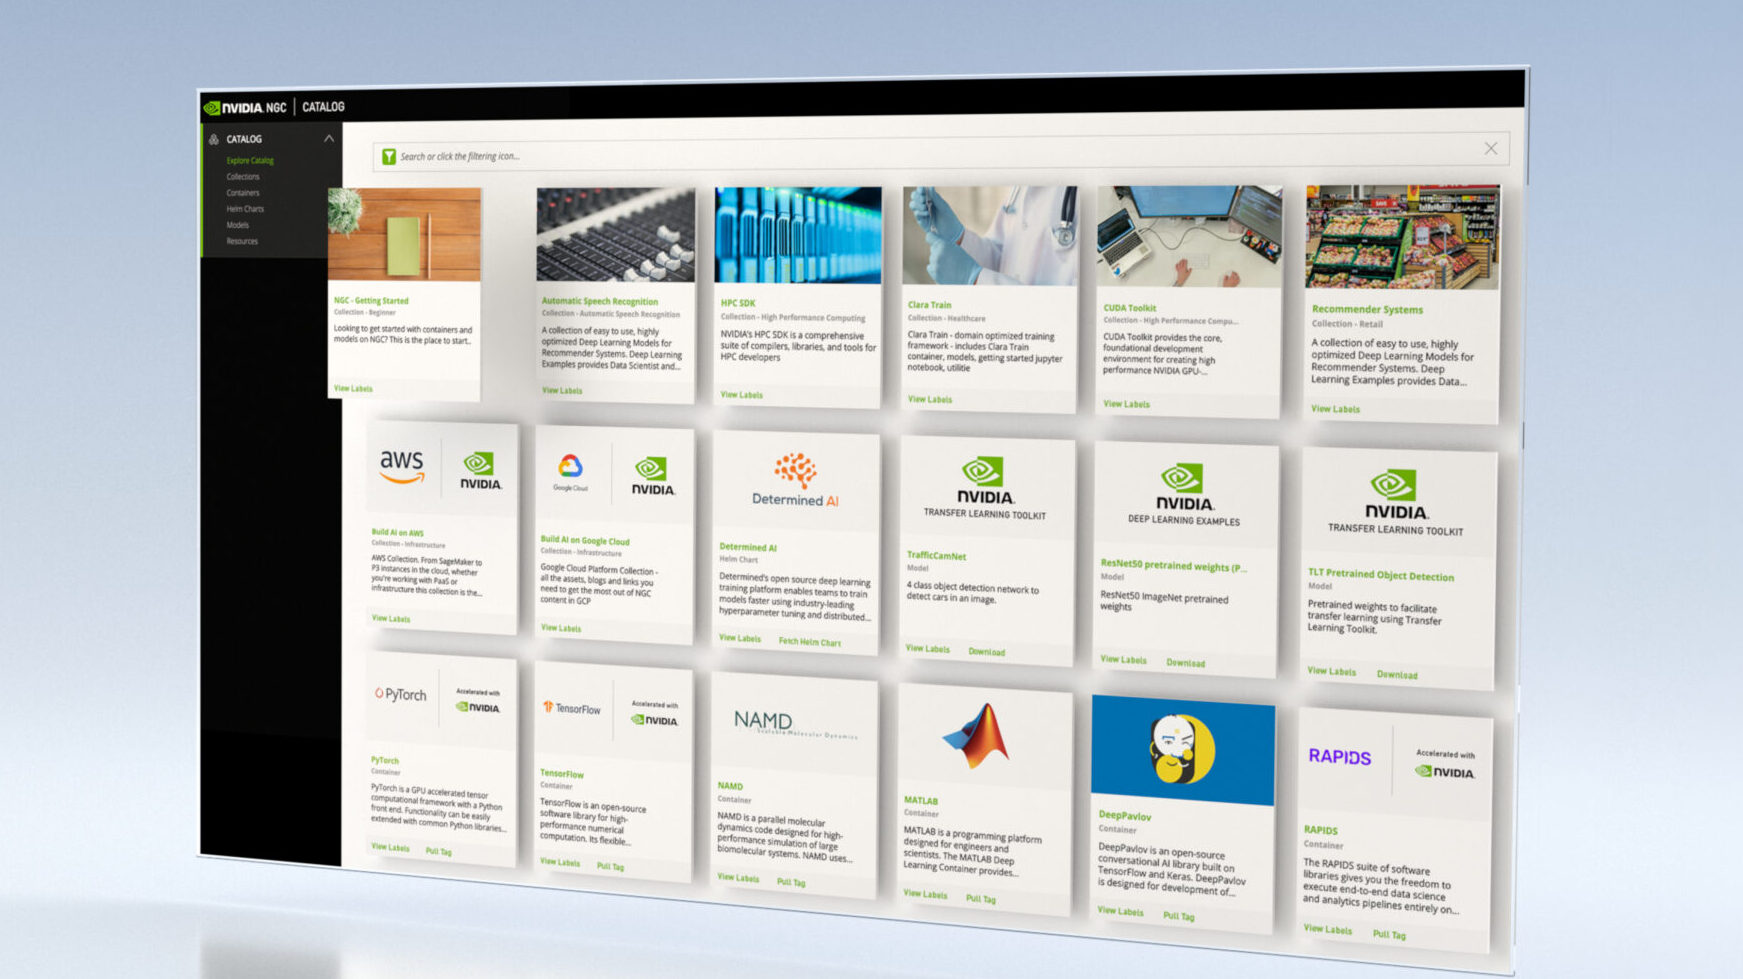
GPUs are great for both training and inference, but you also need GPU-optimized software to accelerate the time to solution, which is why NVIDIA built NGC. Here are several reasons to choose NGC:
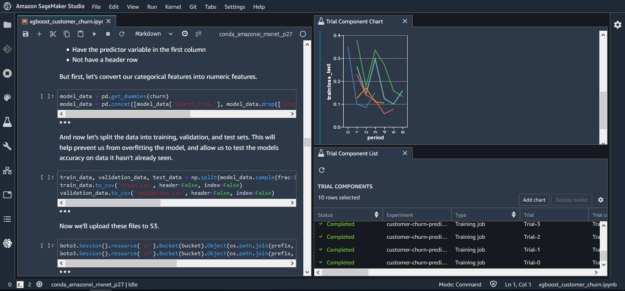
- Ease of use—Jupyter notebooks are quickly becoming the preferred tool of data scientists when it comes to building models and testing their functionality. In your Amazon SageMaker Jupyter session, you can deploy containers and models directly from NGC with one simple pull command.
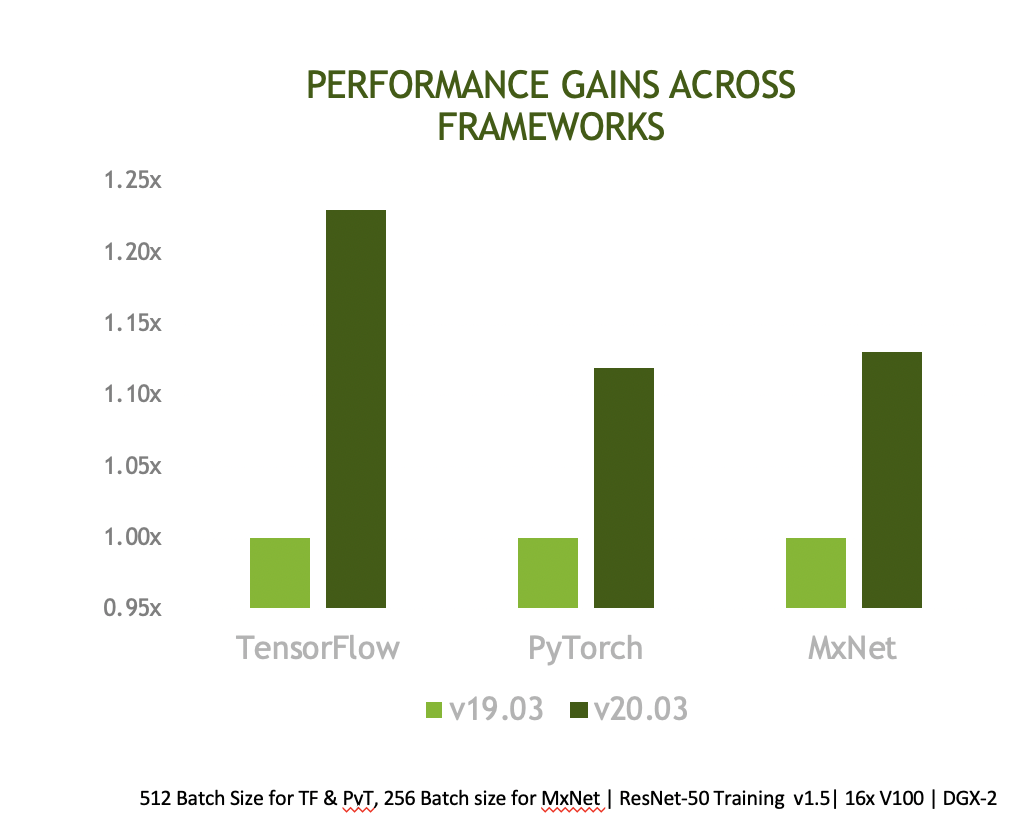
- Highly performant containers—When it comes to deploying applications at scale, containers are pretty much the standard. Containers allow you to package the application, its libraries, and dependencies into a portable and isolated environment. This means that you can run containers anywhere from your PC to your Amazon cloud instance. The NGC containers are updated monthly and are fine-tuned for performance. The performance improvements are made in libraries and runtimes such as cuDNN, cuBLAS, DALI, and NCCL to extract maximum performance from your GPUs when you are deploying the latest version of the containers from NGC.
- Accelerated development process—Pretrained models from NGC help you speed up your application-building process with more than 100 pretrained models across a wide array of applications, such as natural language processing (NLP), image analysis, and recommendation systems. The models are curated and tuned to perform optimally on NVIDIA GPUs for maximum performance. Applying transfer learning, you can retrain these models with your own data set and create your own custom model. If you prefer building the models from scratch, use the resources in NGC, which give you a step-by-step method to build a highly accurate and performant model based on the best practices that NVIDIA engineers use.
- Enterprise-ready—In addition to performance, security is a vital requirement when deploying containers in production environments. The containers published in NGC go through a comprehensive QA process for Common Vulnerabilities and Exposures (CVEs) to make sure that they are highly secure and devoid of any flaws and vulnerabilities, giving you the utmost confidence to deploy them in your infrastructure.
NGC examples
We have carefully curated examples to cover a whole range of workloads and use cases, from deploying for inference to deploying containers for retraining in Jupyter notebooks. In this post, we walk you through all the steps needed to get the most out of Amazon SageMaker using content from NGC. There are seven examples that can be easily accessed using GitHub from your notebook instance.
The general process of deploying a container or a model from NGC is the same for all examples listed. In this post, we elaborated on the first example to show you how to deploy the assets from NGC into your Amazon SageMaker instance. For more information about deploying each example, see Amazon SageMaker and NVIDIA GPU Cloud (NGC) Examples.
Train a TensorFlow BERT-Large model on a Jupyter notebook and deploy to TensorRT
The following example shows how you can deploy a TensorFlow BERT-Large model with the NVIDIA TensorRT container from NGC. You make the most of these three assets from NGC:
- The TensorRT container
- The BERT model (TensorFlow)
- NGC resources
Setup
While the Jupyter notebook provides lots of information and a step-by-step guide to how this example works, it’s worth noting that there’s an additional script included in the container that helps take care of the heavy lifting. The entrypoint.sh script runs when you first build or start the container and it coordinates the NGC models and helper scripts together to make API deployment possible. The script does the following:
- Downloads a pretrained BERT model from NGC.
- Downloads the helper scripts.
- Fine-tunes the BERT model.
- Converts the fine-tuned model to a TensorRT engine.
- Calls
serve.py, which defines and launches the endpoint for serving your model for inference.
We encourage you to explore this file in a little more detail and see how you can modify it for your use case.
Jupyter notebook
The first step is to build the custom Docker container based on TensorRT and push the image to Amazon Elastic Container Registry (Amazon ECR). This step allows you to deploy your custom image for inference.
# build the image and push it to ECR
# build-and-push.sh takes in one arg: the tag. Here you tag the image with 0.1, but feel free to change the tag
# see docker/Dockerfile.sagemaker.gpu for details about the image
!cd docker && bash build-and-push.sh 0.1
Next, import the libraries and tools needed to work with the deployed model and Amazon SageMaker:
import numpy as np
import sagemaker as sage
from sagemaker import get_execution_role
Then, configure the Amazon SageMaker session so that you can deploy the TensorRT container and BERT model to NVIDIA GPUs. Determine the instance type, number of deployment instances, and where to store the output. In this case, use the default bucket.
role = get_execution_role()
session = sage.Session()
TRAIN_INSTANCE_TYPE_ID = 'ml.p3.16xlarge'
TRAIN_INSTANCE_COUNT = 1
INFERENCE_INSTANCE_TYPE_ID = 'ml.p3.2xlarge'
INFERENCE_INSTANCE_COUNT = 1
OUTPUT_BUCKET = 's3://{bucket}/output'.format(bucket=session.default_bucket())
With the environment configured, set up the Estimators API to use the customized TensorRT container and fine-tune the model:
account = session.boto_session.client('sts').get_caller_identity()['Account']
region = session.boto_session.region_name
image_name = '{acct}.dkr.ecr.{region}.amazonaws.com/ngc-tf-bert-sagemaker-demo:0.1'.format(acct=account, region=region)

estimator = sage.estimator.Estimator(image_name=image_name,
                                            role=role,
                                            train_instance_count=TRAIN_INSTANCE_COUNT,
                                            train_instance_type=TRAIN_INSTANCE_TYPE_ID,
                                            output_path=OUTPUT_BUCKET,
                                            sagemaker_session=session)

estimator.fit(inputs=None)
The final step in the configuration is to deploy the custom TensorRT container, models, and scripts to the Amazon SageMaker Estimator instance:
predictor = estimator.deploy(initial_instance_count=INFERENCE_INSTANCE_COUNT,
               instance_type=INFERENCE_INSTANCE_TYPE_ID)
Then, take full advantage of the deployed model by performing Q&A inference against a custom paragraph. You can see how easy it would be to provide a new context and ask different questions. We hope that this example gives you food for thought and a gateway to infusing your applications with AI.
from sagemaker.predictor import json_serializer
from sagemaker.content_types import CONTENT_TYPE_JSON
import numpy as np
short_paragraph_text = "The Apollo program was the third United States human spaceflight program. First conceived as a three-man spacecraft to follow the one-man Project Mercury which put the first Americans in space, Apollo was dedicated to President John F. Kennedy's national goal of landing a man on the moon. The first manned flight of Apollo was in 1968. Apollo ran from 1961 to 1972 followed by the Apollo-Soyuz Test Project a joint Earth orbit mission with the Soviet Union in 1975."
question_text = "What project put the first Americans into space?"
qa_test_sample = {'short_paragraph_text':short_paragraph_text, 'question_text':question_text}
predictor.content_type=CONTENT_TYPE_JSON
predictor.serializer= json_serializer
predictor.predict(qa_test_sample).decode("utf-8")
Proof! As you can see, the deployed API knows all about the moon landing (or any other context that you provide):
“Answer: ‘Project’ Mercury’ with prob: 73.069% at 100.112 Sentences/Sec.”
Using an NGC PyTorch container to fine-tune a BERT model.
In this example, you take the BERT PyTorch container available on NGC and deploy it on Amazon SageMaker. Start by taking an existing container and model from NGC, build the image in Amazon SageMaker, and then push that image to Amazon ECR. Amazon SageMaker makes extensive use of Docker containers. By building the container image, you can then specify this image to be used for either model training or deployment.
After you have the training image built, take the pretrained PyTorch BERT model, and launch a training job from an Amazon SageMaker notebook, by spinning up a training instance that lives for the duration of your training job and executing the training code using the hyperparameters specified. This setup allows you to use smaller instances for exploratory data analysis to save costs, and then use more heavy-duty instances for training.
The training code uses GPU-optimized PyTorch with Apex (a PyTorch extension), an automatic mixed-precision training library, to fine-tune the BERT model for question answering on the SQuAD dataset. Amazon SageMaker makes it easy to launch this container with multi-GPU instances for distributed training.
When the training is complete, take the model weights saved to Amazon S3 and then deploy the fine-tuned model to an Amazon SageMaker endpoint for inference. Finally, you can create your own serving container, but Amazon SageMaker makes it easy to build an endpoint using a specialized, pre-built serving container. Now you can get real-time question answering from your model deployed in the cloud!
Using an NGC pretrained BERT-Large model for question answering in PyTorch
You can take any model from NGC and build an API for inference, by integrating deep learning technology into your applications. Get a model from NGC using wget and load it into your Jupyter notebook instance running on Amazon SageMaker. You then package the model into the format required by the Amazon SageMaker inference API and deploy it. When it’s completed, you have an API that can be used for your own question-answering system.
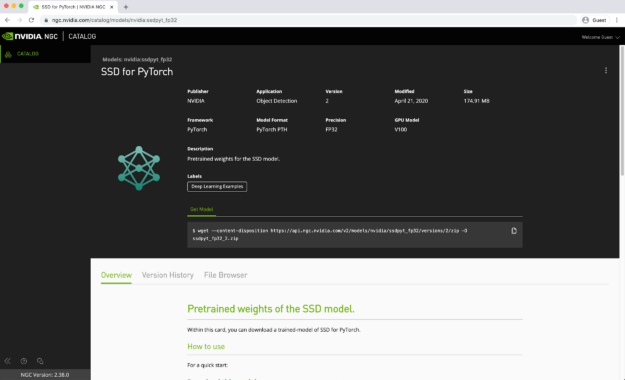
Deploy an NGC SSD model for PyTorch on Amazon SageMaker
If you’re looking to explore object detection or image classification, then this example should get you up to speed. Start by grabbing the Single Shot Detector (SSD) model for PyTorch from NGC and packaging it up into the tarball format required by Amazon SageMaker.
Next, use the example transform_script.py file, which configures the Amazon SageMaker endpoint so that it understands how to perform the following tasks:
- Loading the model, which is an SSD300 object detector based on a ResNet50 backbone
- Processing input data
- Making predictions based on the model
Then, deploy the model using the Amazon SageMaker built-in PyTorchModel function onto an NVIDIA GPU instance endpoint for inference. Finally, provide some example images and get predictions from your API. For more information about how SSD works or the NGC model, see SSD v1.1 for PyTorch.
Compile a PyTorch model from NGC to Neo and deploy on Amazon SageMaker Neo
In this example, you take a pretrained ResNet50 model, the common image classification architecture, from NGC and deploy it with Amazon SageMaker Neo. Start by downloading the model files and resources from NGC and load them into an \NGC_assets directory local to the notebook instance. Then, build the ResNet50 model from NGC, based on the image_classification_resnet Python script that you downloaded from NGC. This step downloads the pretrained weights from NGC and saves the reconstructed model into a PyTorch file that you can use with Neo. With the model and weights stored and packaged into a .tar file, you can then invoke the Neo compilation API. Using this API, you can configure the following things:
- The target model (ResNet50)
- The model framework (PyTorch)
- Where to store the compiled model (in this case, S3)
- Any timeouts or maximum runtime for inference
The last step is to create a prediction endpoint API that you can use with your applications. To do that, you must create two functions:
Neo_preprocess—This function grabs incoming requests, determines their content type and the data itself, and converts it to a NumPy array which can be interpreted by the model API.Neo_postprocess—When the model and API have made their classification, this function executes to take the prediction results and returns the response body, a text value for the classification class.
Finally, you can then configure an endpoint based on the above configuration, model, and functions, test the API using a cat image, and retrieve the most likely class. Hopefully, it’s “cat”.
Using an NGC TensorFlow container on Amazon SageMaker
In this example, we show you how to package a custom TensorFlow container from NGC with a Python example that works with the CIFAR-10 dataset and uses TensorFlow Serving for inference. However, you can use inference solutions other than TensorFlow Serving by modifying the Docker container.
In this example, you use a single image to support training and hosting. This simplifies the procedure because you only manage one image for both tasks. Sometimes you may want separate images for training and hosting because they have different requirements. In this case, separate the parts discussed later into separate Dockerfiles and build two images. Choosing whether to use a single image or two images is a matter of what is most convenient for you to develop and manage.
Deploy an NGC model for TensorFlow on Amazon SageMaker
Here, you’re working with images. If you’re looking to explore object detection or image classification, then this should get you up to speed. Start by grabbing the pretrained model from NGC and packaging it up into the tarball format required by Amazon SageMaker.
Next, create an Amazon SageMaker inference session and specify the IAM role needed to give the service access to the model stored in S3. With the execution context configured, you then deploy the model using Amazon SageMaker built-in, TensorFlow Serving Model function to deploy the model to a GPU instance where you can use it for inference. Finally, provide some example images and get predictions from your API.
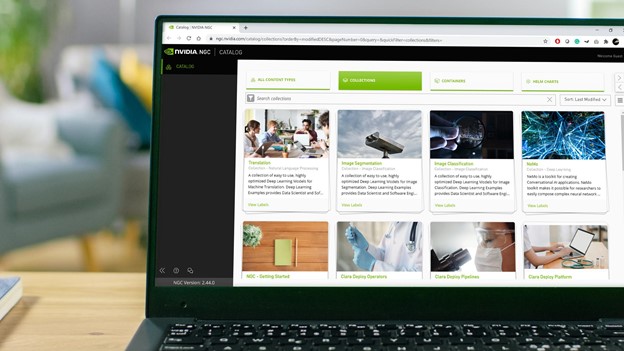
Getting started with NGC examples
The integration between Amazon SageMaker and NGC provides data scientists and developers with the ideal platform: Amazon SageMaker to develop and deploy AI/ML applications and easy access to enterprise-grade AI software from NGC.
Getting started with the NGC examples is quite simple. The following video shows how you can link the NGC examples available on GitHub to your Amazon SageMaker instance or you can directly navigate to the NGC page.
To learn more about how to use NVIDIA GPUs in Amazon SageMaker to accelerate your AI, join the new webinar, Accelerating AI/ML Workflows with Amazon SageMaker and NVIDIA NGC.
Acknowledgements
We’d like to thank Anish Mohan, machine learning architect, and Jin Li, data scientist, for their invaluable help in developing the tutorials for the examples.