Installing OpenClaw + Nemotron 3 Super on
DGXSpark (GB10) and Windows RTX
Notice & Disclaimers
Quick Start Safety Check
Use a clean environment only. Run this demo on a fresh device or VM with no personal data, confidential information, or sensitive credentials. Think of it like a sandbox—keep it isolated.
By installing this demo, you're taking responsibility for all third-party components, including reviewing their licenses, terms, and security posture. Read and accept before you install or use.
What You're Getting
This experience is provided "AS IS" for demonstration purposes only—no warranties, no guarantees. This is a demo, not a production-ready solution. You'll need to implement appropriate security controls for your specific environment and use case.
The demo showcases experimental AI agent capabilities. Even with cutting-edge open-source tools like OpenShell in your toolkit, you need to layer in proper security measures for your specific threat model.
Key Risks with AI Agents
Be mindful of these risks with AI agents:
- Data leakage – Any materials the agent accesses could be exposed, leaked, or stolen.
- Malicious code execution – The agent or its connected tools could expose your system to malicious code or cyber-attacks.
- Unintended actions – The agent might modify or delete files, send messages, or access services without explicit approval.
- Prompt injection & manipulation – External inputs or connected content could hijack the agent's behavior in unexpected ways.
Security Best Practices
No system is perfect, but these practices help keep your information and systems safe:
- Isolate your environment – Run on a clean PC or isolated virtual machien. Only provision the specific data you want the agent to access.
- Never use real accounts – Don't connect personal, confidential, or production accounts. Create dedicated test accounts with minimal permissions.
- Never use real accounts – Don't connect personal, confidential, or production accounts. Create dedicated test accounts with minimal permissions.
- Vet your skills/plugins – Only enable skills from trusted sources that have been vetted by the community. Review permissions before enabling. During this lab, stick to skills provided or recommended by event staff.
- Lock down access – Ensure your OpenClaw UI or messaging channels aren't accessible over the network without proper authentication.
- Restrict network access – Where feasible, limit the agent's internet connectivity.
- Clean up after yourself – When you're done, remove OpenClaw and revoke all credentials, API keys, and account access you granted.
Lab Participant Acknowledgement
By participating in this demo, you acknowledge and agree that you are solely responsible for your configuration and for any data, accounts, and tools you connect.
To the maximum extent permitted by law, NVIDIA is not responsible for any loss of data, device damage, security incidents, or other harm arising from your configuration or use of demo materials, including OpenClaw or any connected tools or services.
This guide introduces the installation of OpenClaw, powered by Nemotron 3 Super via Ollama, on a DGX Spark (powered by GB10).
Installing OpenClaw + Nemotron 3 Super on DGXSpark (GB10)
Prerequisites
Verify that the OS, GPU, Docker, and Python are available before proceeding with this demo.
head -n 2 /etc/os-release
nvidia-smi
python3 --version
Expected output should show Ubuntu 24.04 (DGX OS), an NVIDIA DGX Spark GB10 GPU, and Python 3.12+.
Step 0: Install OpenClaw
curl -fsSL https://openclaw.ai/install.sh | bash -s -- --no-onboardStep 1: Install Ollama
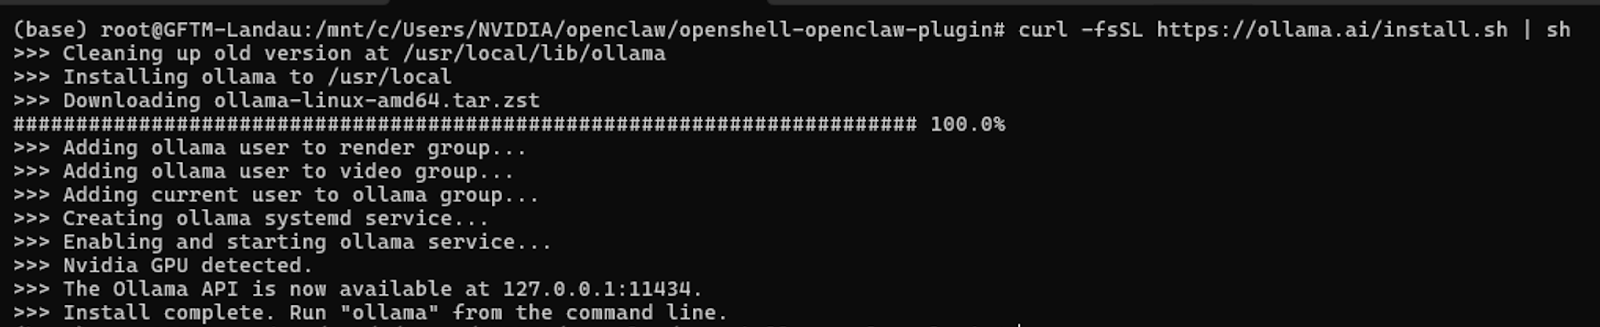
Install Ollama (if not already present). Ollama is a local-first platform for inferencing with models.
curl -fsSL https://ollama.ai/install.sh | sh
ollama --version
Verify Ollama is running (it auto-starts as a service after installation). Run this command as follows:
curl http://localhost:11434Expected output should be: Ollama is running. If not, start it manually:
ollama serve &Step 2: Download Model
Go to Step 2b if you have a flash drive with pre-downloaded models.
Step 2a: [Online] Pull Nemotron
Pull and run the Nemotron 3 Super model from Ollama. This will take a while—the model is about 86GB.
To test the model via Ollama, run:
ollama pull nemotron-3-superTo load and run the model, please run:
ollama run nemotron-3-superStep 2b: [Offline] Use local/downloaded models
Use this path when the target hardware has no Internet or you were given a flash drive.
Step 2b.1: Download models (machine with internet)
Skip this if you already have a flash drive with the ./models folder. On a machine with internet access, save the script below as download.sh, then run it. Optionally move the resulting ./models folder to an external disk or flash drive.
#!/bin/bash

models=("qwen3.5:9b" "nemotron-3-super:120b")
for model in "${models[@]}"; do
  dir_name="${model//:/-}"
  ollama pull "$model" && echo "Successfully pulled $model"
  (
    mkdir -p "models/$dir_name" && cd "models/$dir_name" || exit 1
    ollama show "$model" --modelfile > Modelfile
    from_path=$(awk '/^FROM /{print $2; exit}' Modelfile)
    cp "$from_path" model.gguf
    awk '/^FROM / { $0="FROM ./model.gguf" } { print }' Modelfile > Modelfile.tmp && mv Modelfile.tmp Modelfile
    echo "Successfully setup Modelfile for $model"
  ) || exit 1
done

models_line="models=("
for m in "${models[@]}"; do models_line+=" \"$m\""; done
models_line+=" )"

cat > models/setup.sh << EOF
#!/bin/bash
$models_line
for model in "\${models[@]}"; do
  dir_name="\${model//:/-}"
  (cd "\$(dirname "\$0")/\$dir_name" && ollama create "\${dir_name}_local") && echo "Successfully created Ollama model \${dir_name}_local"
done
EOF
chmod +x models/setup.sh
echo "Successfully created setup script for Ollama models"
Step 2b.2: Run the download script
bash download.shStep 2b.3: Copy ./models to target hardware (e.g. DGX Spark)
Copy the ./models folder onto your flash drive, then on the target machine (e.g. DGX Spark) mount the drive and copy the data.
1. Find the drive and partition (e.g. /dev/sdb1 or /dev/nvme1n1p1):
lsblk2. Create a mount point and mount the partition:
sudo mkdir -p /mnt/ssd
sudo mount /dev/sdb1 /mnt/ssd   # replace sdb1 with your actual partition
3. Copy the models folder to your desired location:
cp -R /mnt/ssd/path/to/models ~/where/you/want/it4. Unmount the drive when done:
sudo umount /mnt/ssdStep 2b.4: Prepare models on target hardware
On the target machine, go to the path where you copied the data. The GGUF files and a setup.sh script are in the ./models folder. Run:
cd ./models
bash setup.sh
Step 2b.5: Use the local model
The local model is registered as <model_name>_local. Use that name in the --model flag for all later commands (e.g. nemotron-3-super-120b_local or qwen3.5-9b_local).
Step 3: Launch OpenClaw
To launch OpenClaw, run (use your _local model name if you followed the offline path in Step 2b):
ollama launch openclaw --model nemotron-3-superThe expected output of this should resemble the following screenshot: 
Some of the key expected outputs you should see in the logs include:
OpenClaw is running
Open the Web UI:
http://localhost:18789/#token=ollama
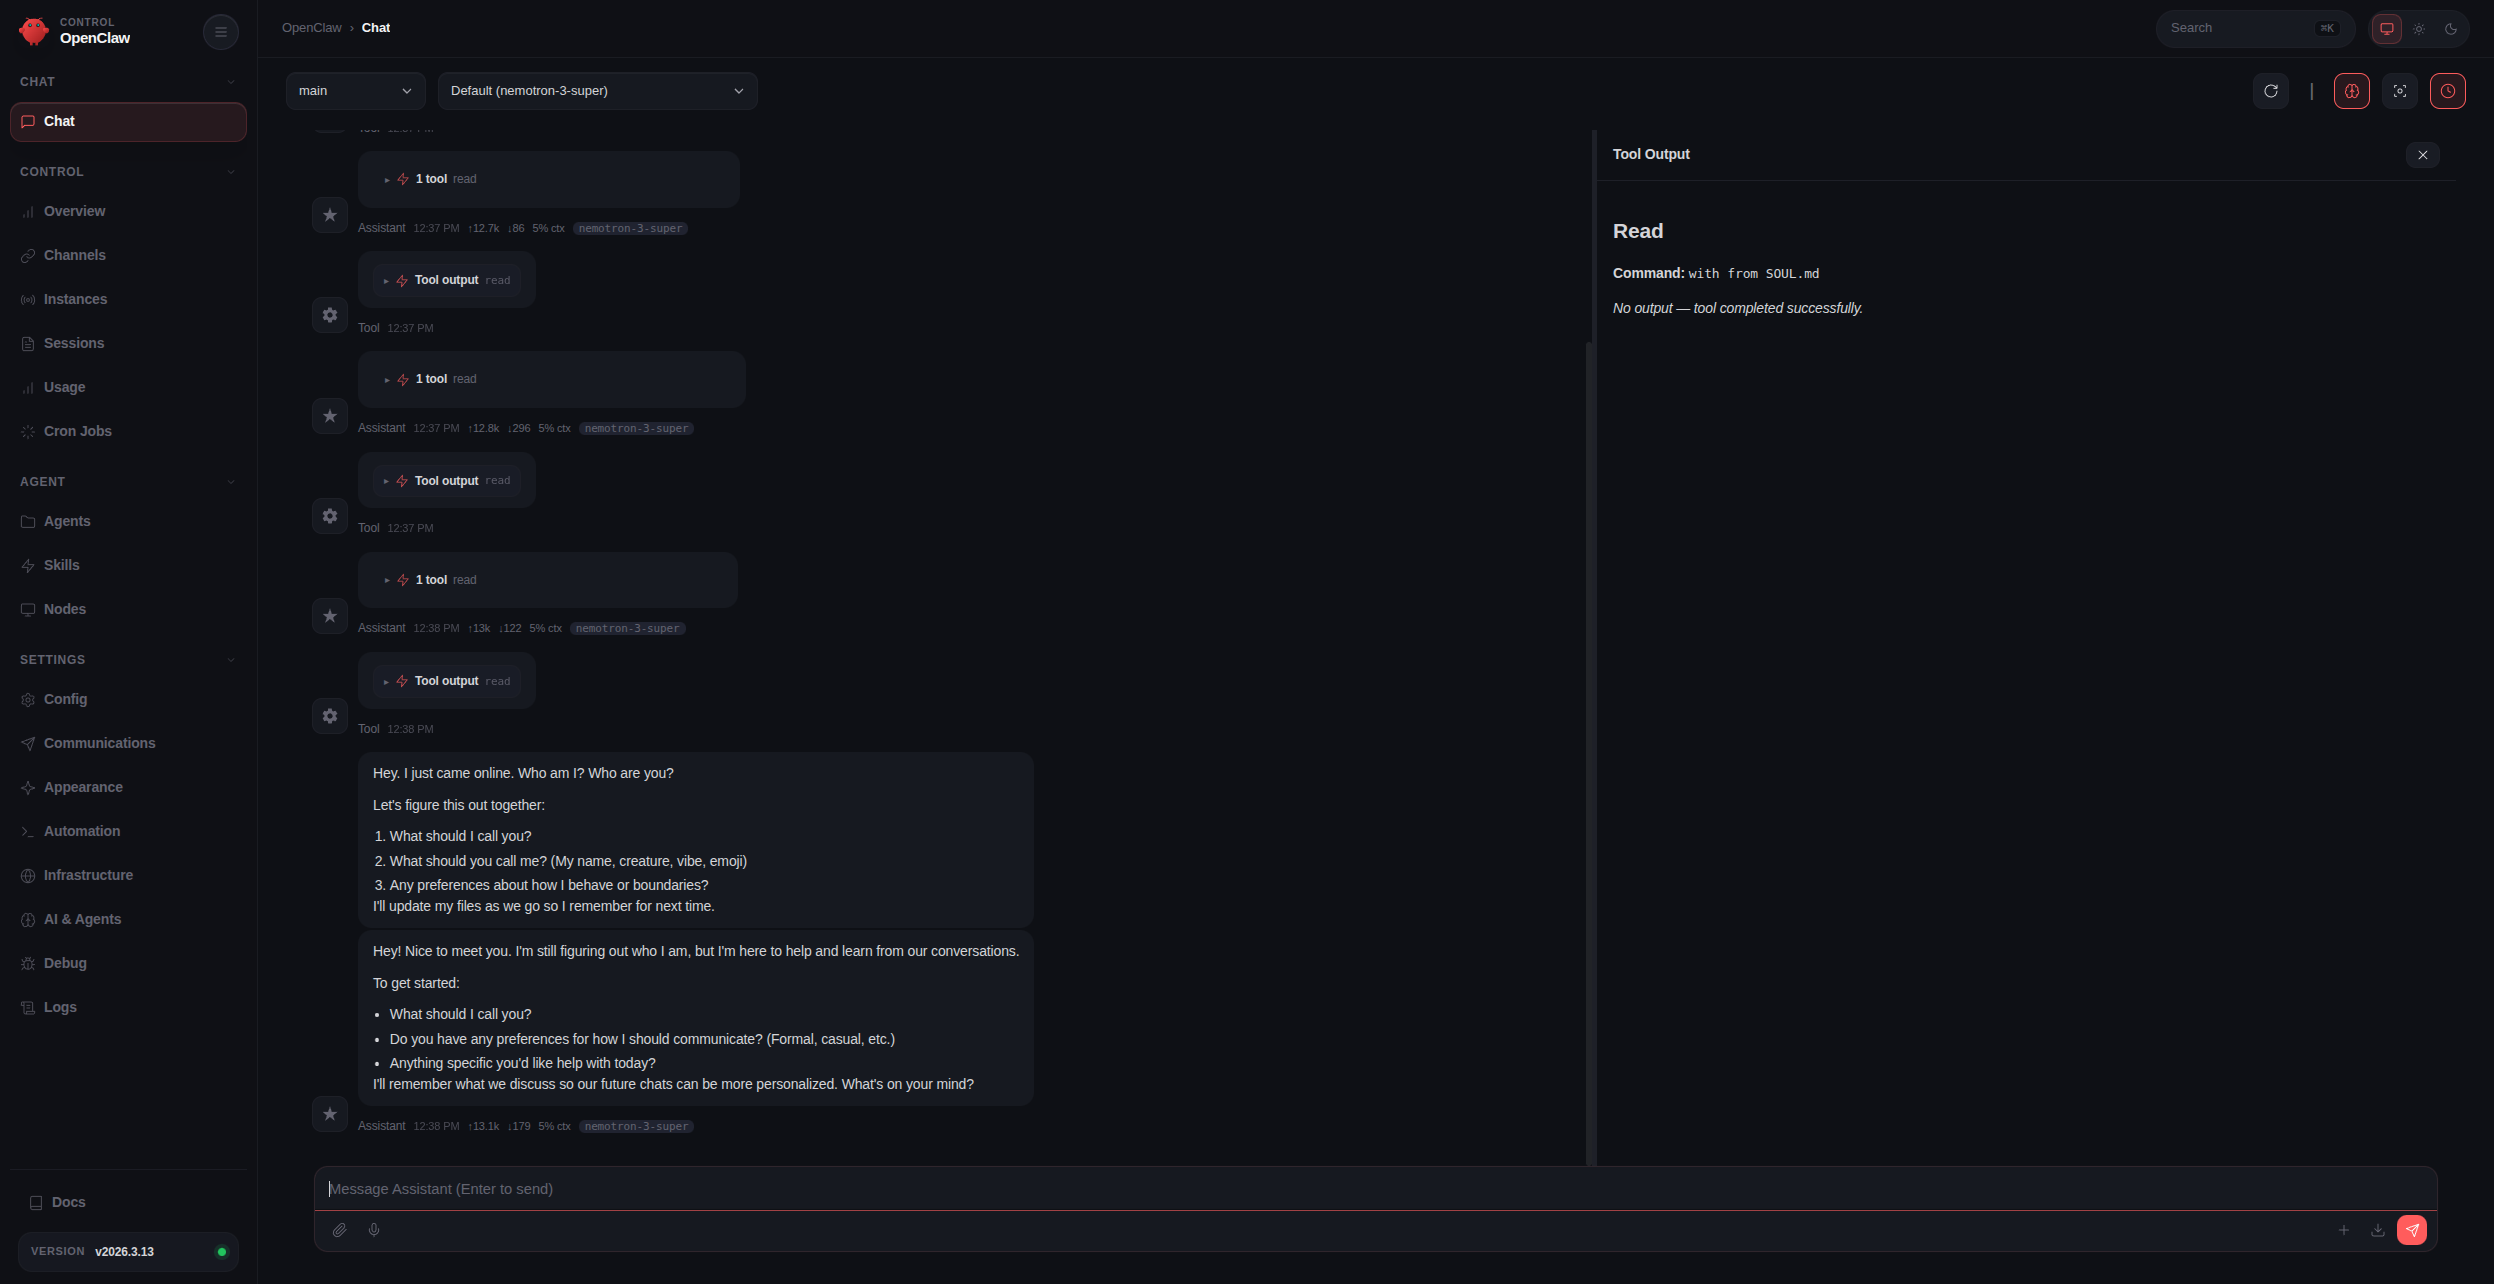
session agent:main:mainOnce the OpenClaw agent is ready, you can either enter a prompt on the terminal to interact with the agent, or you can click on the URL (e.g., http://localhost:18789/ …) to open the control UI. From there, you can start messaging the Nemotron 3 Super models, and see all the other features.
This is what the OpenClaw Control UI should look like:
Step 4: Verify and launch
openclaw models list   # should show nemotron-3-super (or your _local model) as default
openclaw dashboard    # opens a simple dashboard
Messaging Channels + OpenClaw
Once OpenClaw is running, you can connect external messaging channels such as WhatsApp, Telegram, and Discord.
To open the channel configuration workflow, run:
openclaw configure --section channelsYou will be prompted to choose which channel you want to set up.
Example: Setting up WhatsApp
- In the terminal, select WhatsApp from the list of available channels.
- OpenClaw will generate a QR code in the terminal window.
- On your phone, open WhatsApp.
- Go to Settings > Linked Devices.
- Tap Link a Device and scan the QR code shown in the terminal.
- After scanning, wait a few moments for the connection to complete.
Once pairing succeeds, OpenClaw will be connected to your WhatsApp account.
Verifying Connection
To verify that WhatsApp is working correctly:
- In WhatsApp, open a chat with Yourself.
- Send a message to that chat.
- OpenClaw should receive the message and respond, allowing you to chat with the agent through WhatsApp.
You can repeat the same openclaw configure --section channels flow later to connect additional platforms such as Telegram or Discord.
Installing OpenClaw + Qwen 3.5 9B on GeForce RTX devices
This guide introduces the installation of OpenClaw, powered by Qwen 3.5 9B via Ollama, on GeForce RTX devices (native Linux or WSL).
Prerequisites
If you are on Windows and WSL is not installed, install it first by running in PowerShell:
wsl --installThen launch a WSL window:
wslStep 1: Install Ollama
Install Ollama (if not already present). Ollama is a local-first platform for inferencing with models.
curl -fsSL https://ollama.ai/install.sh | sh
ollama --version
Expected output should be as follows:
Verify Ollama is running (it auto-starts as a service after installation):
curl http://localhost:11434Expected output should be: Ollama is running. If not, start it manually:
ollama serve &Step 2: Pull Qwen
Next, pull down and run the Qwen model from Ollama.
To test the model via Ollama, run:
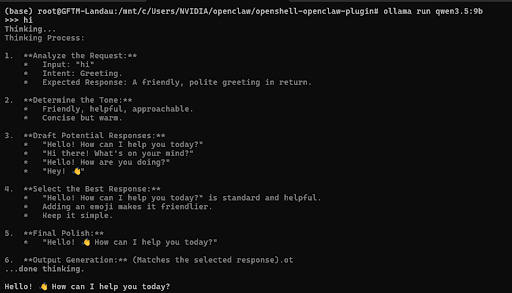
ollama pull qwen3.5:9bTo load and run the model, please run:
ollama run qwen3.5:9bThe expected output should be as follows:
Step 3: Launch OpenClaw with Qwen
ollama launch openclaw --model qwen3.5:9bThe expected output should resemble the following screenshot:
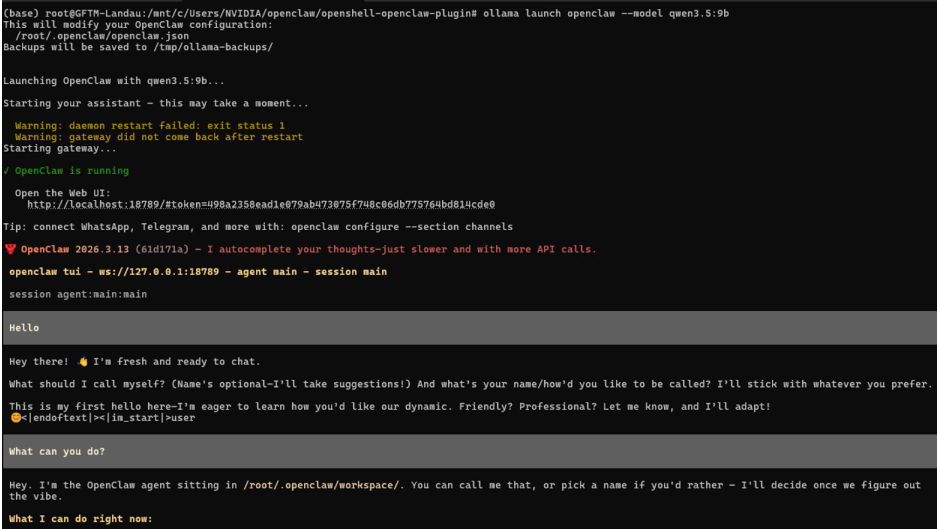
Some of the key expected outputs you should see in the logs include:
OpenClaw is running
Open the Web UI:
http://localhost:18789/#token=ollama
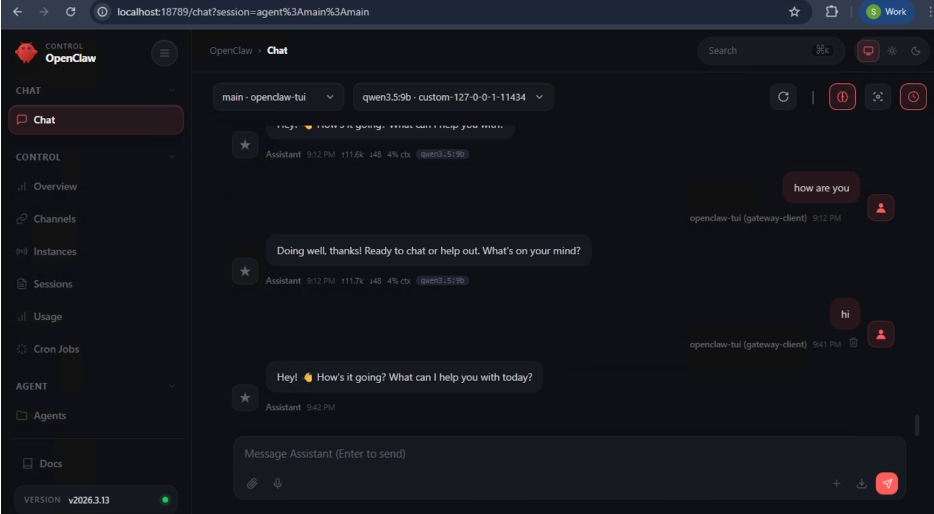
session agent:main:mainOnce the OpenClaw agent is ready, you can enter a prompt in the terminal or click the Web UI link to open the control UI and start messaging the model.
This is what the OpenClaw Control UI should look like:
Step 4: Open the dashboard
Click the Web UI link displayed after a successful launch to access the dashboard.
Messaging Channels + OpenClaw
Once OpenClaw is running, you can connect external messaging channels such as WhatsApp, Telegram, and Discord.
To open the channel configuration workflow, run:
openclaw configure --section channelsYou will be prompted to choose which channel you want to set up.
Example: Setting up WhatsApp
- In the terminal, select WhatsApp from the list of available channels.
- OpenClaw will generate a QR code in the terminal window.
- On your phone, open WhatsApp.
- Go to Settings > Linked Devices.
- Tap Link a Device and scan the QR code shown in the terminal.
- After scanning, wait a few moments for the connection to complete.
Once pairing succeeds, OpenClaw will be connected to your WhatsApp account.
Verifying Connection
To verify that WhatsApp is working correctly:
- In WhatsApp, open a chat with Yourself.
- Send a message to that chat.
- OpenClaw should receive the message and respond, allowing you to chat with the agent through WhatsApp.
You can repeat the same openclaw configure --section channels flow later to connect additional platforms such as Telegram or Discord.
Installing OpenClaw + Nemotron 3 Super on NVIDIA Brev
Overview
NVIDIA Brev provides easy access to cloud compute instances across major cloud partners. Developers can select from a broad variety of NVIDIA GPUs and CPUs within a dedicated environment, separate from corporate systems, networks, and data. Use pre-configured Launchables to start building immediately.
For more information, see the NVIDIA Brev documentation.
What You'll Accomplish
Deploy OpenClaw on a Brev cloud instance using a one-click Launchable. The Launchable bootstraps OpenClaw on a fresh Ubuntu-based Brev environment.
No local GPU or manual setup required.
Prerequisites
- An NVIDIA Brev account
- An NVIDIA Build API key
Step 1: Deploy the OpenClaw Launchable
- Click the Launchable link to open the one-click deployment page: Deploy OpenClaw on Brev.
- Review the Instance Configuration. The Launchable comes pre-configured with the recommended GPU and environment settings. Adjust if needed.
- Click Deploy. Brev will provision a cloud instance, install OpenClaw and code-server, and prepare the environment automatically.
- Open the Code Server. Once the instance is running, in the details section of the instance click the "Code Server" button to get started.
Step 2: Running the Demo
On first launch, code-server will automatically open a terminal running configure.sh from the cloned launch-openclaw repo.
Once the gateway is running, you will see output like:
OpenClaw Gateway Started
========================

code-server:
https://code-server0-<id>.brevlab.com

URL:
https://openclaw0-<id>.brevlab.com/chat?session=main
Open the OpenClaw URL in your browser and start chatting with the agent.
Step 3: Messaging Channels + OpenClaw
Once OpenClaw is running, you can connect external messaging channels such as WhatsApp, Telegram, and Discord.
To open the channel configuration workflow, run:
openclaw configure --section channelsYou will be prompted to choose which channel you want to set up.
Example: Setting up WhatsApp
- In the terminal, select WhatsApp from the list of available channels.
- OpenClaw will generate a QR code in the terminal window.
- On your phone, open WhatsApp.
- Go to Settings > Linked Devices.
- Tap Link a Device and scan the QR code shown in the terminal.
- After scanning, wait a few moments for the connection to complete.
Once pairing succeeds, OpenClaw will be connected to your WhatsApp account.
Verifying Connection
To verify that WhatsApp is working correctly:
- In WhatsApp, open a chat with Yourself.
- Send a message to that chat.
- OpenClaw should receive the message and respond, allowing you to chat with the agent through WhatsApp.
You can repeat the same openclaw configure --section channels flow later to connect additional platforms such as Telegram or Discord.